To set up an online product designer, define each product's print areas, add editable templates and cliparts, configure text and image controls, set upload rules, and validate that the customer preview matches the print-ready output. With Printcart, this turns a static product into a customer-editable product that produces clean production files.
Key takeaways
What is an online product designer, and why does setup matter?
An online product designer is the customizer where a shopper adds text, uploads images, or edits a template directly on a product before buying. Setup matters because the designer controls two things at once: the customer experience and the production file. Configure it well and customers personalize confidently while your printer receives print-ready artwork. Configure it loosely and you get off-center prints, low-resolution uploads, and reprints.
Product setup and product-designer setup are not the same job. Product setup defines the item, its variants, and price. Product-designer setup defines what the customer can change and what production ultimately receives. This guide covers the second job.
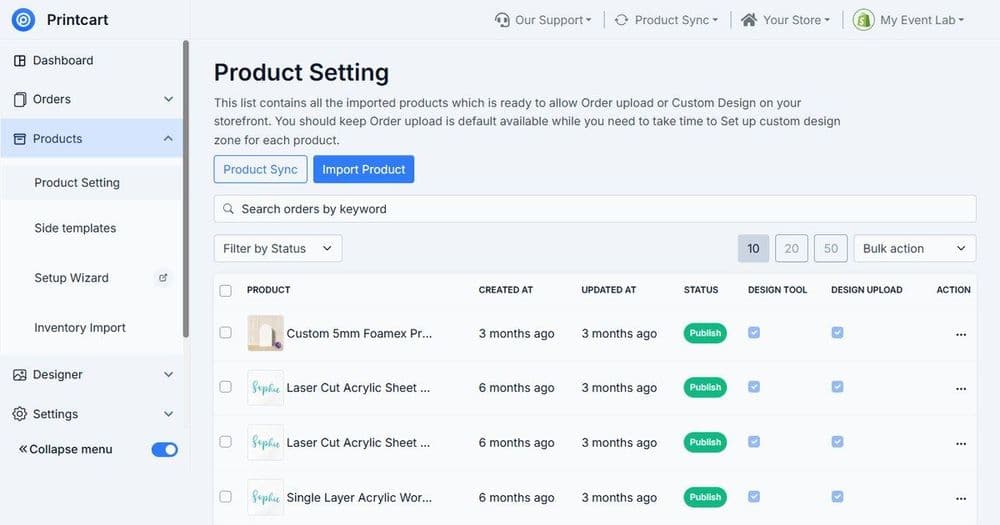
How do you set up the product designer with Printcart?
Work through these stages per product. Start with one representative product, prove the flow, then repeat for the rest of your catalog.
Step 1Define print areas
Map the exact printable region on each product side and its dimensions. Print areas keep every customer design inside a safe zone, so a name or photo never runs off the edge. Set areas for every side you sell, front and back, so the preview reflects real output.
Step 2Add templates and cliparts
Load starting templates from your template library and relevant cliparts so customers begin from a good design rather than a blank canvas. Templates set readable fonts, safe placement, and color contrast by default, which reduces bad artwork and support requests. Browse ready-made assets in the Printcart template library.
Step 3Configure text and image controls
Decide what customers can edit: which text fields, fonts, colors, and image slots are open, and which are locked. Expose only the controls a customer needs. Locking layout decisions you have already made protects your design and keeps output consistent.
Step 4Set upload and preview rules
Define minimum resolution for uploads, accepted file types, and how the live preview behaves. Clear upload rules stop low-quality images from reaching production. A trustworthy preview is what gives the customer confidence to buy a personalized product.
Step 5Validate print-ready output
Generate the production file from a test customization and check resolution, alignment, bleed, and that customer input renders correctly. This is the step that determines whether personalization is sellable or a reprint risk.
What can the customer edit vs what production receives?
Keeping these two views aligned is the core of a reliable designer setup.
| Designer element | What the customer edits | What production receives |
|---|---|---|
| Text field | Name, date, message within font/size limits | Rendered text on the correct layer and position |
| Image slot | Uploaded or selected image inside the frame | High-resolution image clipped to the print area |
| Template | Chooses and personalizes a starting layout | Flattened, print-safe artwork matching preview |
| Clipart | Adds approved graphics from the library | Vector or high-res elements at correct scale |
Which products benefit most from a product designer?
- Apparel — t-shirts, hoodies, and tote bags with names, slogans, or uploaded art.
- Gifts — mugs, ornaments, and keepsakes with photos and messages.
- Business print — labels, cards, and stationery with editable fields.
- Photo products — posters and canvases built from customer images.
How do you avoid personalization reprints?
Most personalization reprints trace back to three causes: low-resolution uploads, text that does not fit the print area, and a preview that does not match the produced file. Enforce upload resolution, cap text length and font size to the safe area, and validate the print-ready output during setup. Where source images are weak, an AI image upscale tool can help lift resolution before production, though final files should still be reviewed.
How do you roll the designer out across your catalog?
Do not configure every product at once. Prove the flow on one representative product per family, apparel, drinkware, and one flat print item, then clone the working pattern to similar products. A pattern you have already validated is far faster to apply than building each product from scratch, and it keeps behavior consistent so customers learn one editing experience across your store. Templates and cliparts you build once are reusable across the family, so the second and third product in a category take a fraction of the time of the first. Prioritize the products that most benefit from personalization and highest expected volume, and leave rarely personalized items as standard listings until demand justifies the setup.
Next best step
With the designer configured, apply it to a real revenue driver using the guide on customizing personalized gifts for POD. If you would rather have the designer configured for you, Printcart offers a product personalizer setup service that handles templates, print areas, controls, and print-ready QA. To add a designer to an existing store, see the Printcart apps for your platform.
Want customers designing your products? Create a free Printcart account to set up the product designer, or talk to the Printcart team for a guided personalization setup.
Printcart field note
What to verify before you roll out Setting Up the Online Product Designer
This tutorial is written from Printcart implementation patterns across file quality, proofing, and production risk. Before treating it as complete, test the workflow with one real product, one real design file, and one real order path.
Setting Up the Online Product Designer — common questions
What is an online product designer, and why does setup matter?
An online product designer is the customizer where a shopper adds text, uploads images, or edits a template directly on a product before buying. Setup matters because the designer controls two things at once: the customer experience and the production file. Configure it well and customers personalize confidently while your printer receives print-ready artwork. Configure it loosely and you get off-center prints,...
How do you set up the product designer with Printcart?
Work through these stages per product. Start with one representative product, prove the flow, then repeat for the rest of your catalog.
What can the customer edit vs what production receives?
Keeping these two views aligned is the core of a reliable designer setup.
How do you avoid personalization reprints?
Most personalization reprints trace back to three causes: low-resolution uploads, text that does not fit the print area, and a preview that does not match the produced file. Enforce upload resolution, cap text length and font size to the safe area, and validate the print-ready output during setup. Where source images are weak, an AI image upscale tool can help lift resolution before production, though final files...
Next steps in Printcart
Connect setting up the online product designer with catalog setup, templates, production workflows, and implementation support.
Want to put setting up the online product designer into practice?
Use the related Printcart tool below, or create a free account to start building with the product designer.