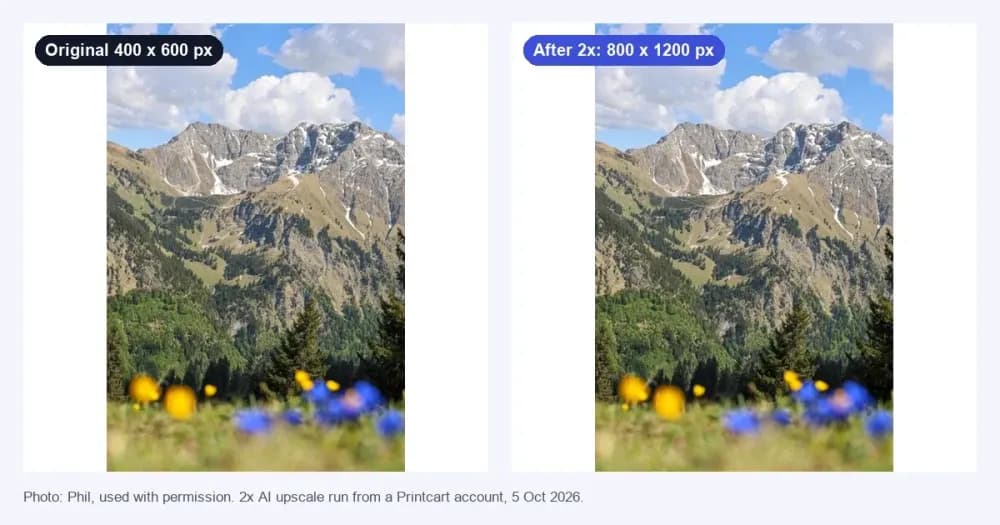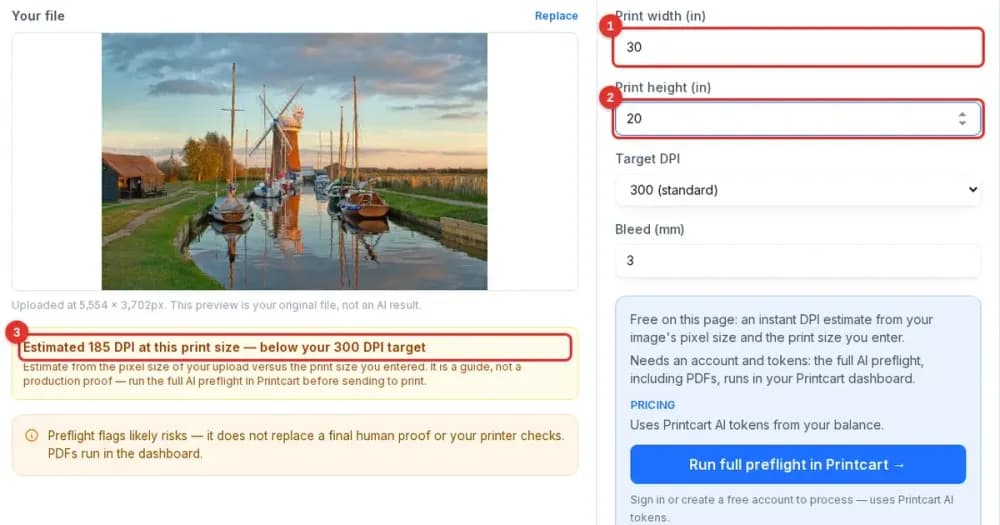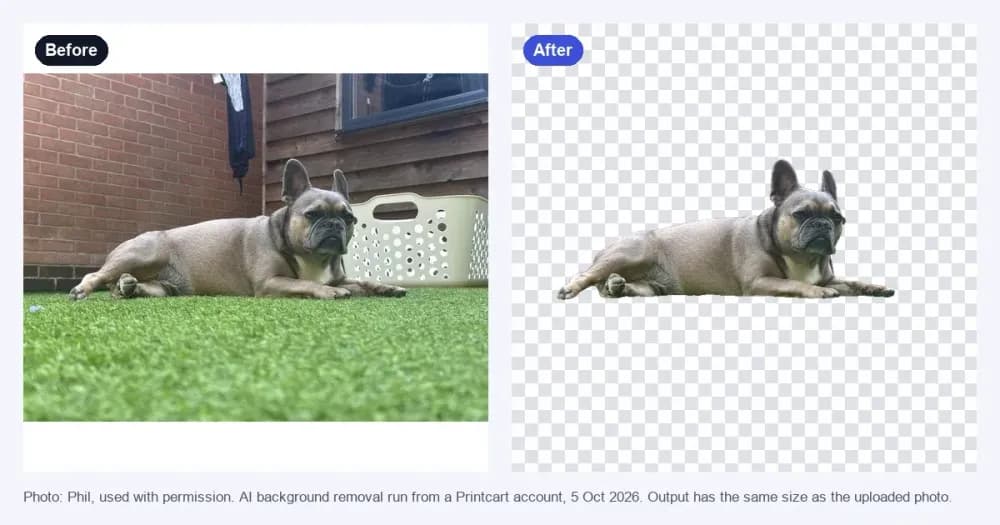
In your Printcart Dashboard, open API Services , pick the store the results belong to under Results go to , check the price on the tool page, confirm, and follow your tokens in the top bar and in Wallet & Billing . Every AI tool in the Dashboard works the same way. In our test on 5 October 2026, a 2× upscale cost 60 tokens and the balance dropped by exactly...
Key takeaways
What you need before you start
- A Printcart account with at least one connected store. If you have none yet, connect your store first.
- Tokens in your balance. The balance is shown in the top bar of the Dashboard.
- A photo or print file to try. We use a small logo.
The screenshots come from a real Dashboard session on 5 October 2026.
Run an AI tool and follow the tokens
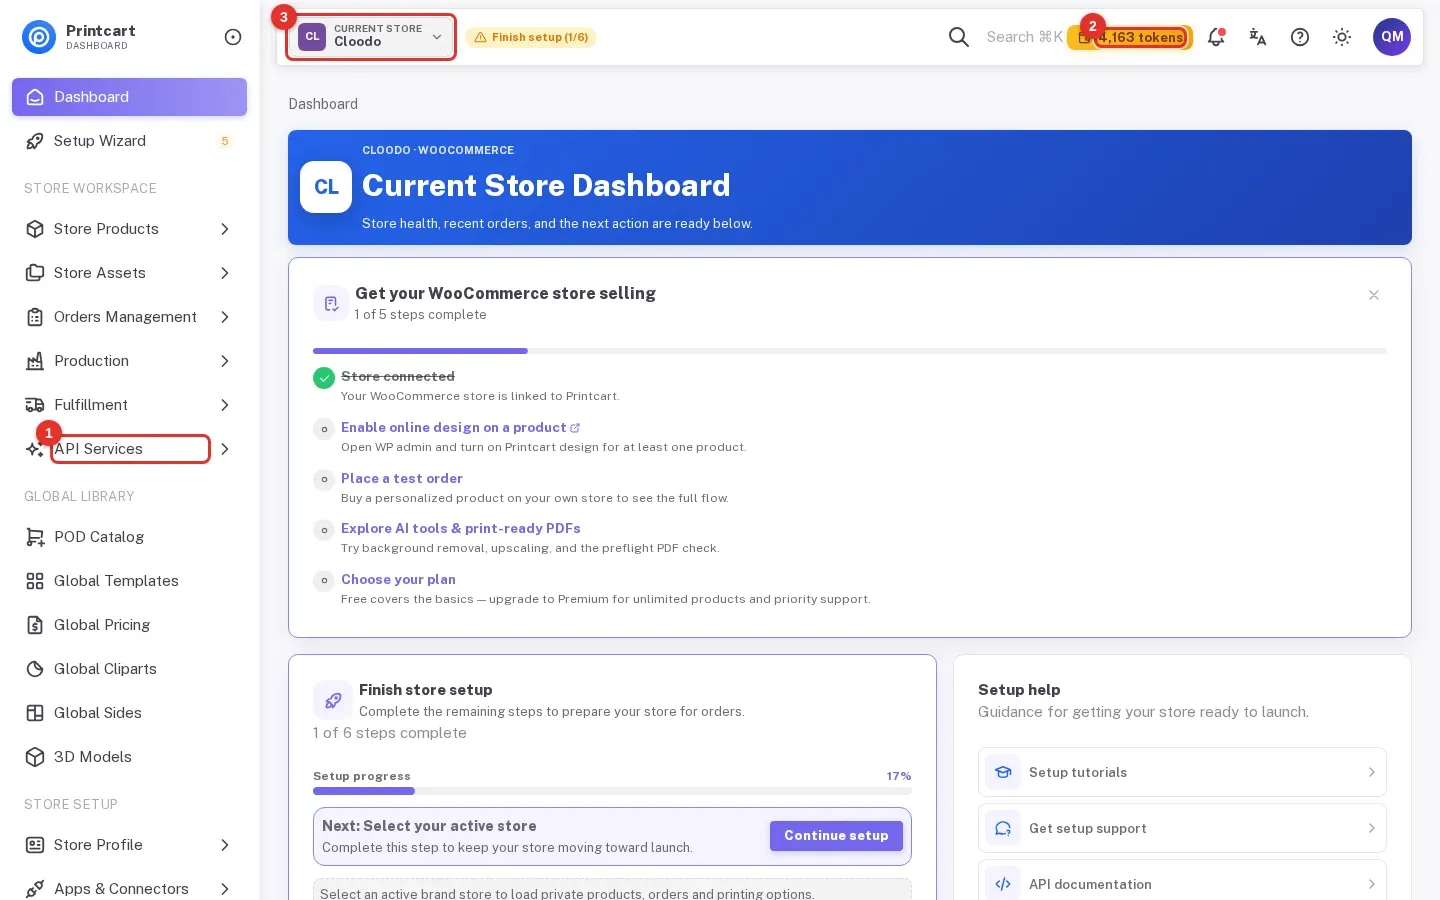
Step 1Sign in and find API Services
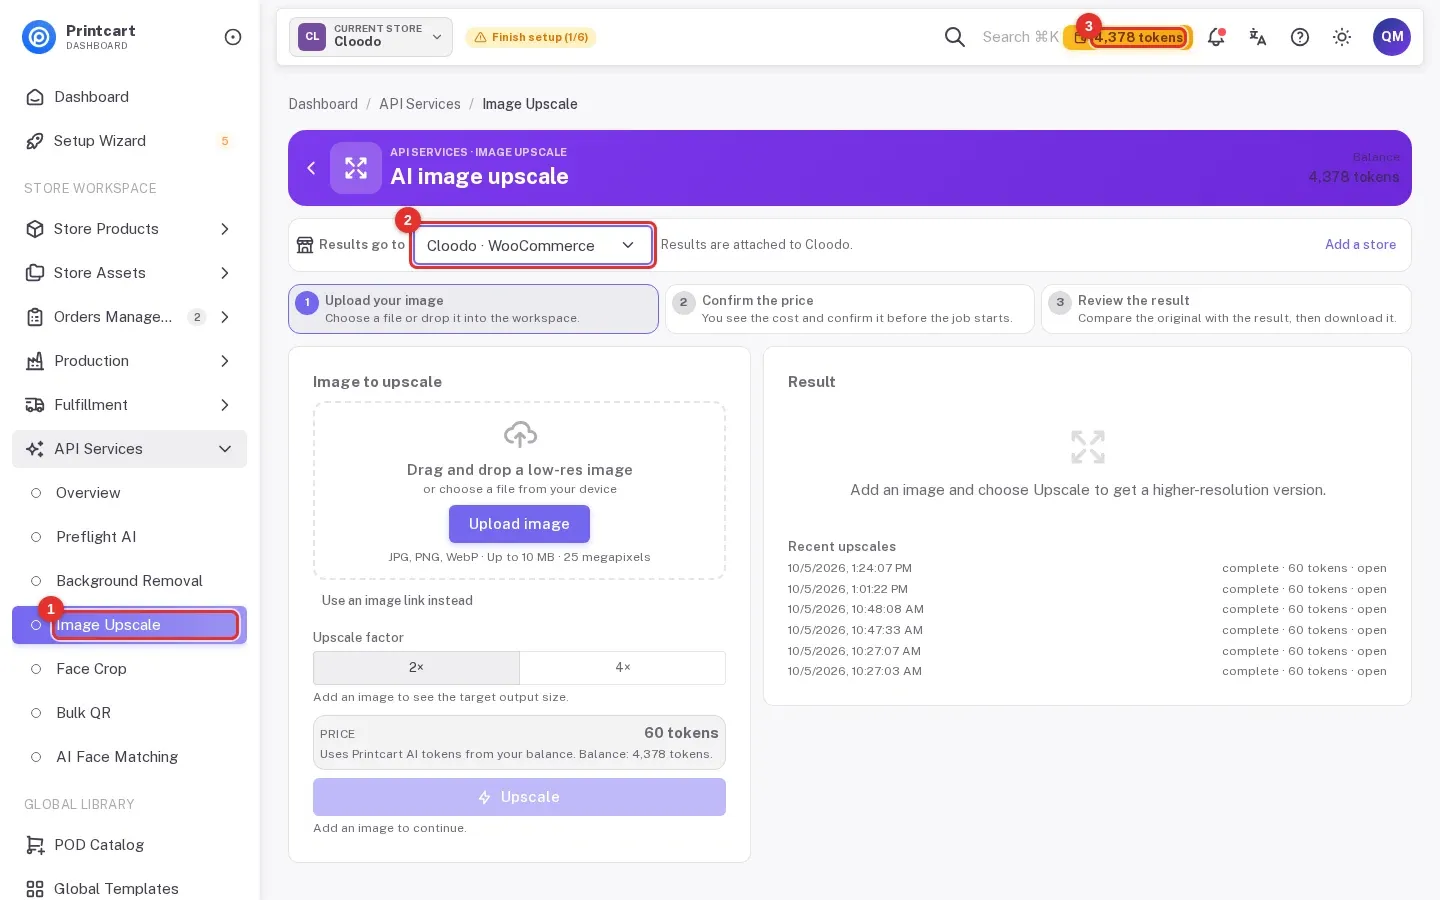
After you sign in, the Dashboard opens on your current store. Open API Services (1) in the sidebar. Your token balance (2) and the current store (3) are always in the top bar.
Expected result: the Current Store Dashboard opens, with your store name in the top bar.
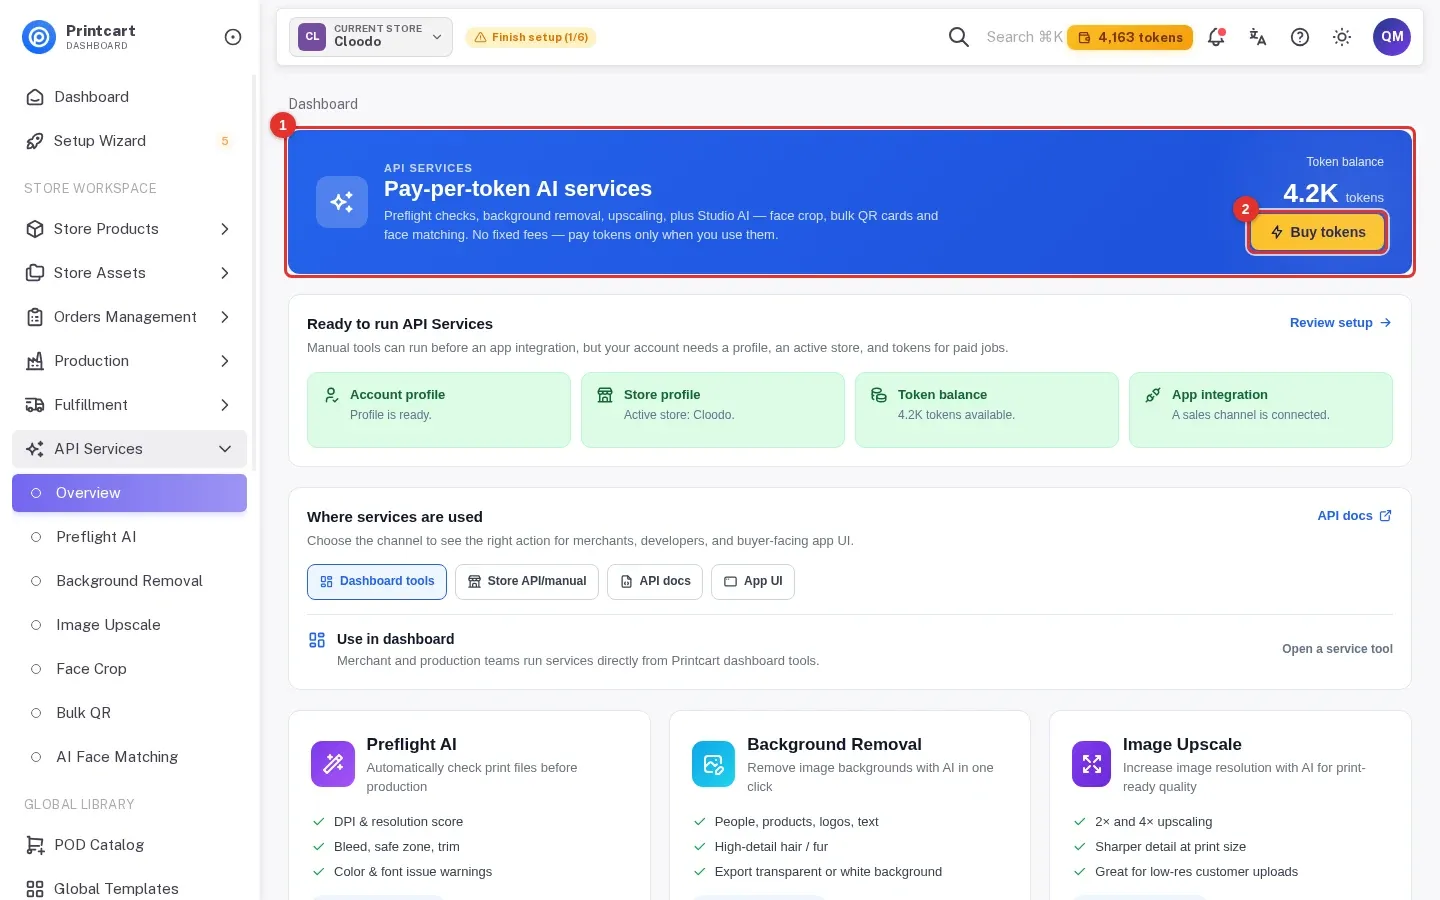
Step 2See the tools and their prices
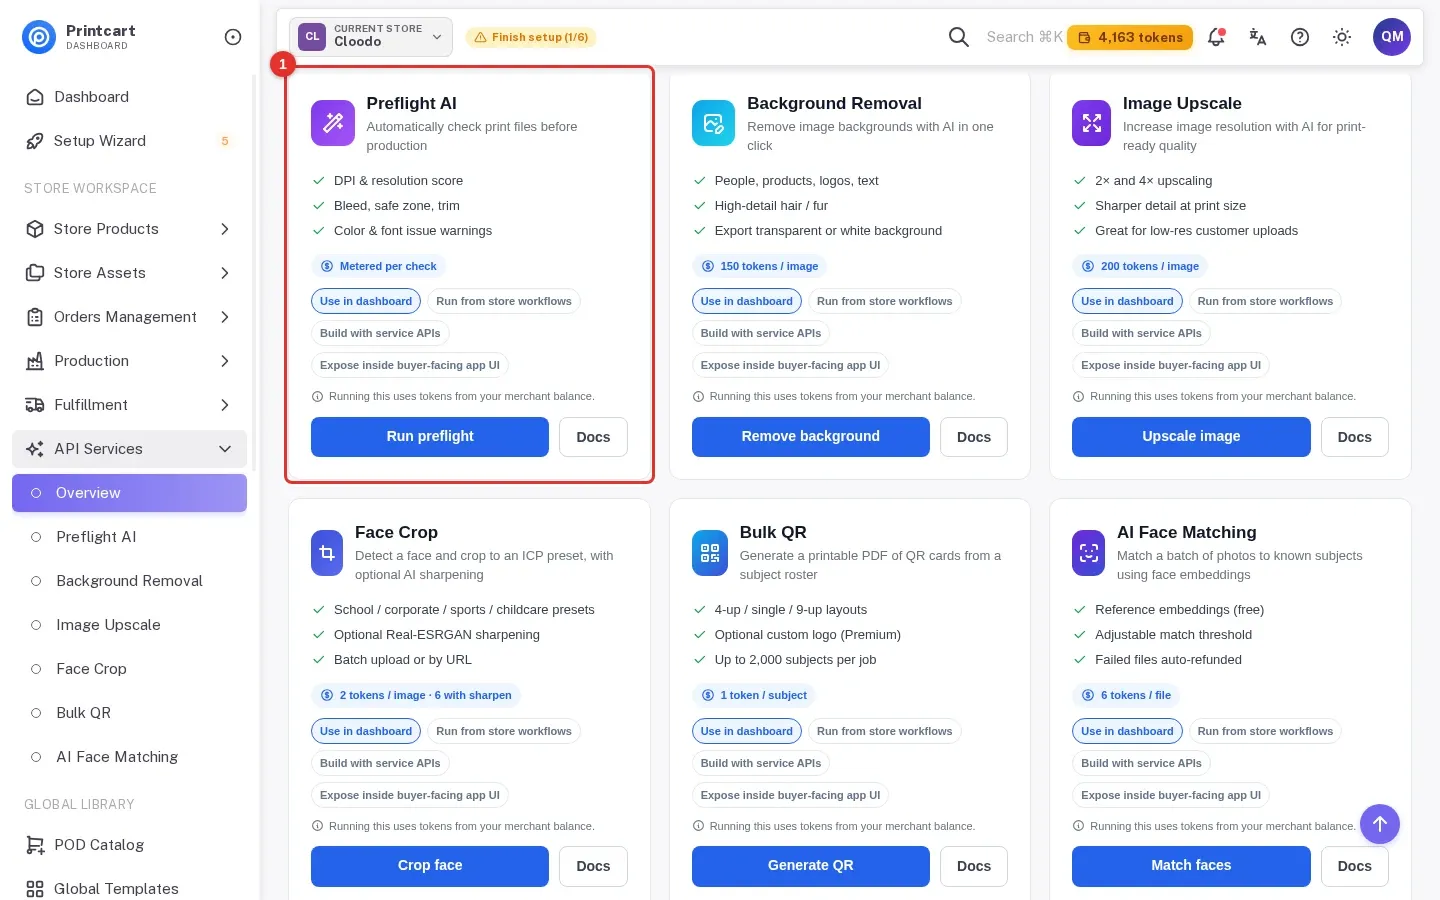
The Overview page lists the token balance (1), a Buy tokens button (2) and one card for each tool. Prices on the cards are a guide. The tool page shows the exact price for your file before you confirm.
Expected result: cards for Preflight AI, Background Removal, Image Upscale, Face Crop, Bulk QR and AI Face Matching.
Step 3Choose the store the result belongs to
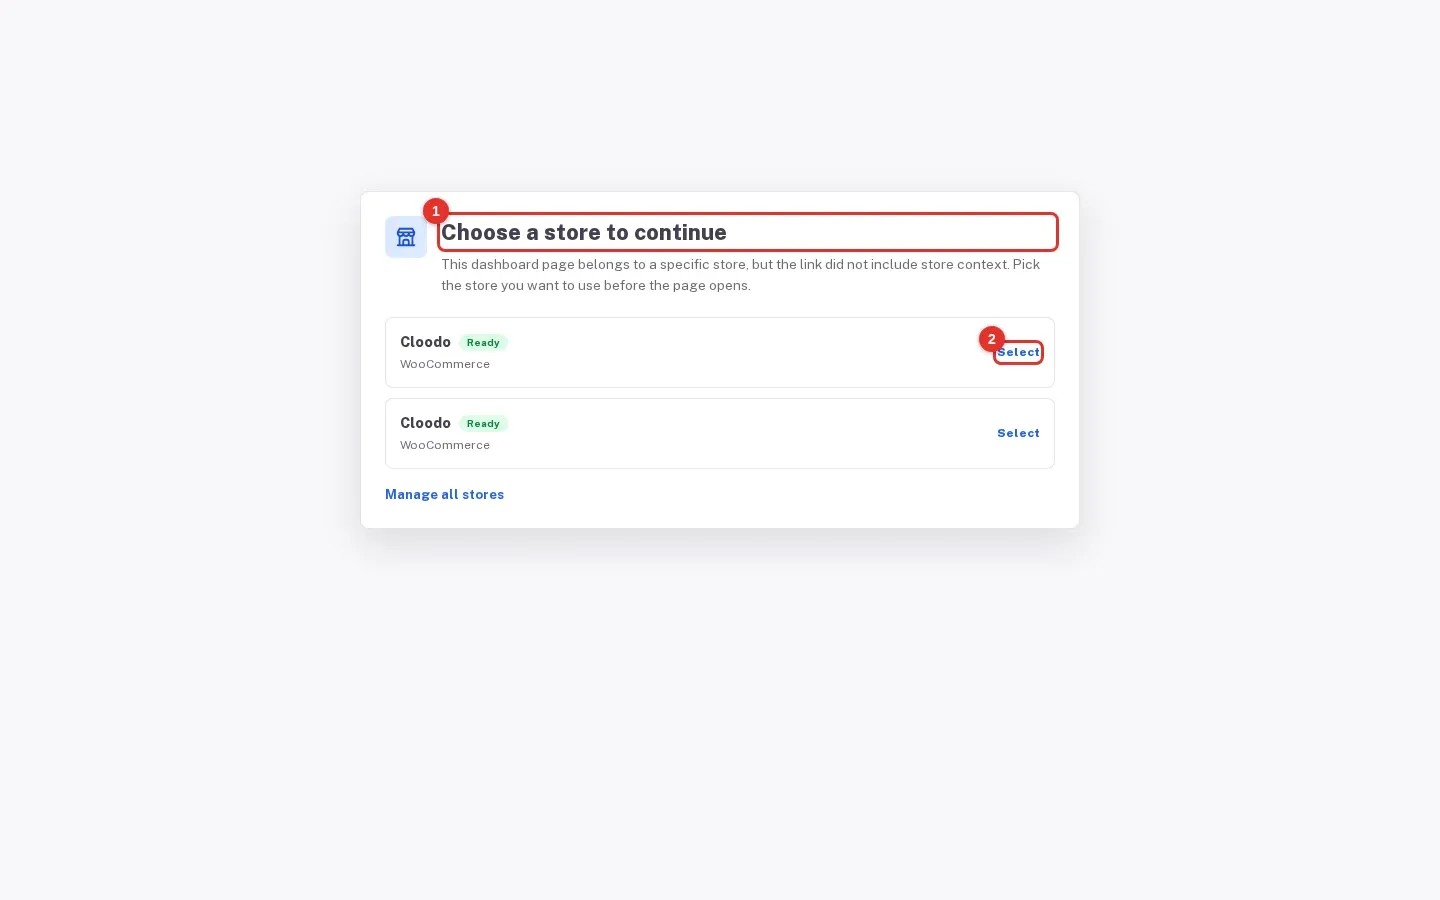
Open a tool, for example Image Upscale (1). Under Results go to (2), pick the store. The line next to it says which store the result is attached to. If you open a tool page from a link that does not include a store, the Dashboard asks you to choose one first.
Expected result: the store name appears next to "Results are attached to".
Step 4Add a file and read the price
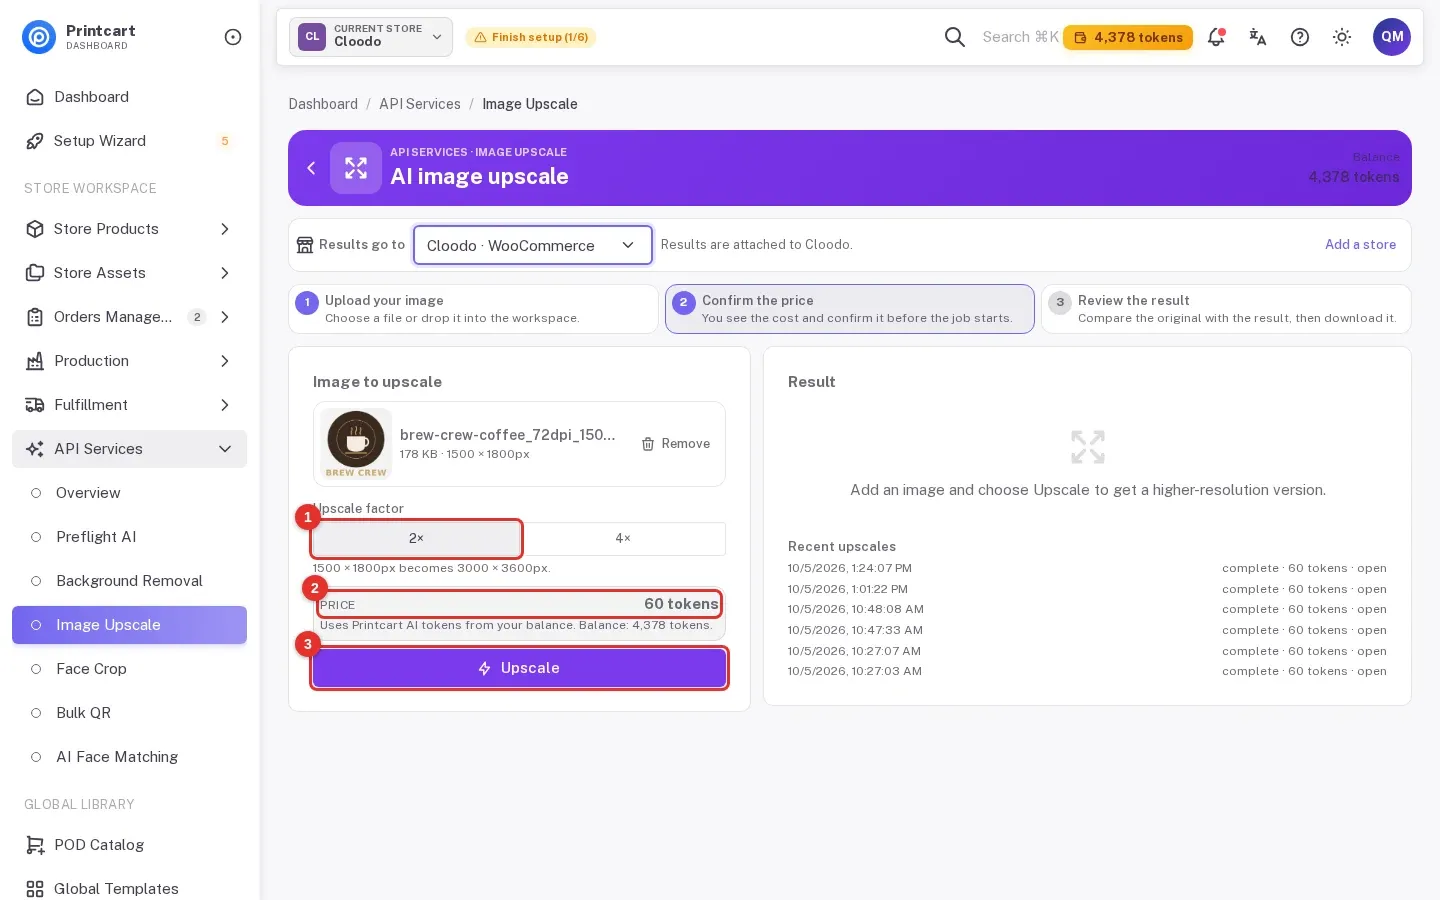
Add your image, pick the options, and look at the price box (2) before you click the main button (3).
Expected result: the price is shown before anything runs. For an upscale at 2× it was 60 tokens.
Step 5Confirm and download
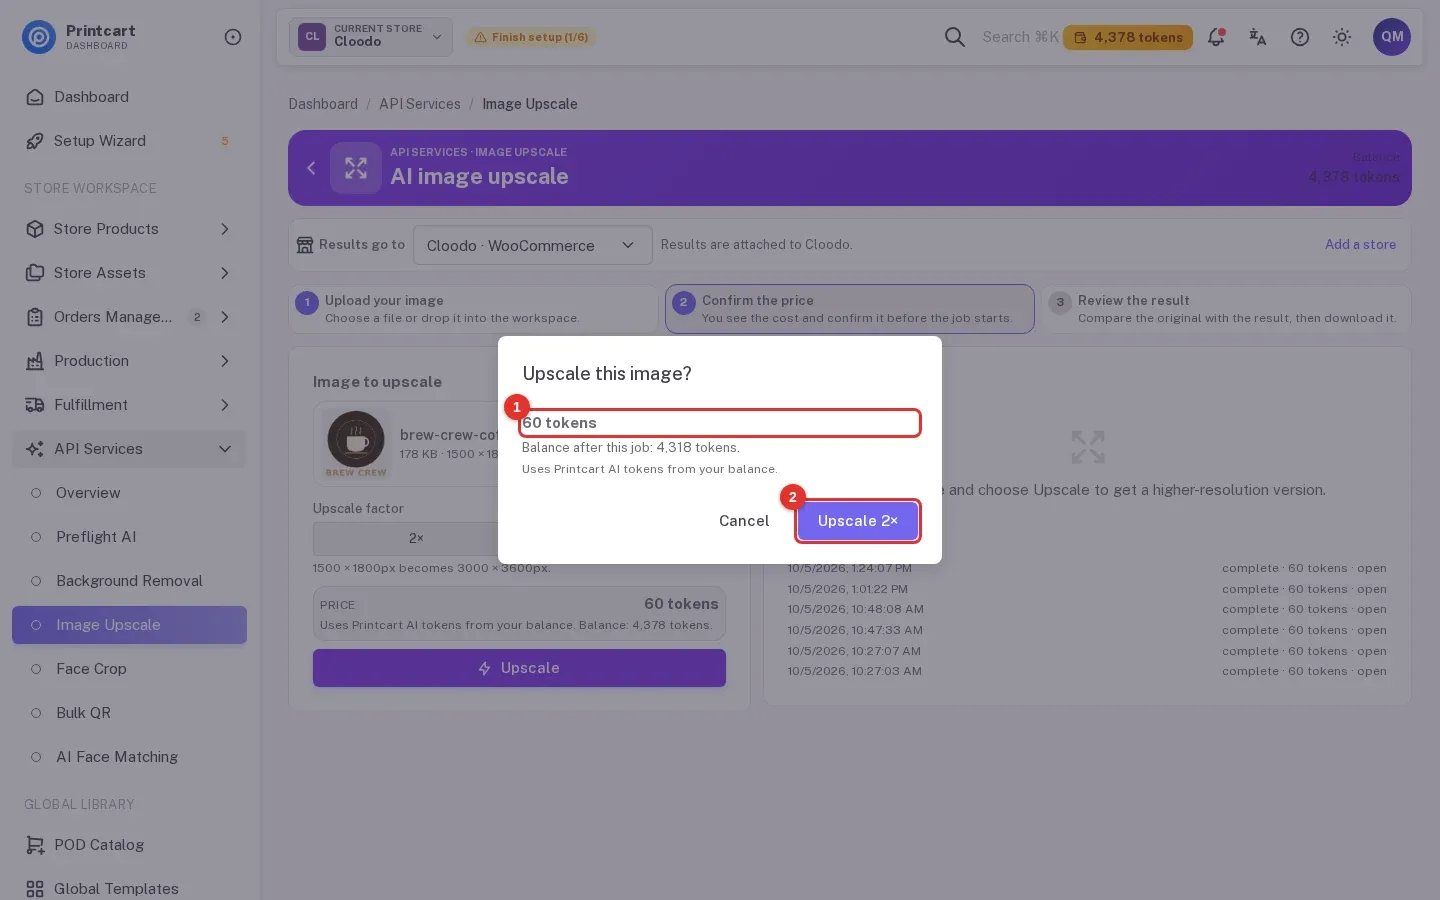
A confirmation box shows the price and your balance after the job. Click the confirm button (2) to start. Nothing is taken from your balance before this click.
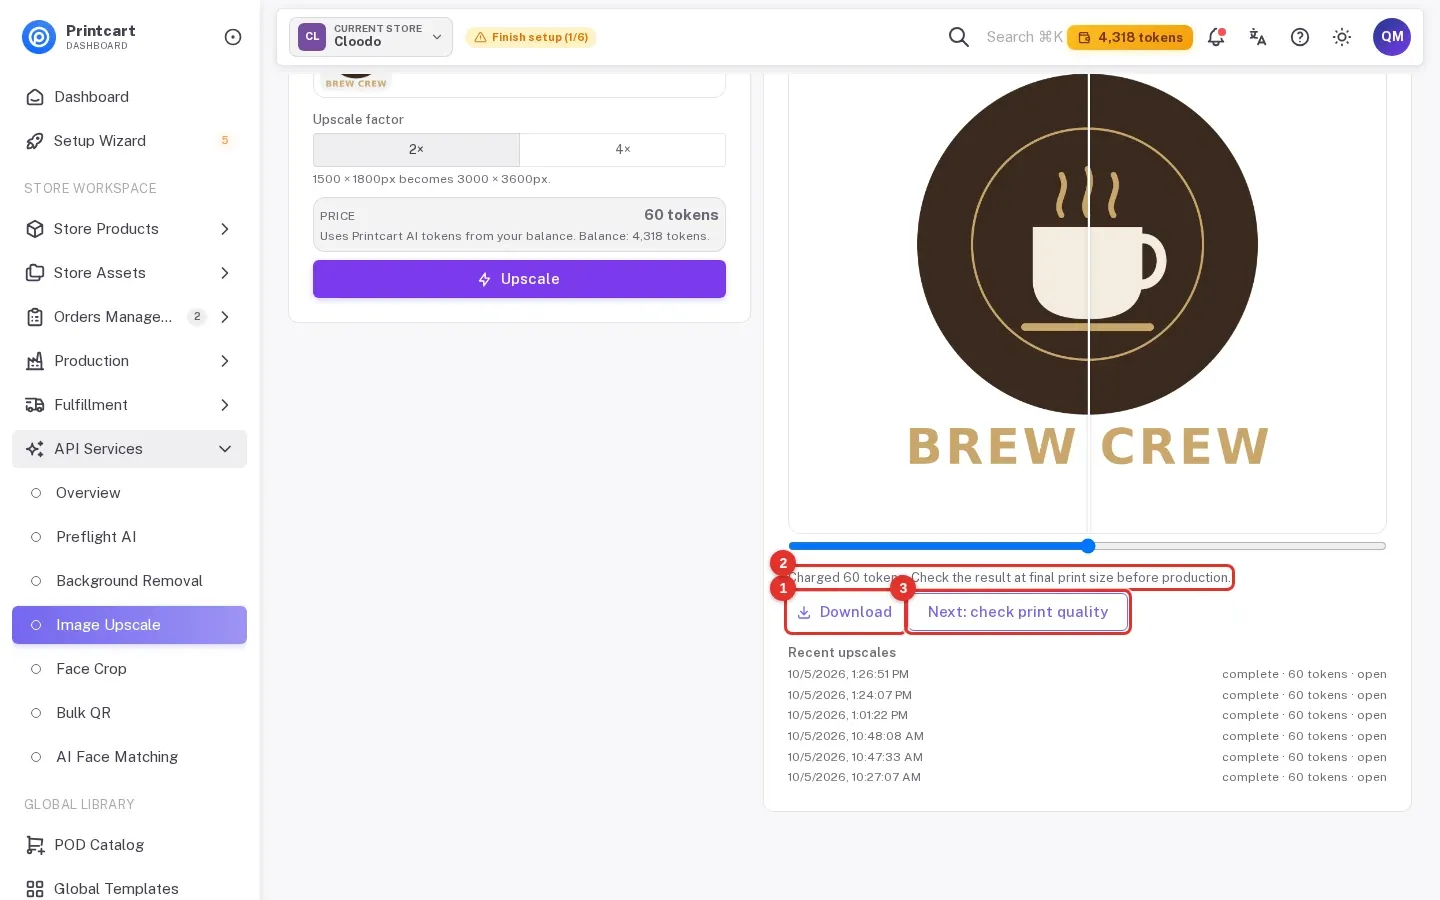
Expected result: the result appears with the message "Charged 60 tokens" and a Download button.
Step 6Check your balance and usage
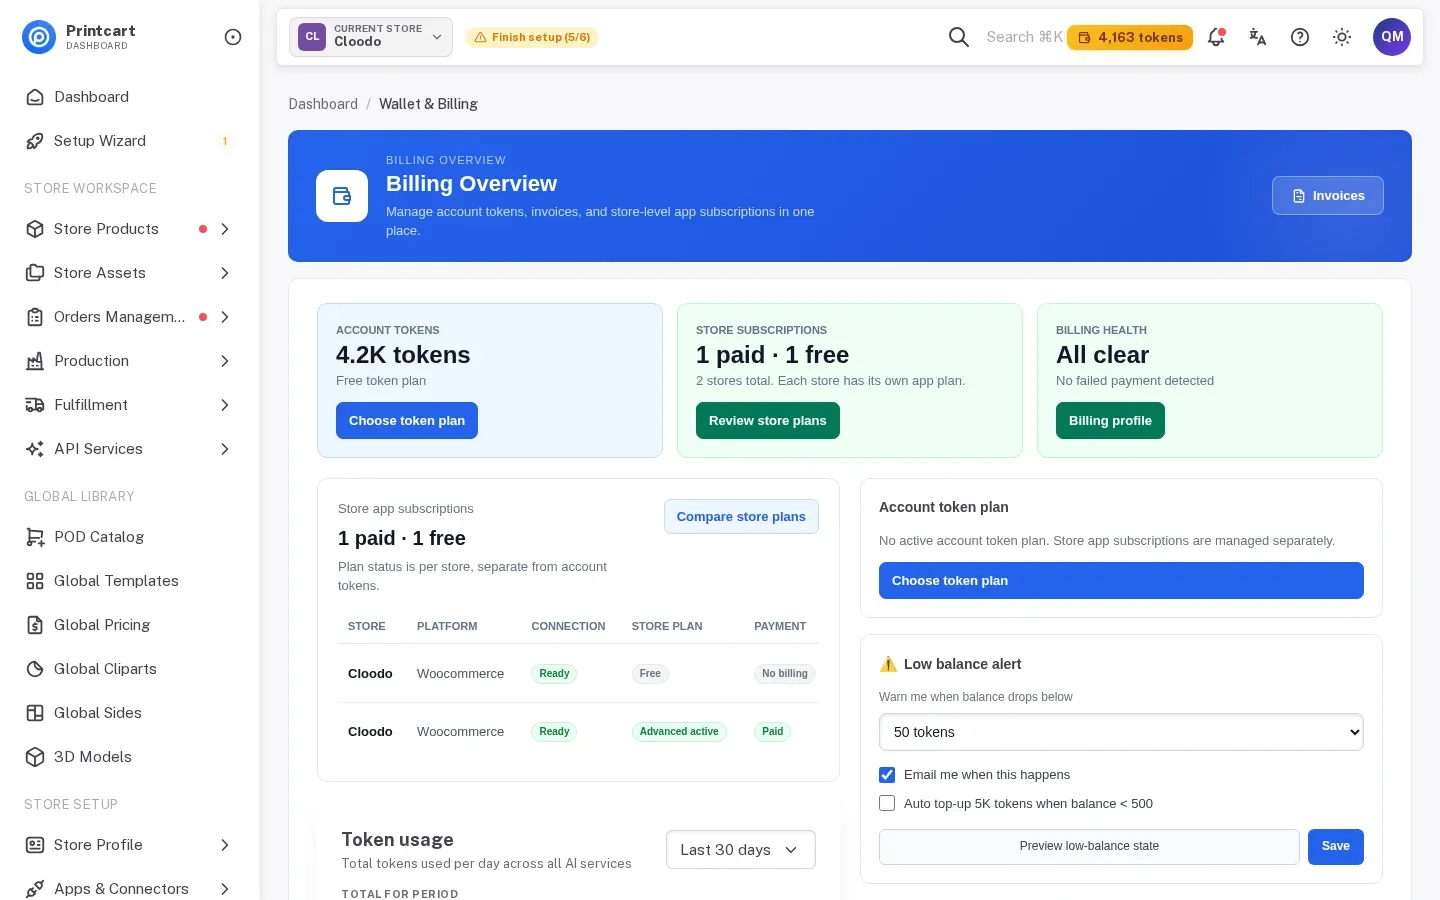
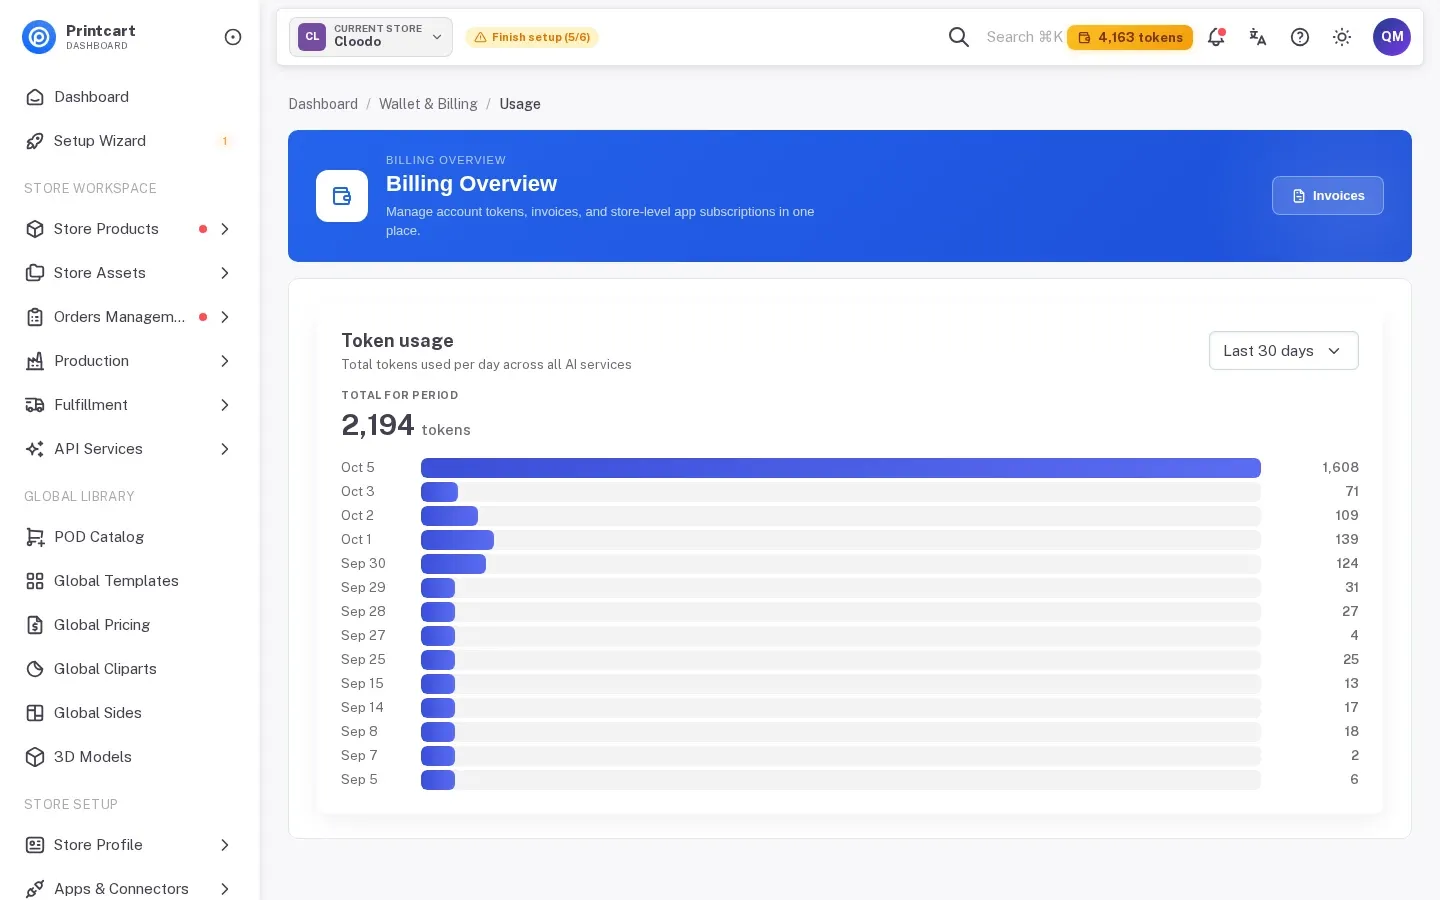
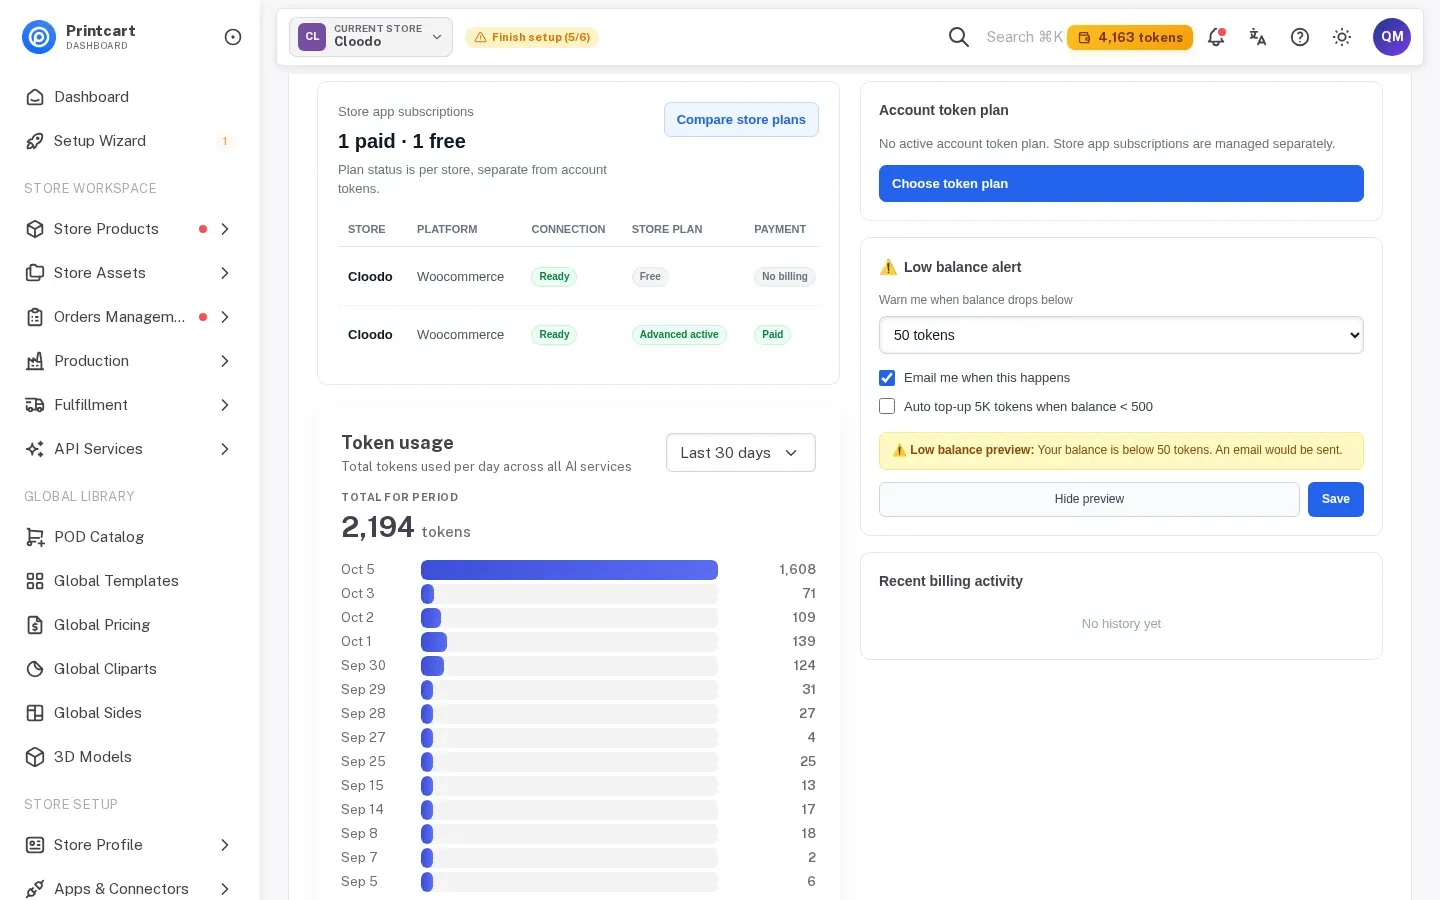
Open Wallet & Billing in the sidebar. The overview shows your account tokens, your store plans and the low-balance alert. The Usage page shows the tokens used per day across all AI services.
Expected result: a bar for each day you used a tool, with a total for the period.
Step 7Set a low-balance alert
On the Wallet & Billing overview, choose the balance below which you want a warning, and tick Email me when this happens. The Preview low-balance state button shows the message you would see without changing your balance.
Expected result: a preview message that your balance is below the limit you chose.
Troubleshooting
- The page asks "Choose a store to continue". You opened a tool from a link that has no store. Pick the store from the list.
- Two stores have the same name. Check the platform shown next to the name, or the plan on Wallet & Billing, before you pick.
- Your balance is too low for the price. Use Buy tokens on the API Services overview, or choose a long-term plan.
- You started a job twice. Check the tool's history list before you run it again.
Where do the results go?
Each tool page says which store the result is attached to. Change the store under Results go to before you run the job.
Does a tool use tokens before I confirm?
No. In our test the balance changed only after we confirmed the job. The preflight check showed a price after the run, and its balance stayed the same in our run, so always look at your balance after your own run.
Next steps
- Remove a background: remove a background on printcart.com.
- Check the size of a photo: free size check.
- Try the tools without an account: Background removal, Image upscale and Print file preflight.
- More photo tools: Photo commerce tools tutorials.
Ready for whole folders? Process whole folders and save results to your store — choose a long-term plan, or create an account to start.
Printcart field note
What to verify before you roll out Run Printcart AI Tools in Your Dashboard: Choose a Store, See the Price, Track Tokens
This tutorial is written from Printcart implementation patterns across web-to-print launch planning, buyer experience, and repeatable production. Before treating it as complete, test the workflow with one real product, one real design file, and one real order path.
Run Printcart AI Tools in Your Dashboard: Choose a Store, See the Price, Track Tokens — common questions
Where do the results go?
Each tool page says which store the result is attached to. Change the store under Results go to before you run the job.
Does a tool use tokens before I confirm?
No. In our test the balance changed only after we confirmed the job. The preflight check showed a price after the run, and its balance stayed the same in our run, so always look at your balance after your own run.
Next steps in Printcart
Connect run printcart ai tools in your dashboard: choose a store, see the price, track tokens with catalog setup, templates, production workflows, and implementation support.
Want to put run printcart ai tools in your dashboard: choose a store, see the price, track tokens into practice?
Use the related Printcart tool below, or create a free account to start building with the product designer.