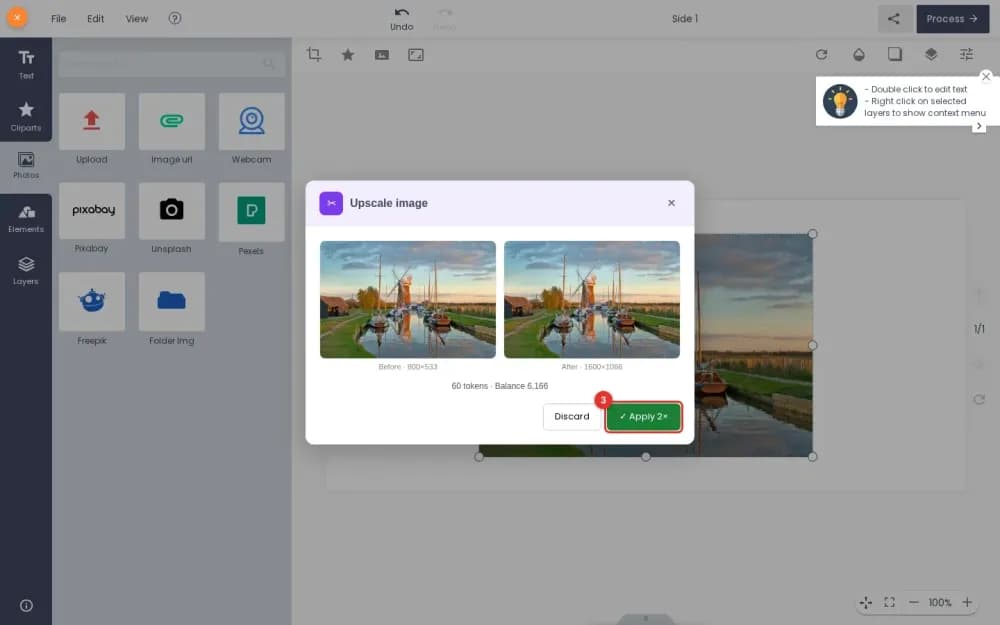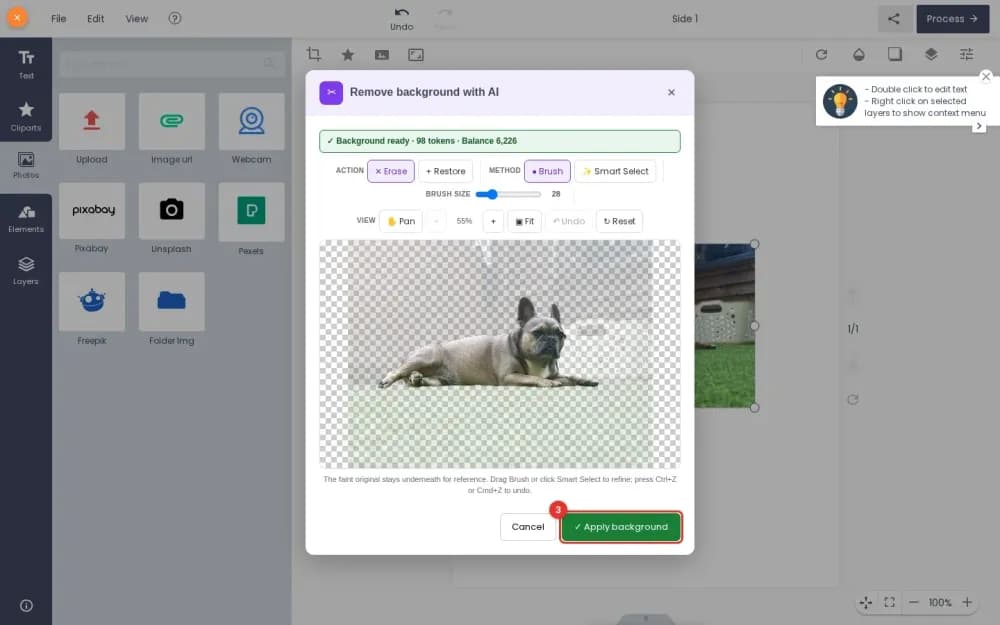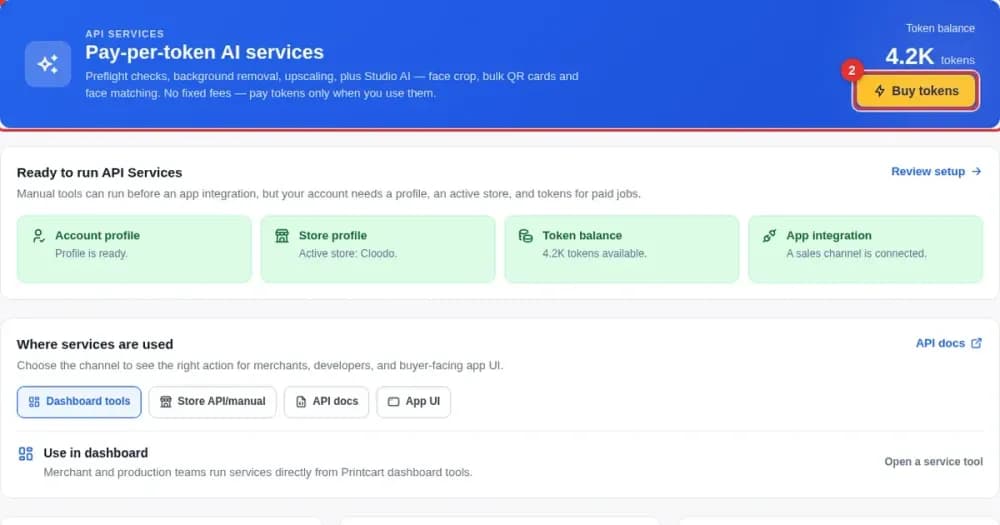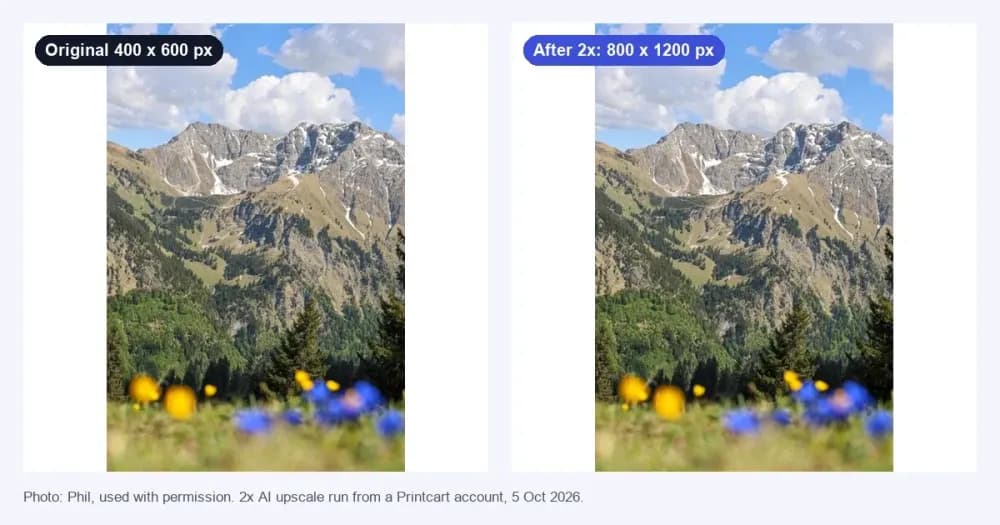
In your Printcart Dashboard, open API Services and then Image Upscale , add a photo, choose 2× or 4×, confirm the price and compare the result. In our test on 5 October 2026, a 400 x 600 px photo became 800 x 1200 px in about ten seconds at 2×, and 1600 x 2400 px in about six seconds at 4×. The page showed 60 tokens for both runs. Upscaling adds pixels and...
Key takeaways
What you need before you start
- A Printcart account with tokens in your balance. The page shows the price before the job starts.
- A photo as JPG, PNG or WebP, up to 10 MB and 25 megapixels. You can also paste an image link instead.
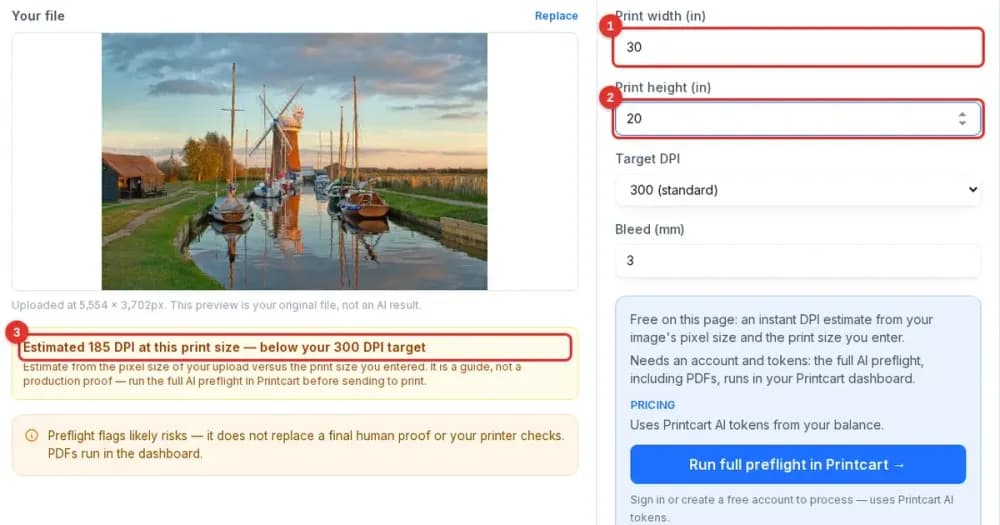
- Not sure how large you can print? Read how large you can print a photo first. You can also try the size calculation on the Image upscale page without an account.
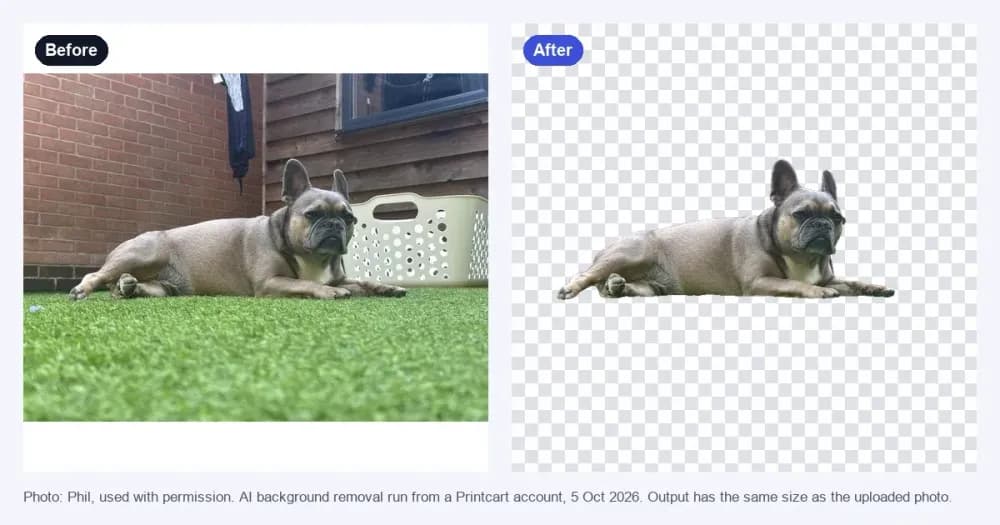
The Dashboard screenshots below use a demo store. The before and after images come from real upscale runs on 5 October 2026.
Upscale a photo in the Dashboard
Step 1Open Image Upscale
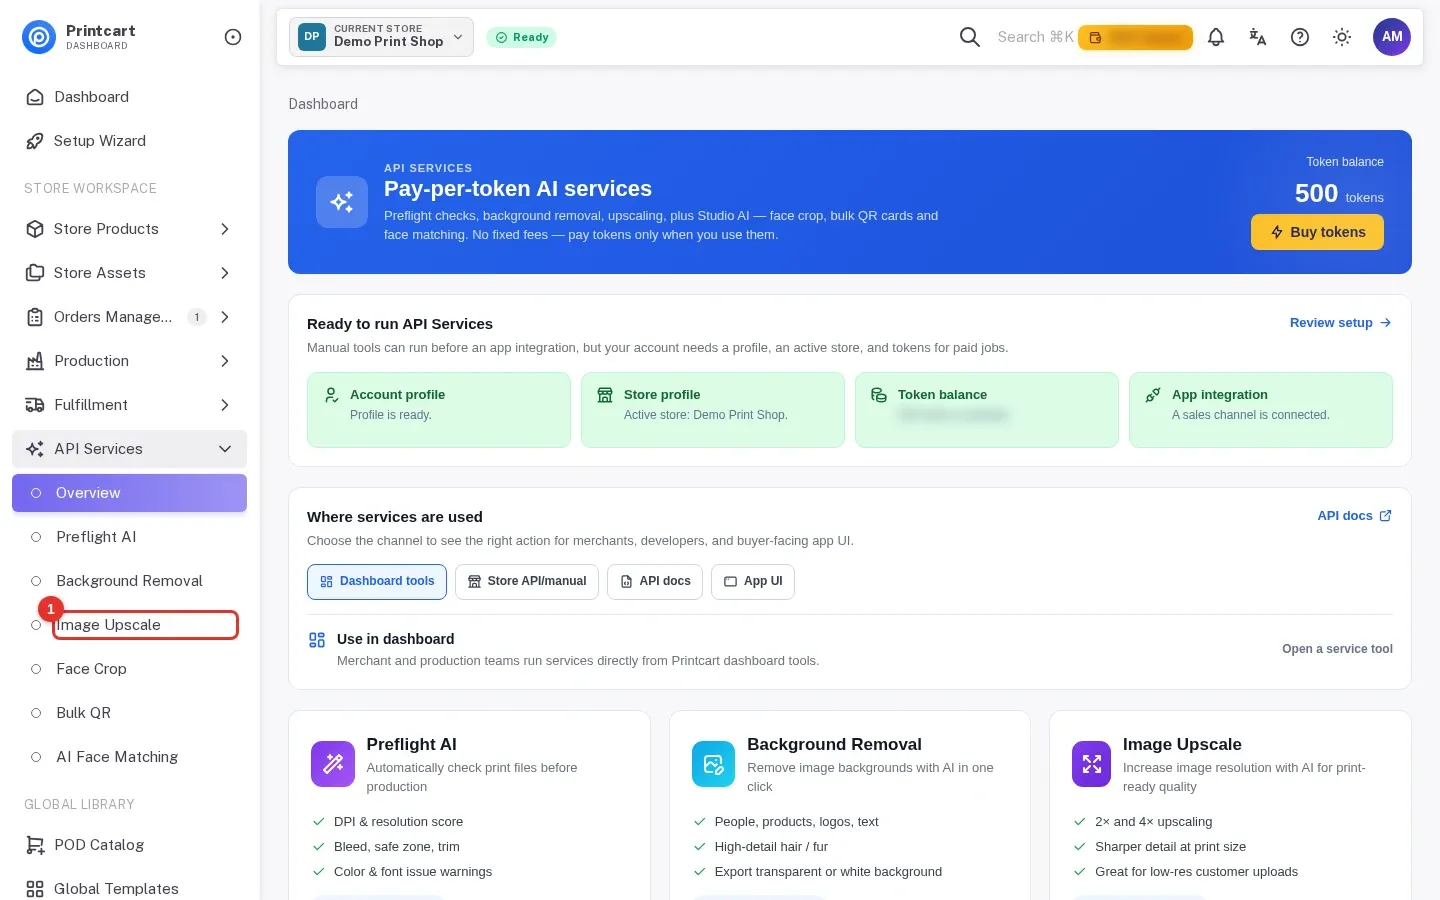
In the Dashboard sidebar, open API Services and click Image Upscale (1). The same tools are listed on the API Services overview page.
Expected result: the page "AI image upscale" opens with three steps across the top: upload your image, confirm the price, review the result.
Step 2Add your photo
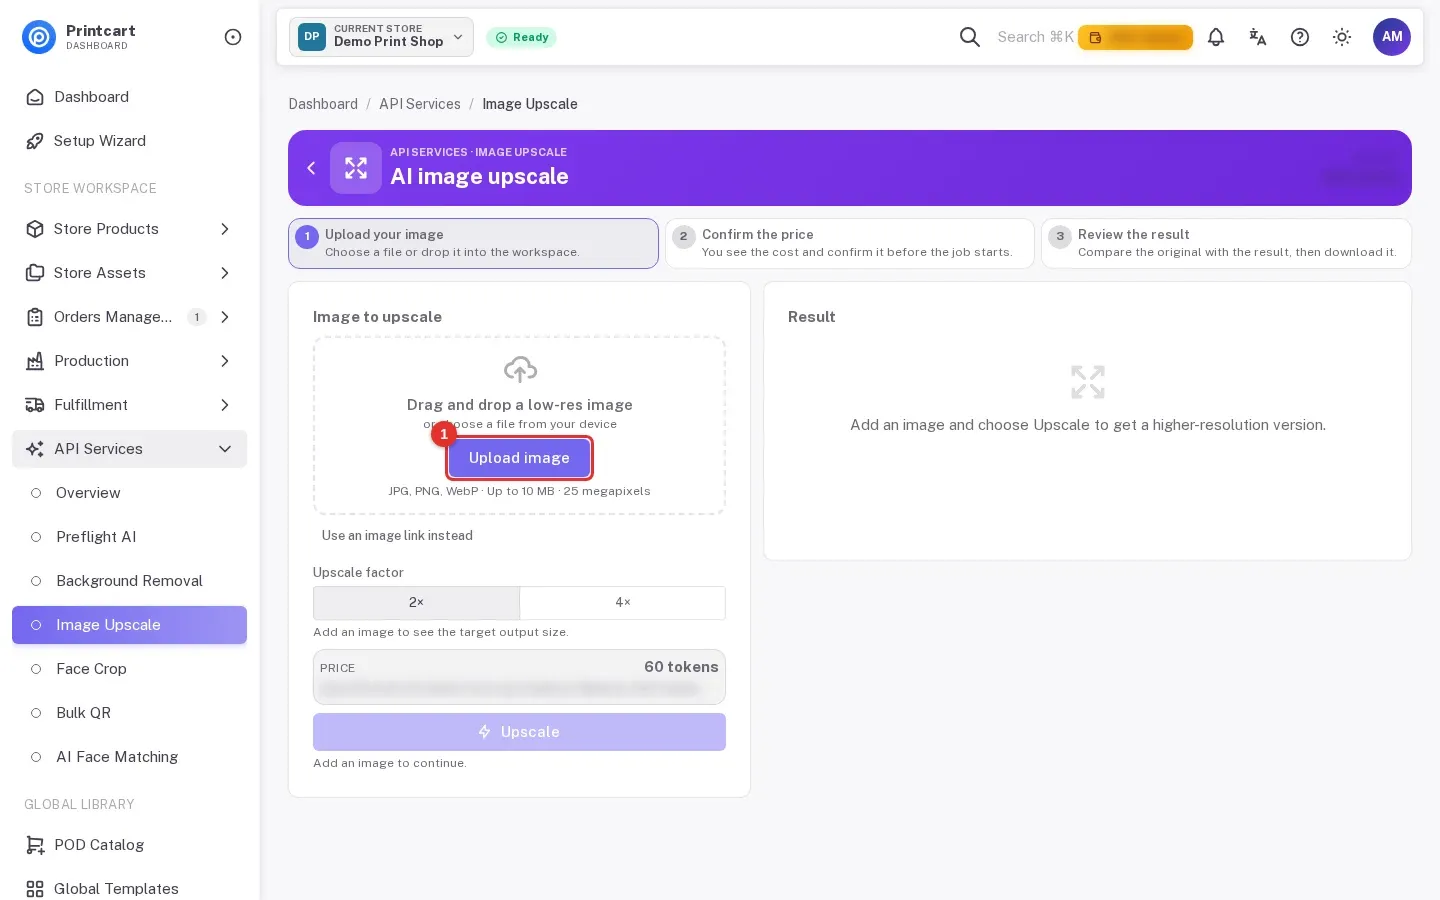
Click Upload image (1) and choose your file, or drag it onto the box. If the photo is already online, use Use an image link instead.
Expected result: the file name, size and pixel dimensions appear in the Image to upscale box. Our test file was 97 KB and 400 × 600px.
Step 3Choose 2× or 4×
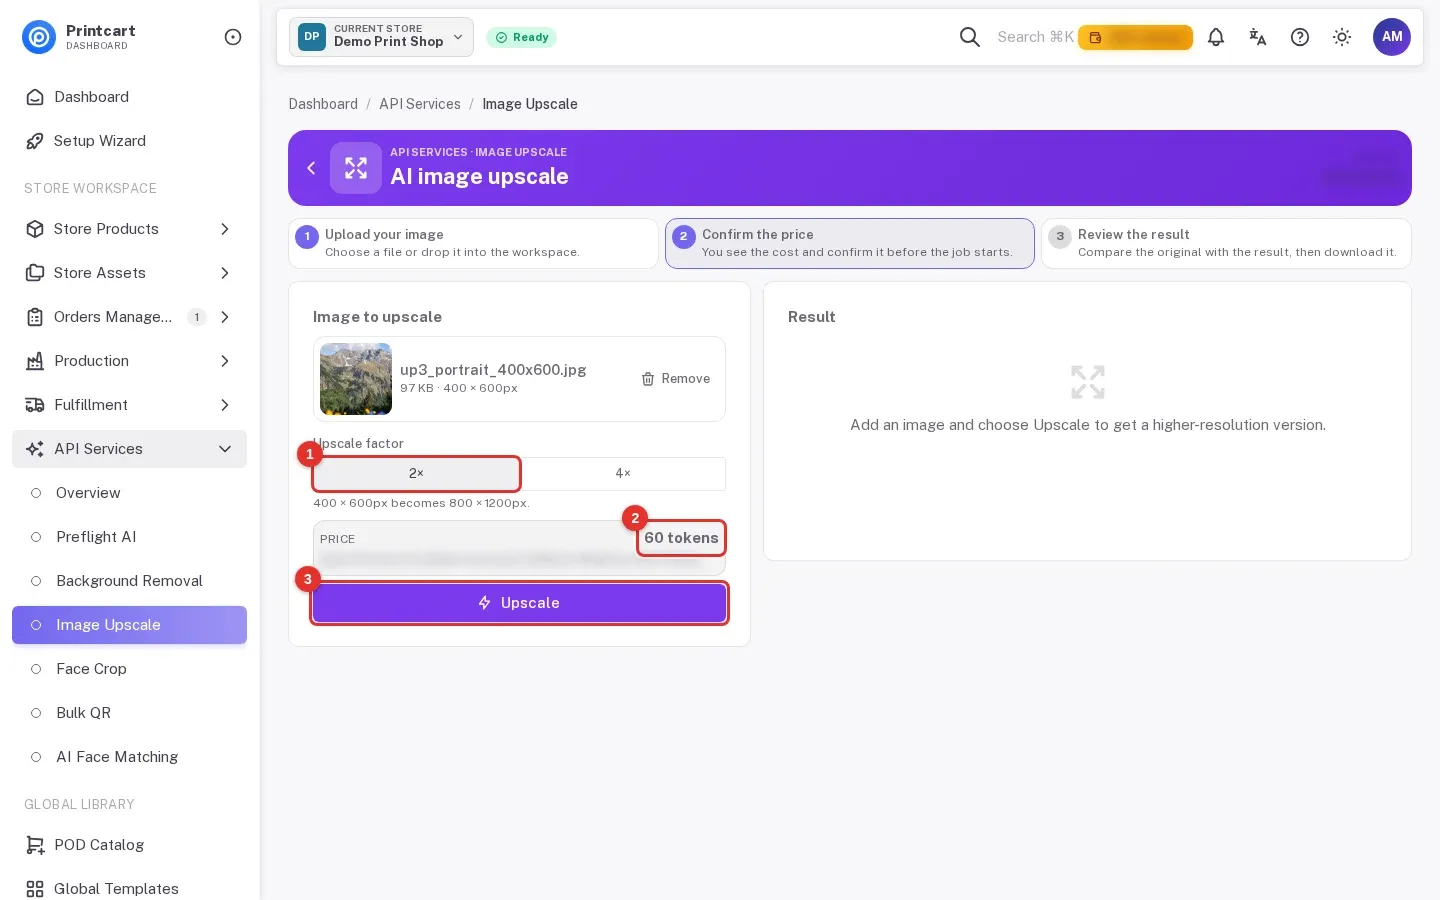
Pick the Upscale factor (1). The line under the buttons tells you the new size before you run anything, and the price box (2) shows what the job will cost. The Upscale button (3) is available once a photo is added.
Expected result: at 2× the page says "400 × 600px becomes 800 × 1200px".
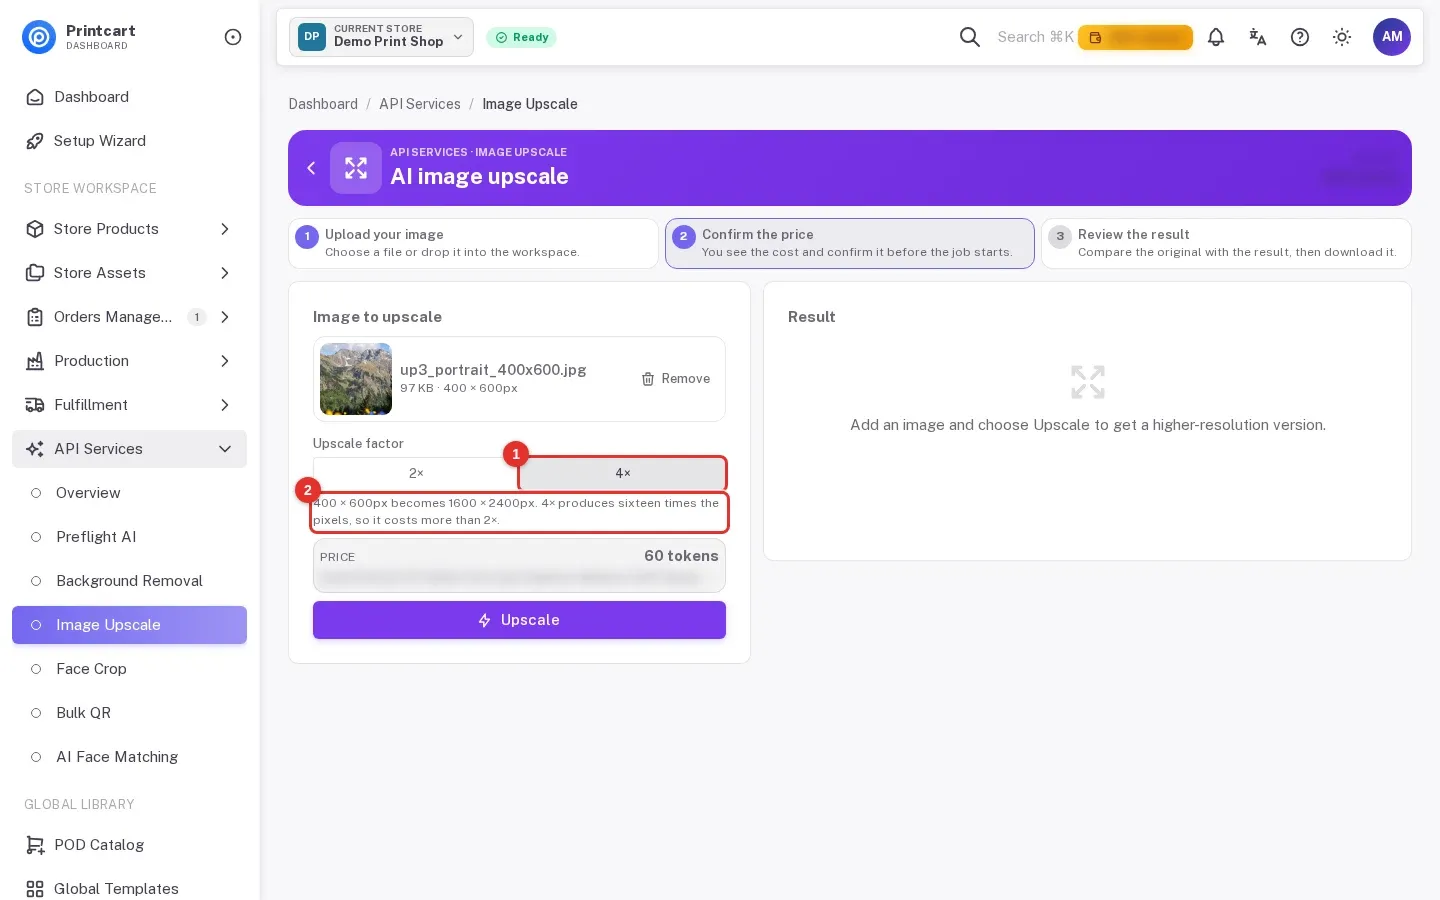
Choose 4× (1) for "1600 × 2400px" (2). The text under the buttons says 4× may cost more than 2×. In our test the price shown was 60 tokens for both, so read the price in the confirmation box before you run the job.
Step 4Confirm the price
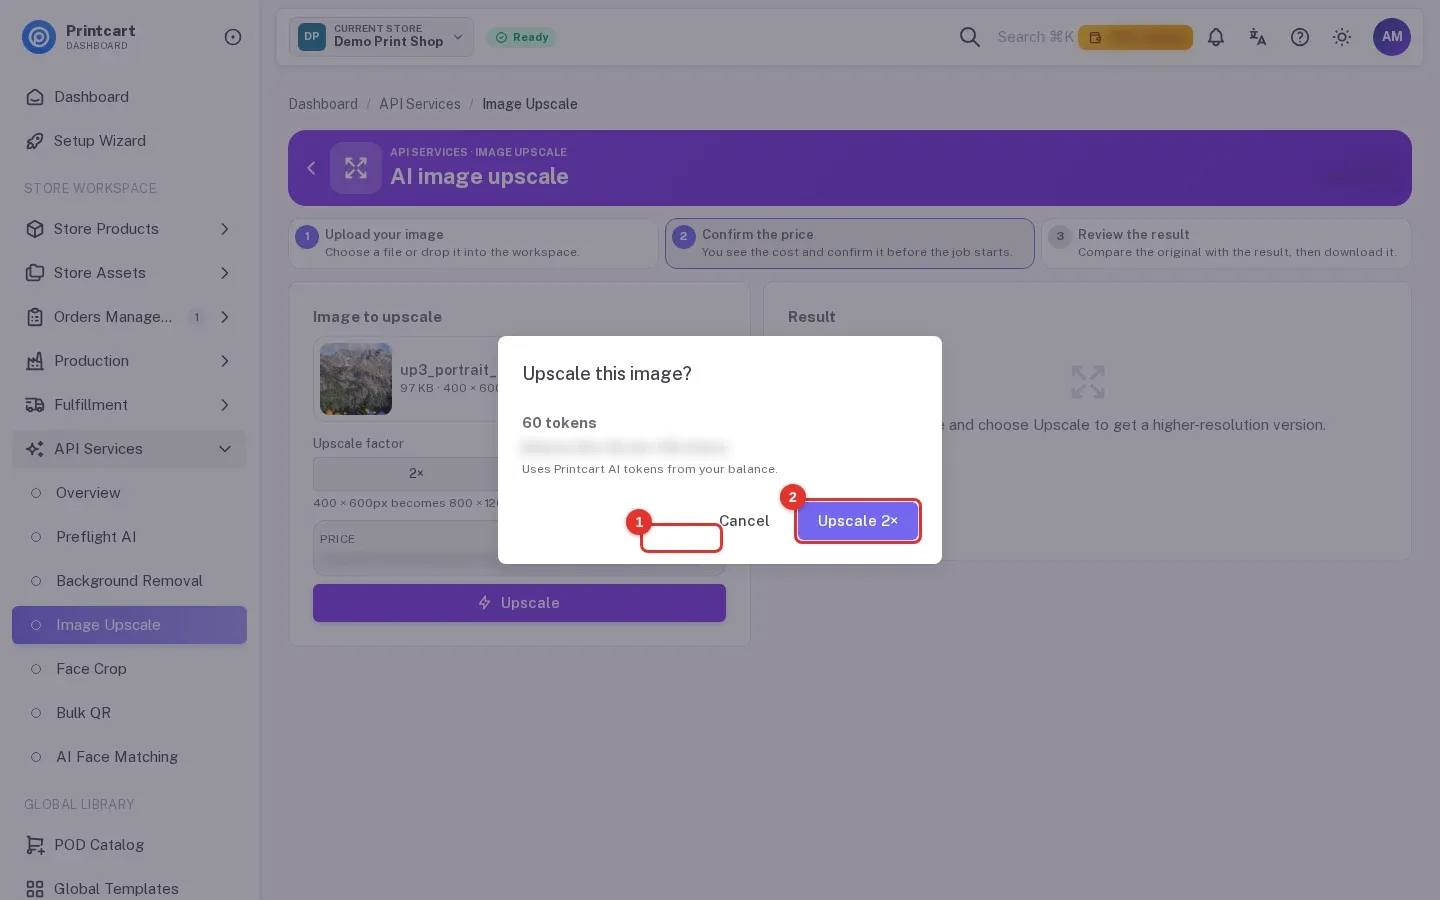
Click Upscale. A box called "Upscale this image?" shows the price (1) and the balance after the job. Click Upscale 2× (2) to start, or Cancel to stop without being charged.
Expected result: the job starts only after you confirm.
Step 5Wait for the result
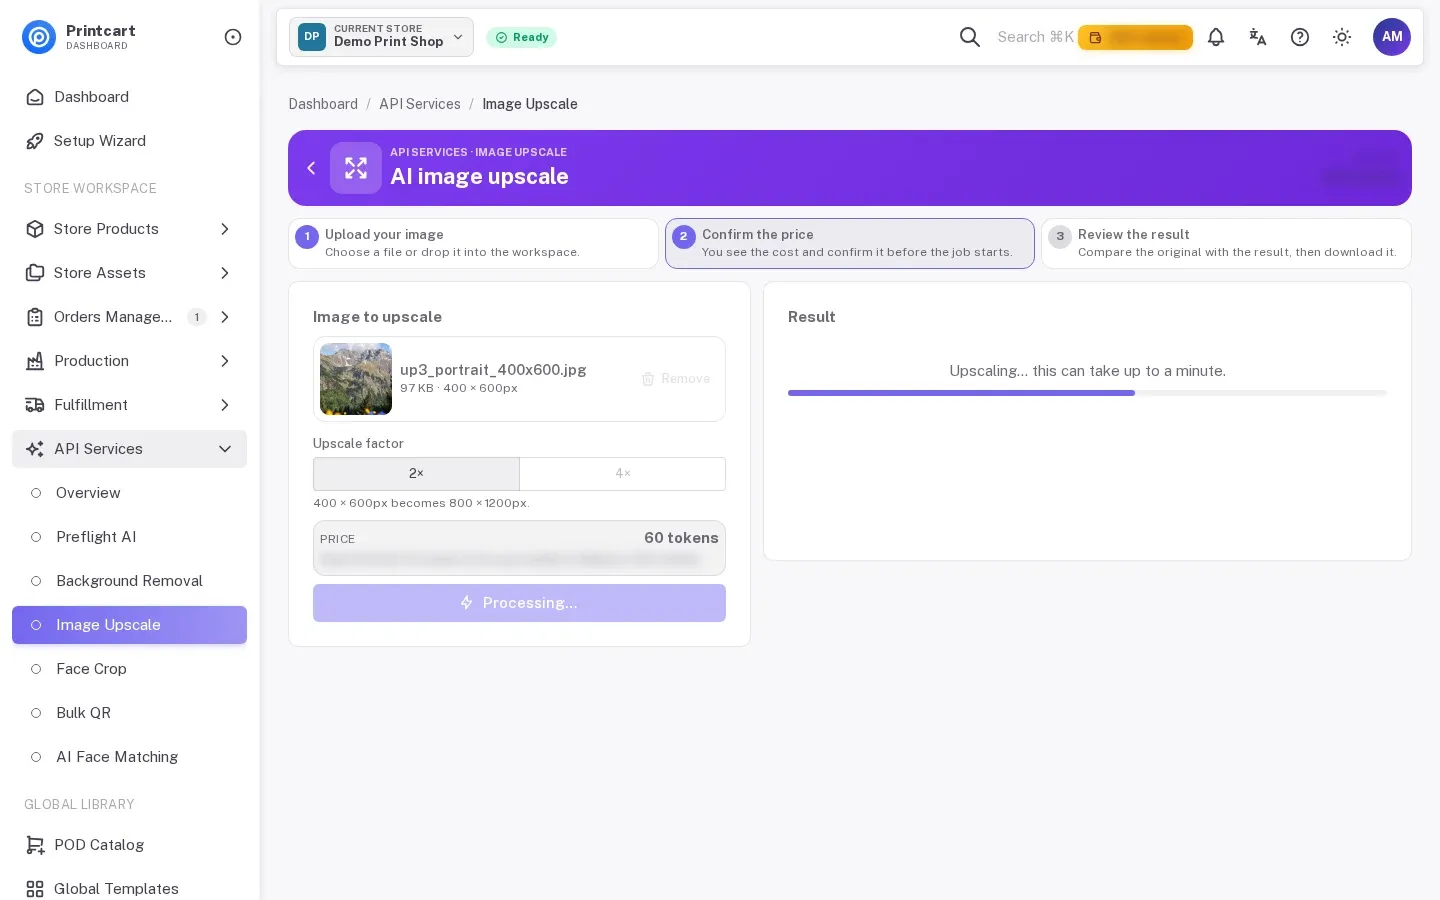
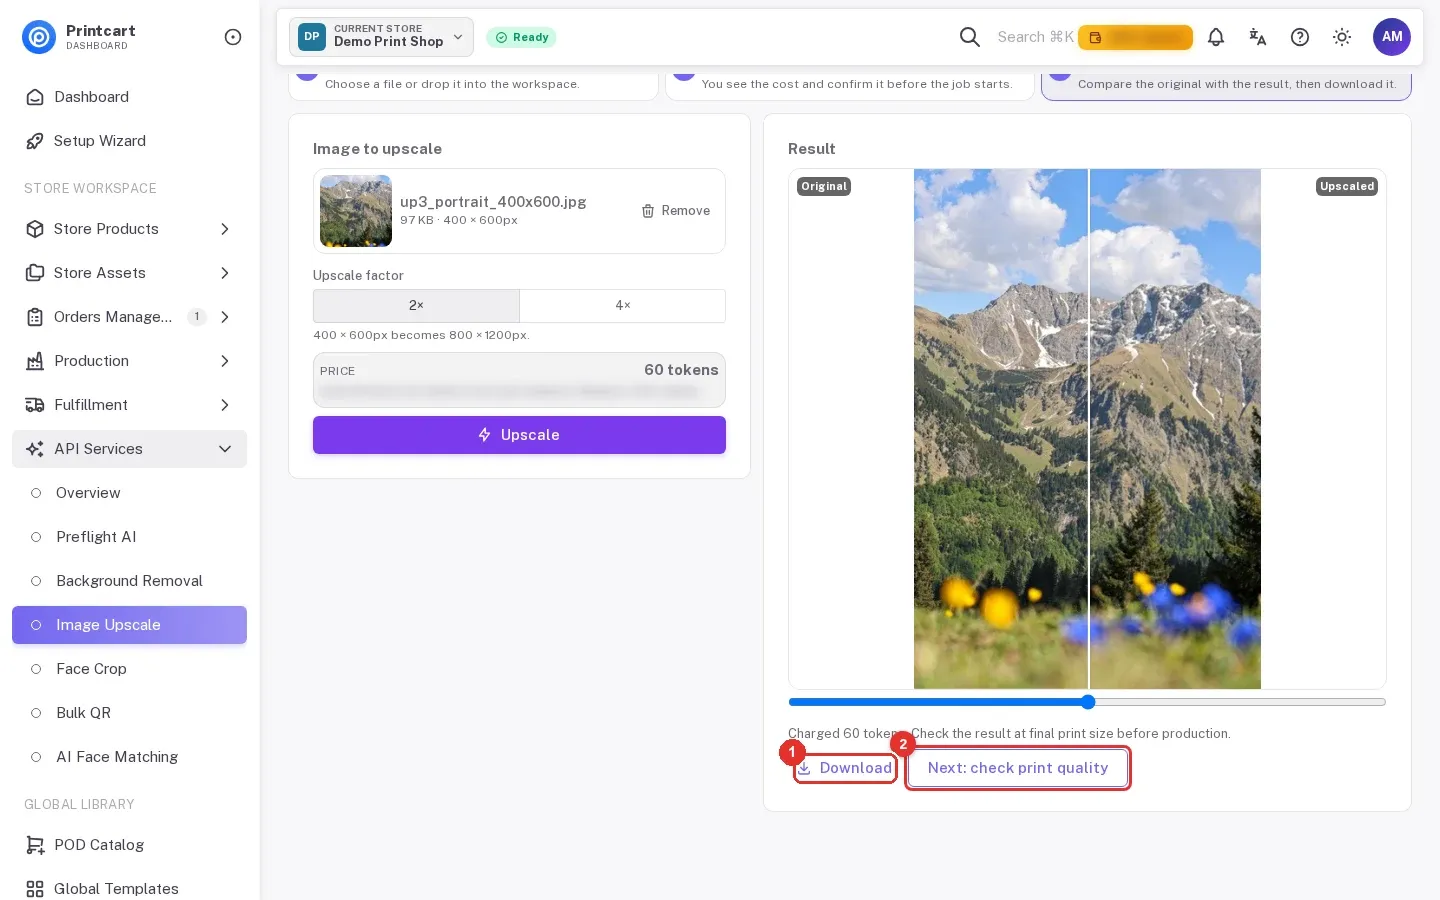
The Result panel shows "Upscaling… this can take up to a minute." In our two test runs the result was ready in about ten seconds (2×) and about six seconds (4×).
Expected result: a progress bar, then the finished image. If it is still running after a minute, check Recent upscales before you run it again, so you are not charged twice.
Step 6Compare and download
Drag the slider to compare Original and Upscaled. Click Download (1) to save the file. Next: check print quality (2) takes you to the print file checker.
Expected result: the page confirms the charge ("Charged 60 tokens") and reminds you to check the result at final print size before production.
Step 7Judge the result at print size
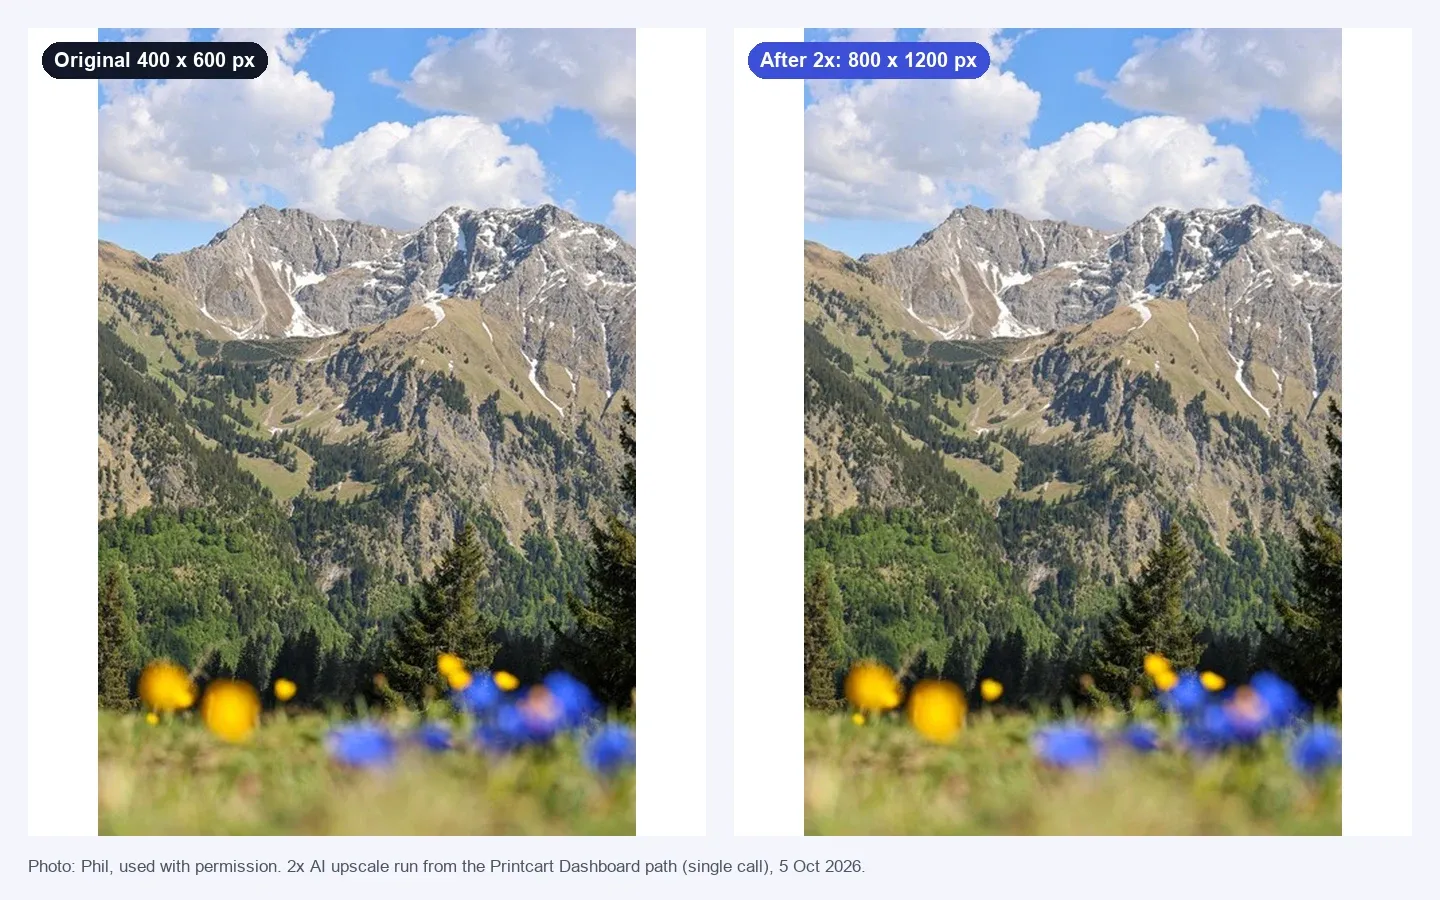
Open the downloaded file at 100%. The comparison below is the same photo as a real run: the 2× result has smoother edges and less blockiness than the original enlarged to the same size.
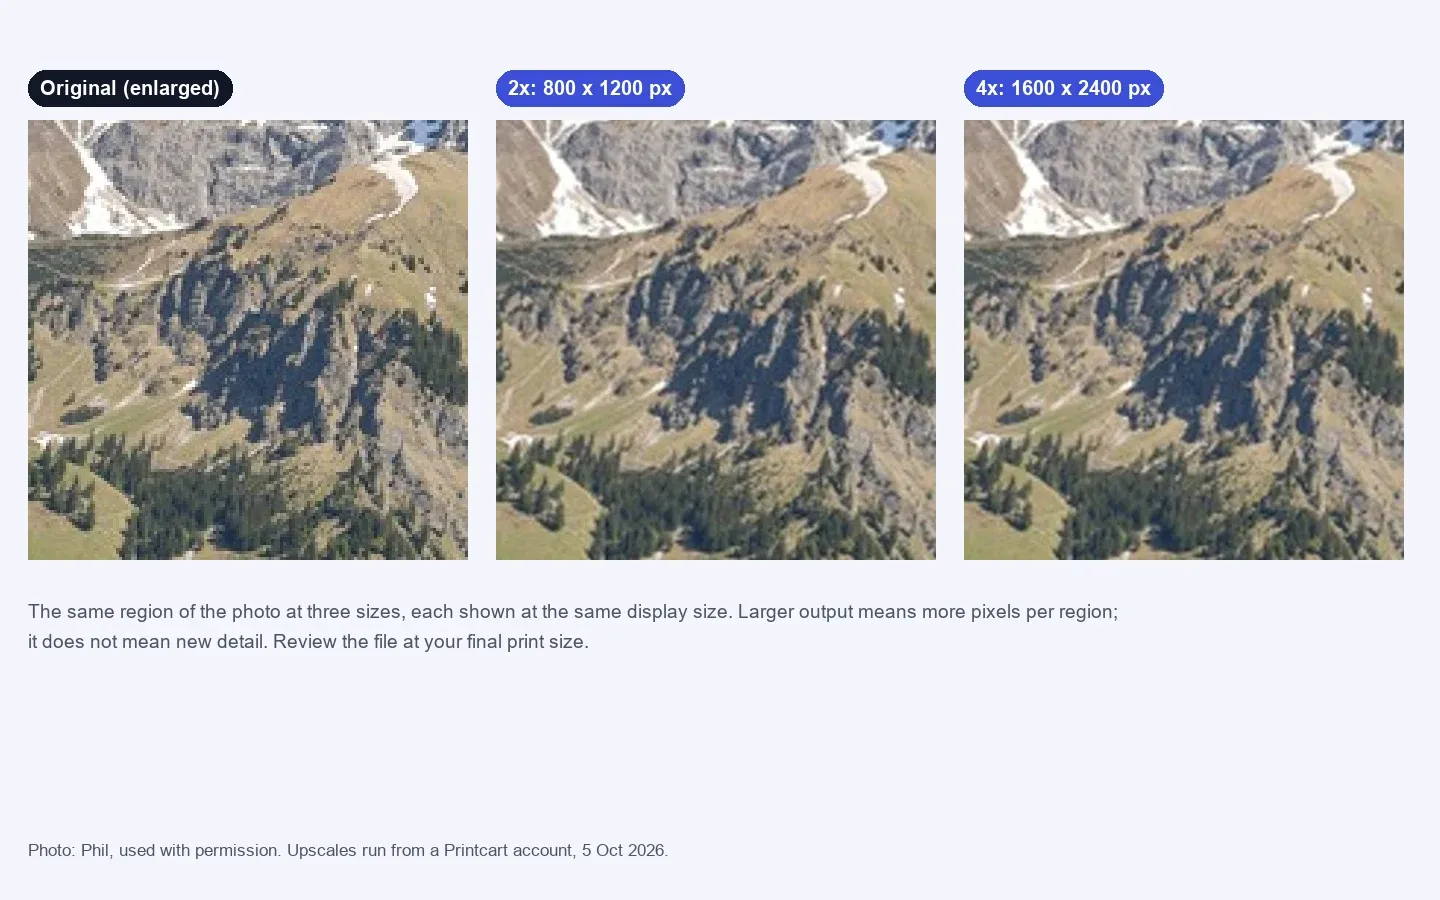
The next picture shows one small region at three sizes. A larger output has more pixels in the same area, but it is not a sharper photograph.
Known limitation. The Dashboard shows the new pixel size, not the print size. Use the free size check to see the estimated DPI of the upscaled file at your print size, and ask for a better original when the photo is blurry or heavily compressed.
Run it in your Printcart Dashboard (full resolution)
The steps above use a demo store. This section shows the same tool on a real account: you pick the store the result belongs to, see the exact price before you confirm, and can follow your token balance and your past runs. The screenshots below come from a real Dashboard session on 5 October 2026.
Step 1Open Image Upscale and check the store
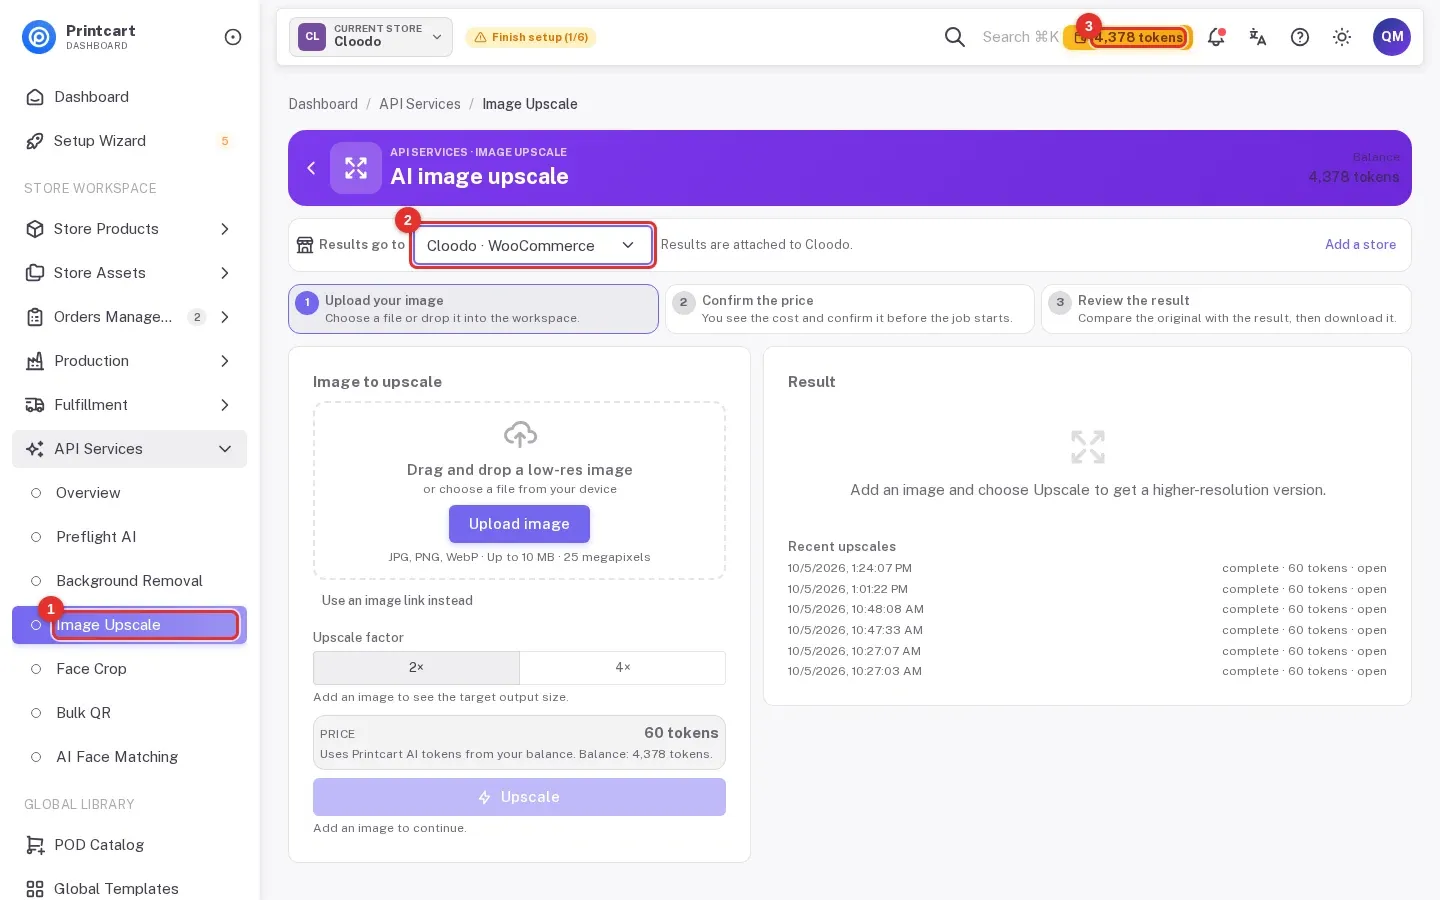
In the Dashboard sidebar, open API Services and click Image Upscale (1). Under Results go to (2), make sure the store you want is selected. The token balance (3) is visible in the top bar.
Expected result: the page "AI image upscale" opens with the three steps across the top.
Step 2Add your image
Click Upload image (1) and choose a JPG, PNG or WebP file up to 10 MB and 25 megapixels, or drag the file onto the box.
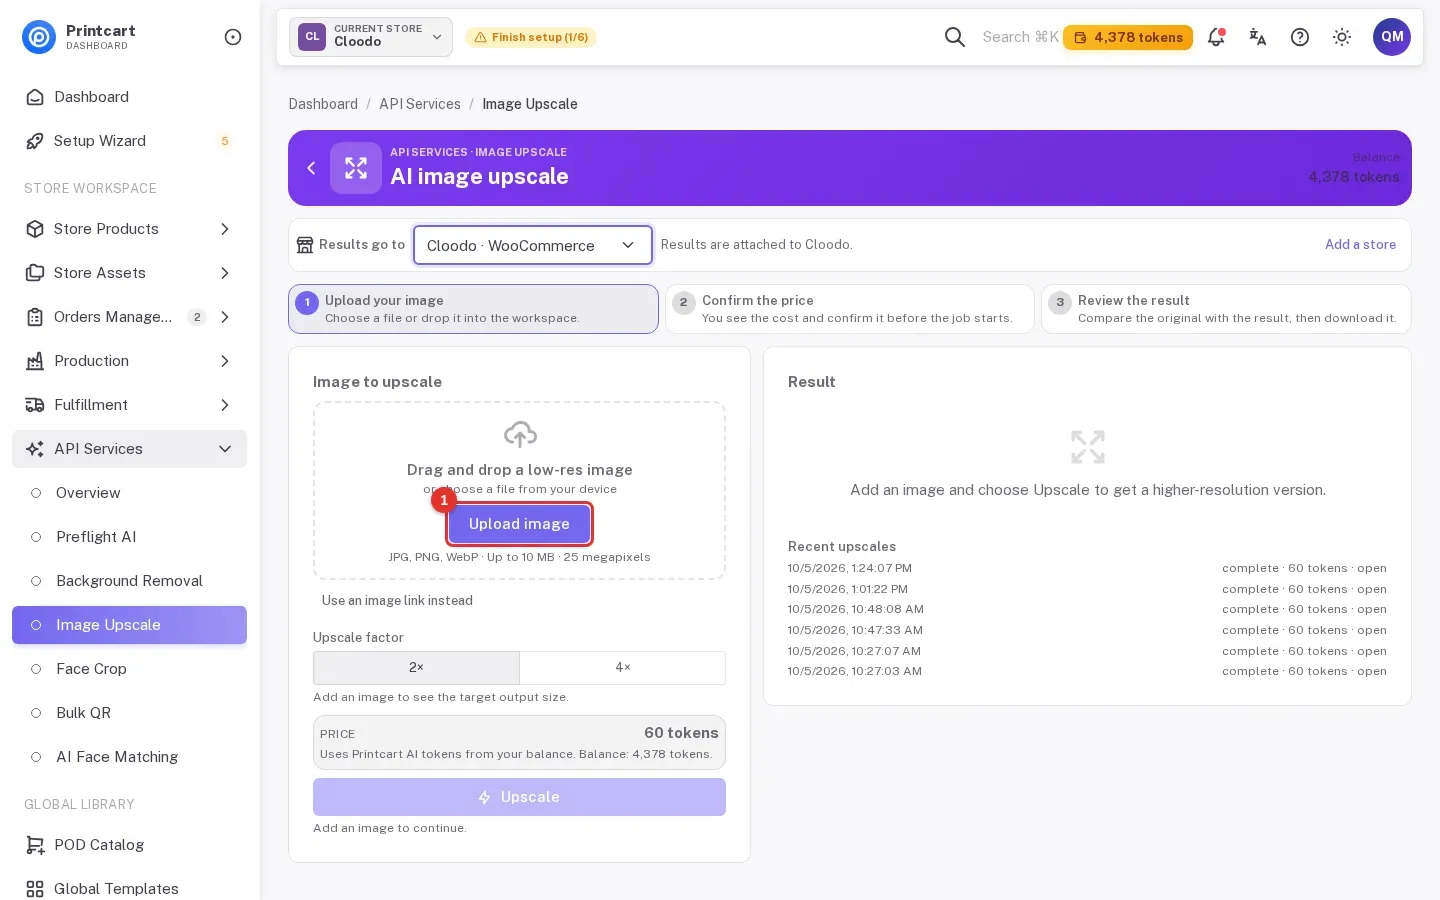
Step 3Choose 2× or 4× and read the price
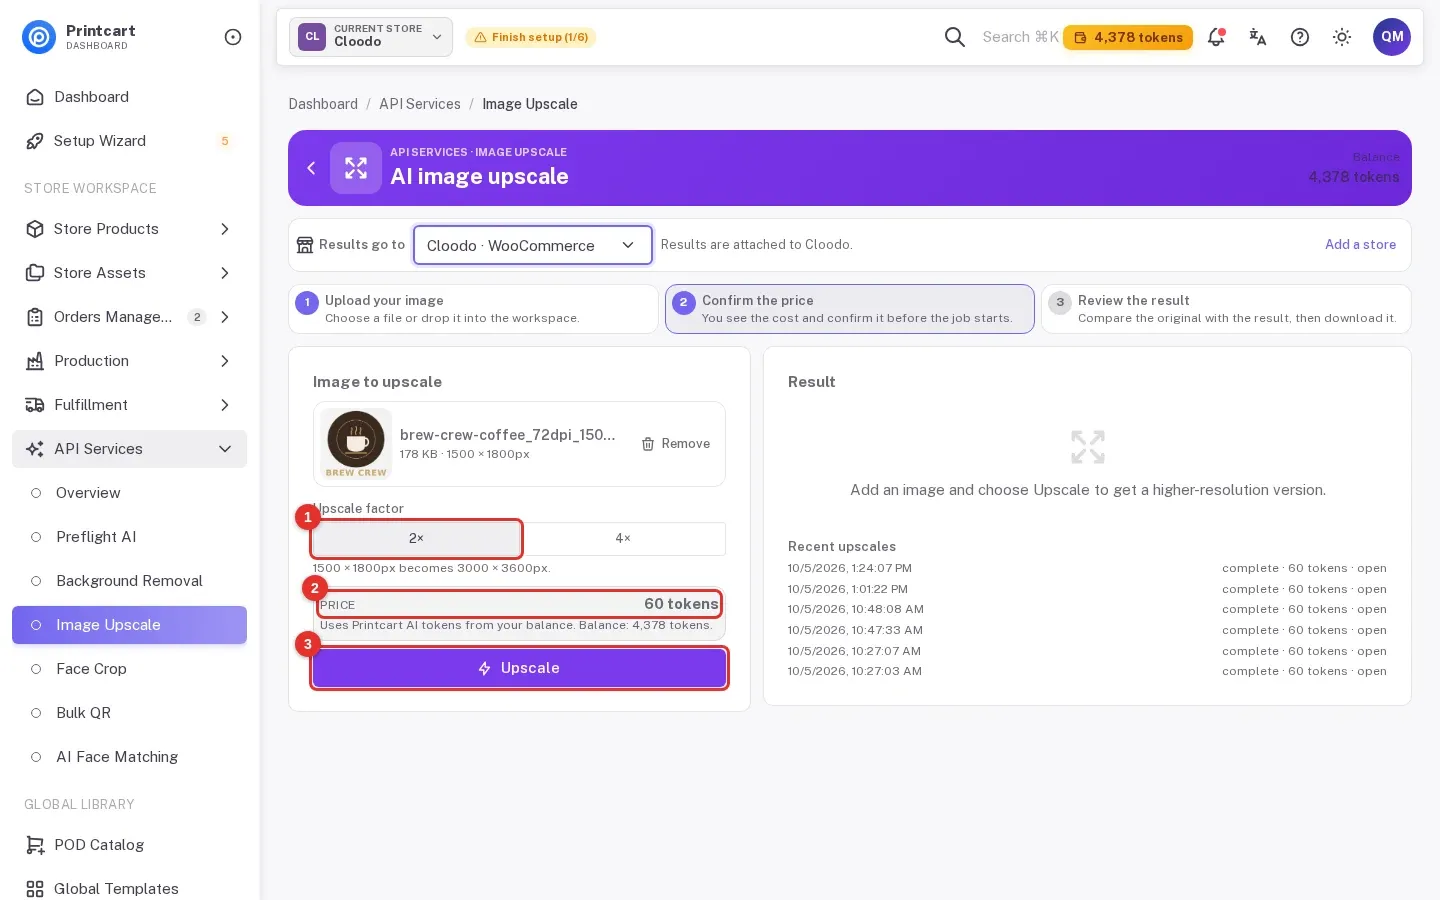
Pick the factor (1). The line under the buttons gives the new size, and the price box (2) shows the cost before you run anything. The Upscale button (3) starts the job.
Expected result: "1500 × 1800px becomes 3000 × 3600px" and a price of 60 tokens for 2×.
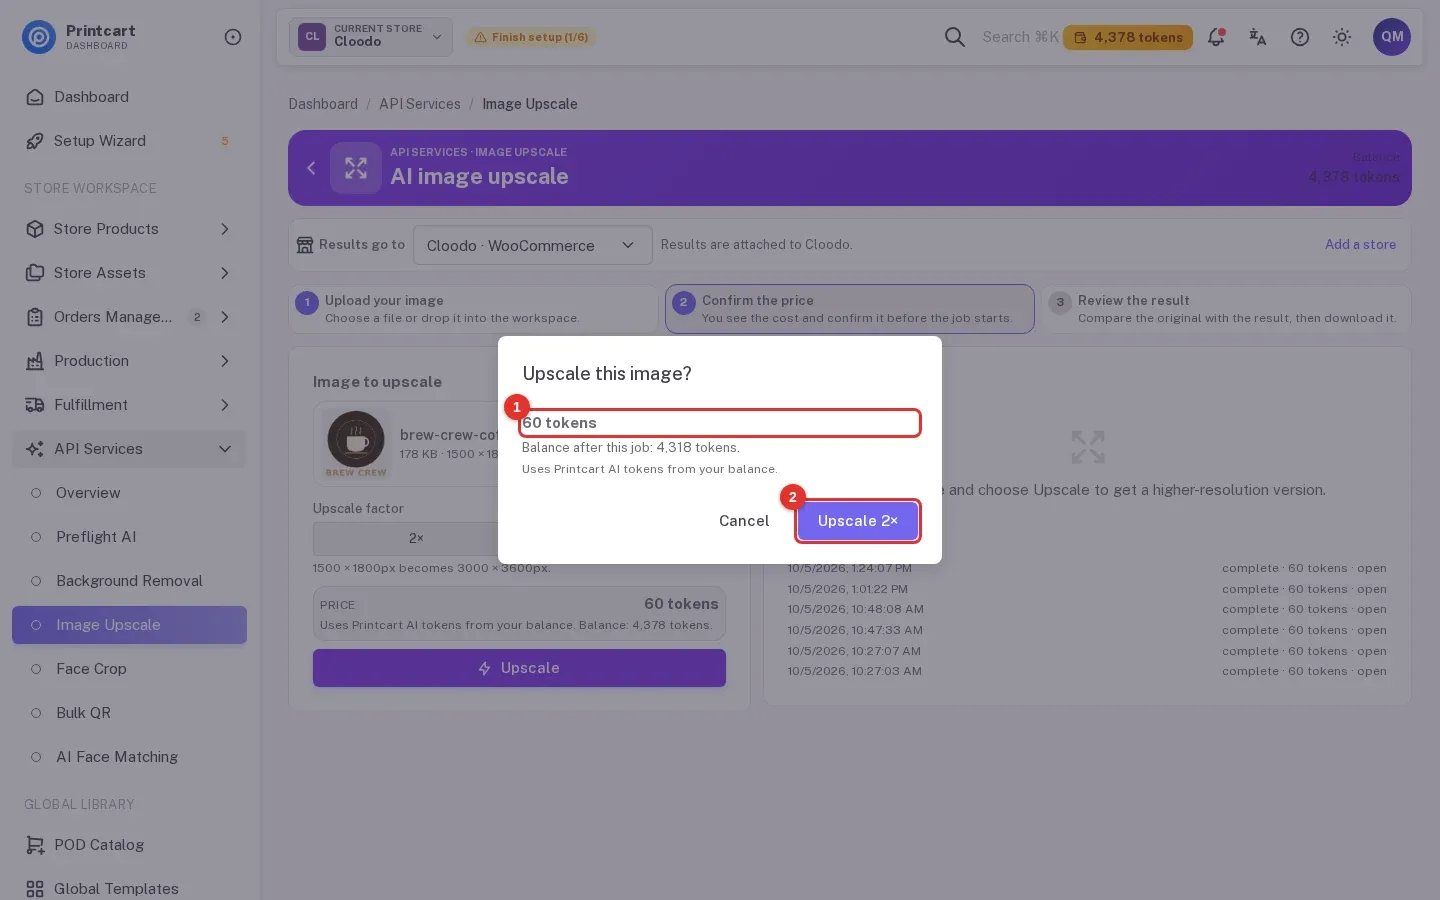
Step 4Confirm the price
Click Upscale. A box called "Upscale this image?" shows the price (1) and your balance after the job. Click Upscale 2× (2) to start, or Cancel to stop without being charged.
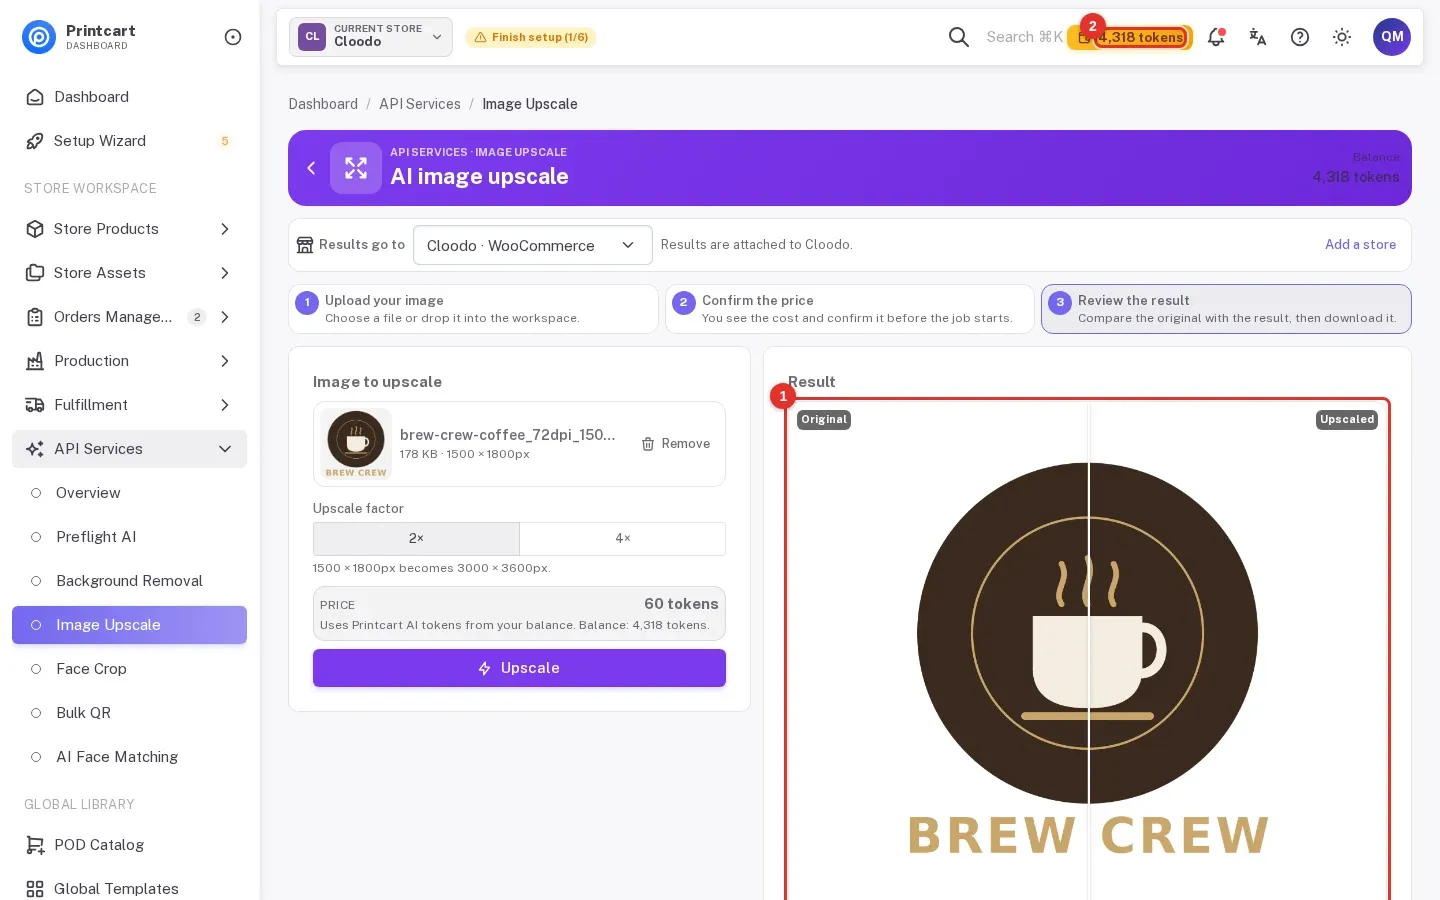
Step 5Compare and download
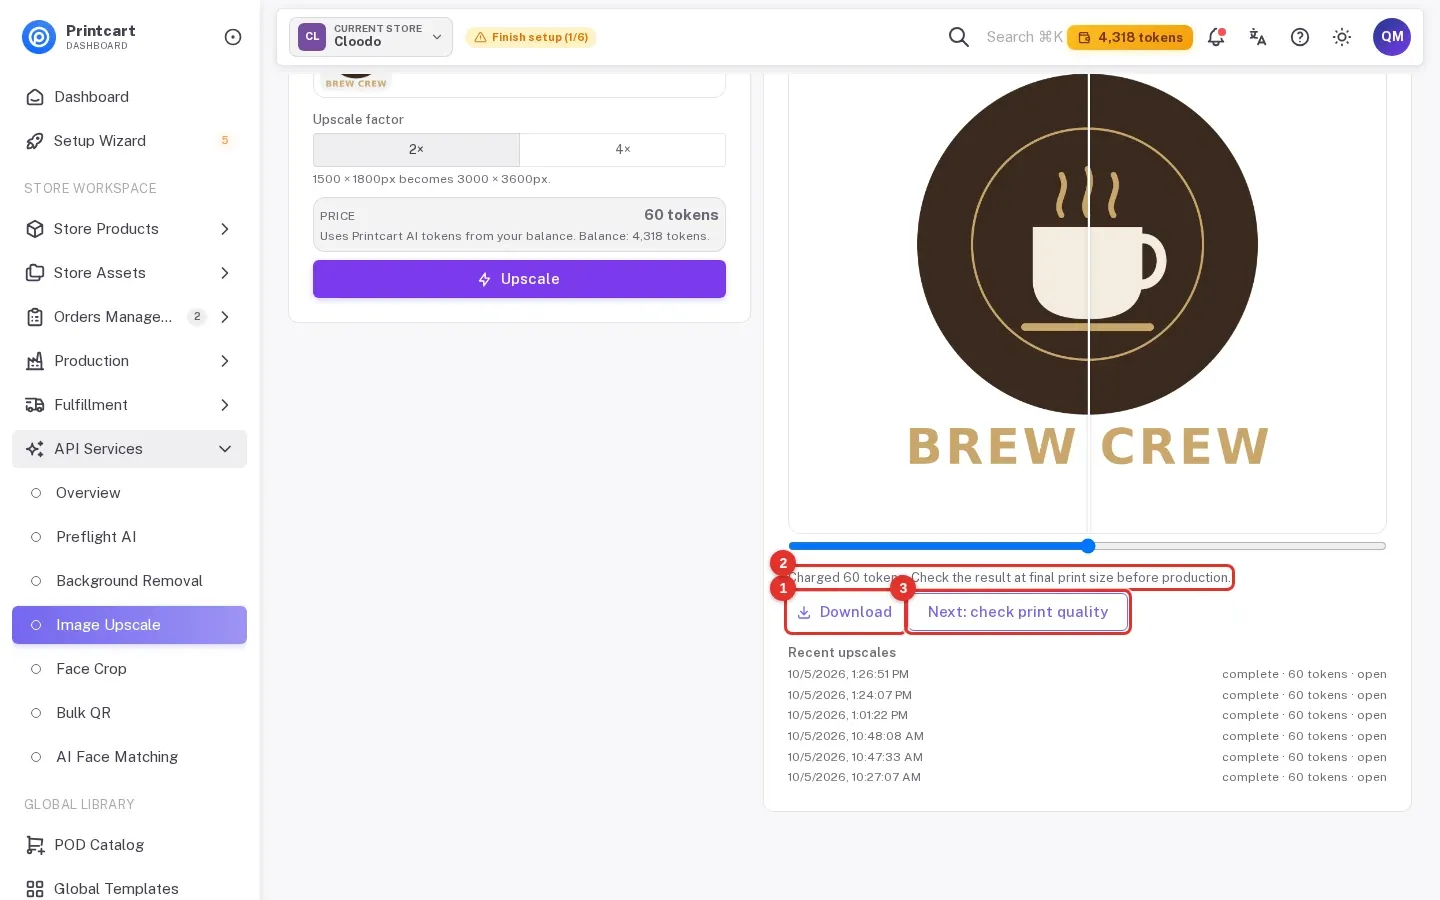
The result appears in a few seconds (4 seconds in our run). Drag the slider (1) to compare the original with the upscaled file. Your balance (2) drops by the price you confirmed.
Expected result: the comparison slider shows the original on the left and the upscaled file on the right. The file is 3000 × 3600 px, twice the width and height of the 1500 × 1800 px original.
Click Download (1) to save the file. The message "Charged 60 tokens" (2) confirms the cost, and Next: check print quality (3) opens the print file check.
Step 6Find your earlier runs
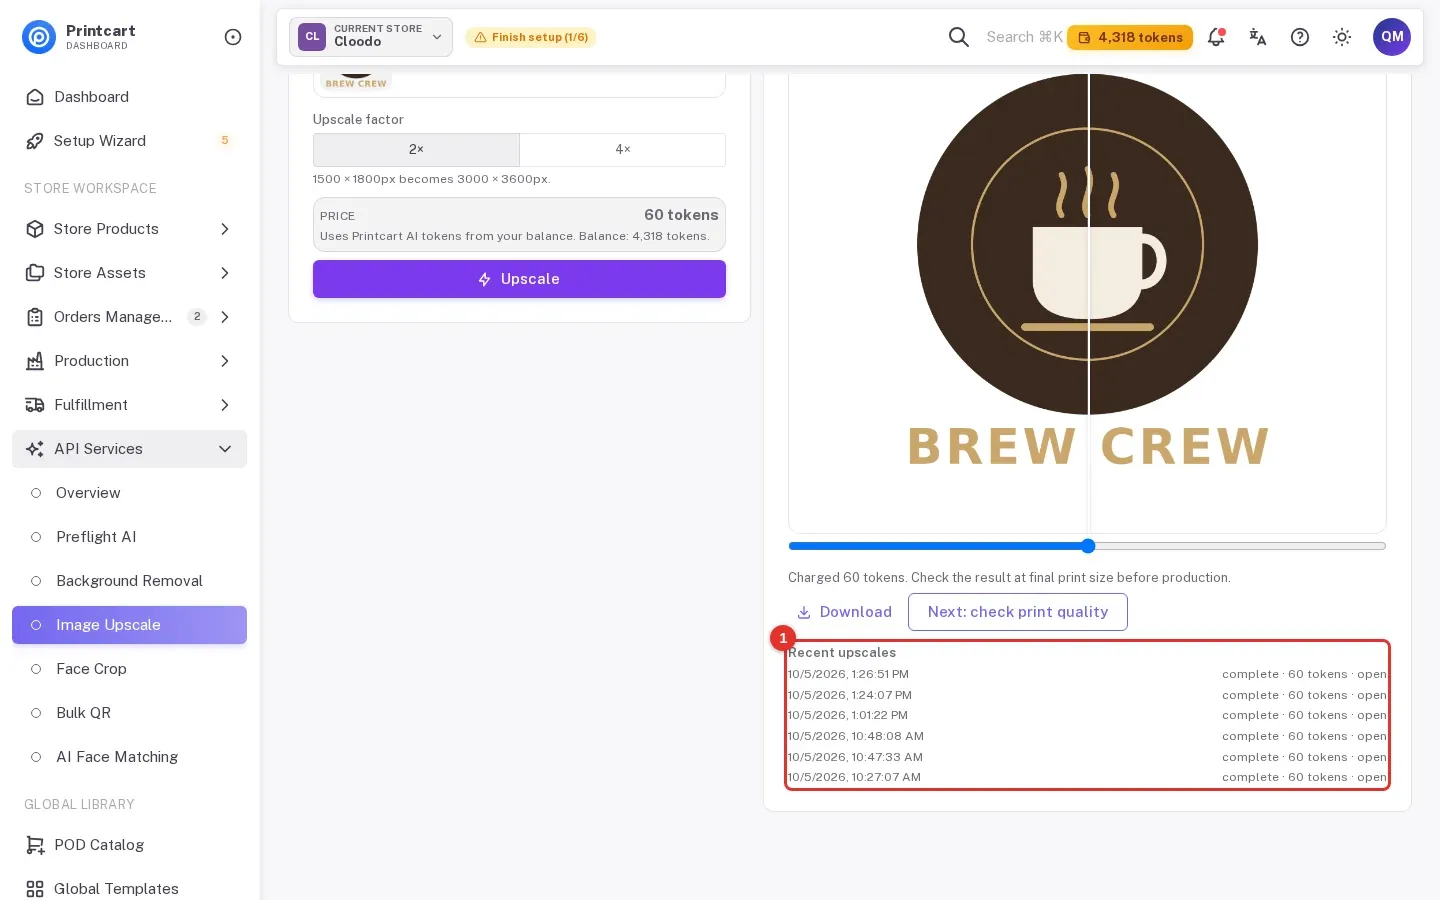
Every run is listed under Recent upscales (1) with its status and the tokens it cost. The open link next to each run opens its file.
Ready for whole folders? Process whole folders and save results to your store — choose a long-term plan, or create an account to start.
Troubleshooting
- The Upscale button is not available. Add an image first. The page also stops a run when your balance is too low to cover the price.
- The job takes longer than a minute. Open Recent upscales and check whether it finished before you start it again.
- The photo looks soft after upscaling. A blurry or compressed original stays that way. Upscaling smooths edges; it does not add detail.
- The file is rejected. The Dashboard accepts JPG, PNG or WebP up to 10 MB and 25 megapixels.
Should I choose 2× or 4×?
Choose the smallest factor that reaches the size you need. Work out the pixels you need from your print size and the DPI your printer asks for, then pick 2× or 4× to match.
Does upscaling make a blurry photo sharp?
No. It adds pixels and can smooth jagged edges, but a photo that was blurry or heavily compressed stays that way.
Next steps
- Check the estimated DPI at your print size: free size check and the Print file preflight tool.
- Clean the background first: remove a background on printcart.com.
- Try the size calculation without an account: Image upscale.
- Use these tools with your store: WordPress plugin, Shopify app, Wix app or connect your store.
- More photo tools: Photo commerce tools tutorials.
Ready for whole folders? Process whole folders and save results to your store — choose a long-term plan, or create an account to start.
Printcart field note
What to verify before you roll out Upscale a Low-Resolution Photo for Printing in the Printcart Dashboard
This tutorial is written from Printcart implementation patterns across web-to-print launch planning, buyer experience, and repeatable production. Before treating it as complete, test the workflow with one real product, one real design file, and one real order path.
Upscale a Low-Resolution Photo for Printing in the Printcart Dashboard — common questions
Should I choose 2× or 4×?
Choose the smallest factor that reaches the size you need. Work out the pixels you need from your print size and the DPI your printer asks for, then pick 2× or 4× to match.
Does upscaling make a blurry photo sharp?
No. It adds pixels and can smooth jagged edges, but a photo that was blurry or heavily compressed stays that way.
Next steps in Printcart
Connect upscale a low-resolution photo for printing in the printcart dashboard with catalog setup, templates, production workflows, and implementation support.
Want to put upscale a low-resolution photo for printing in the printcart dashboard into practice?
Use the related Printcart tool below, or create a free account to start building with the product designer.