

Key takeaways
Part 3 of 5 in the Printcart Product Personalizer for Shopify series. The series starts on the Printcart Product Personalizer for Shopify page.
What you need before you start
- A product with Upload on (see Part 2).
- A product description that tells buyers the size, bleed and file type you print with.
- For the DPI rating in the designer: a Design product with a print area.
How this guide was checked. We ran every step on 11 November 2026 and checked the upload warning again on 16 November 2026 on a Shopify development store with the Printcart Product Personalizer installed, three real products (a T-shirt, business cards and kraft mailer boxes) and a test checkout. The screenshots are from that store. Names, emails and checkout links are blurred or made up.
Step 1The buyer opens an Upload product
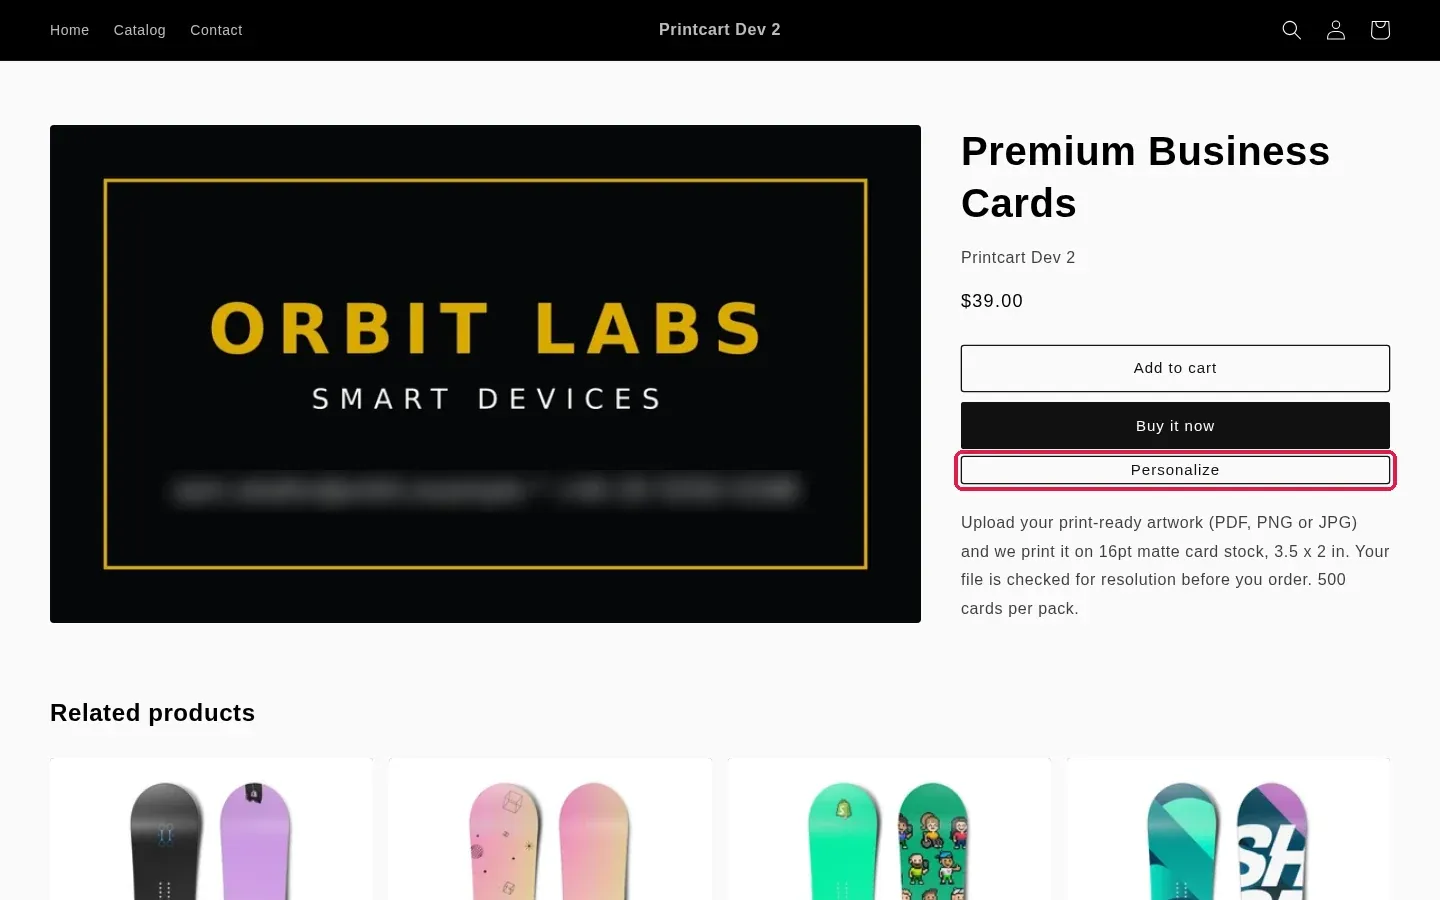
On a product with Upload on, the buyer clicks Personalize under Buy it now. Put the file requirements in your product description, for example the size and bleed you print with.
Expected result: The Personalize button shows on the product page.
Step 2The buyer chooses a file
The Upload artwork window opens. The buyer drags a file in or clicks choose a file. Accepted types are PDF, AI, EPS, SVG, PNG, JPG and JPEG, up to 50 MB.
Expected result: The window shows the drop area and the accepted file types.
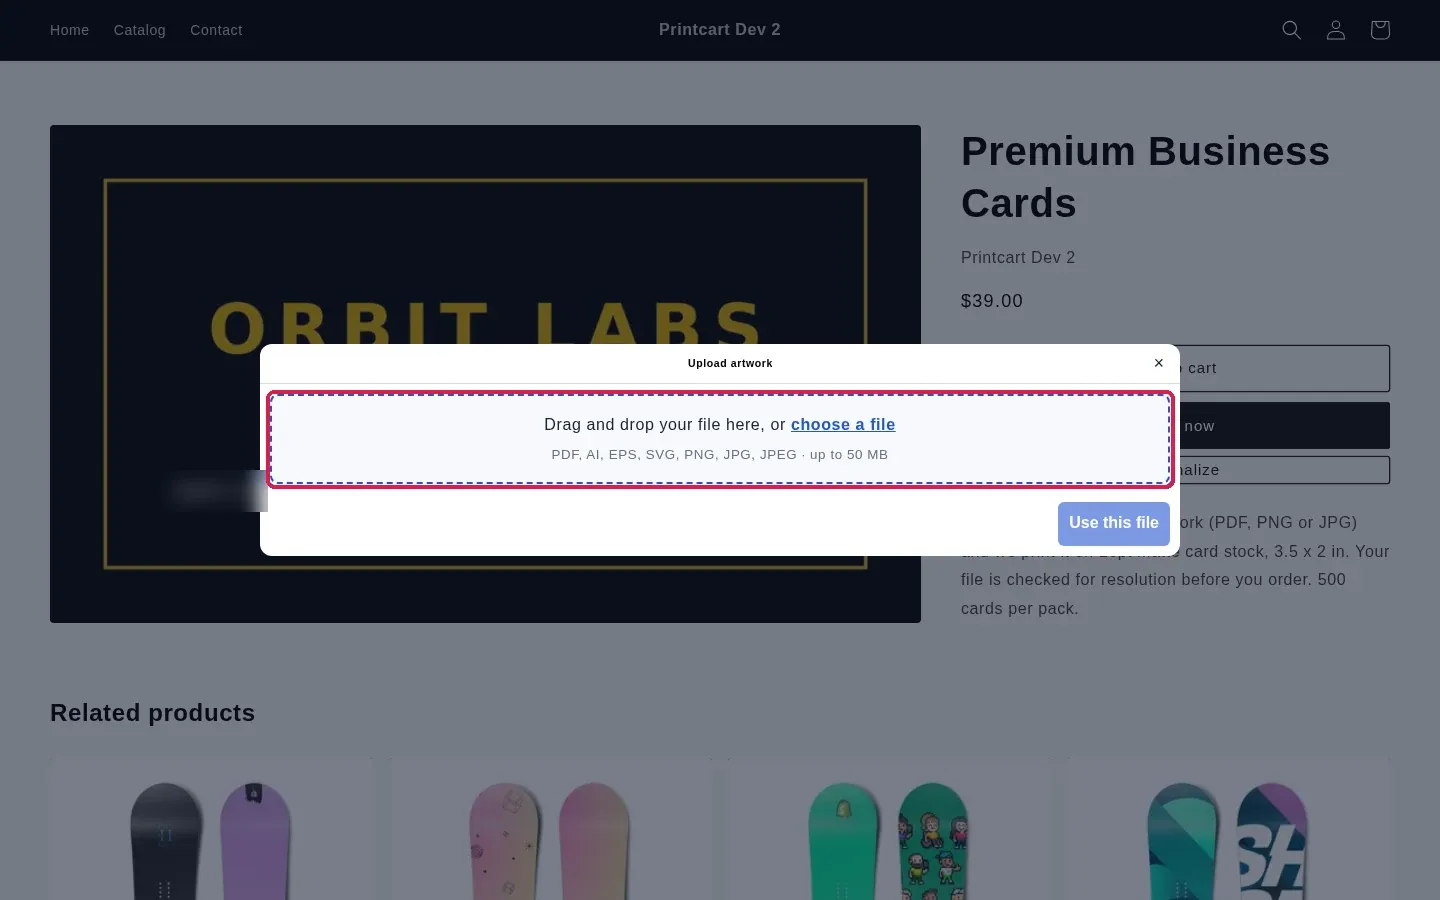
Step 3Check the file name, then click Use this file
After the upload the window shows the file name and size. The buyer can pick another file with Choose another file, then clicks Use this file.
Small images get a warning. When the buyer picks a PNG or JPG whose long side is under 1,200 pixels, the window says This image is small and may print blurry. A larger file prints sharper. with the pixel size. The buyer can choose another file or click Use this file anyway, so the warning never blocks an order. PDF and vector files are not checked this way. If you print small items such as business cards, still ask for PDF files with bleed in the product description.
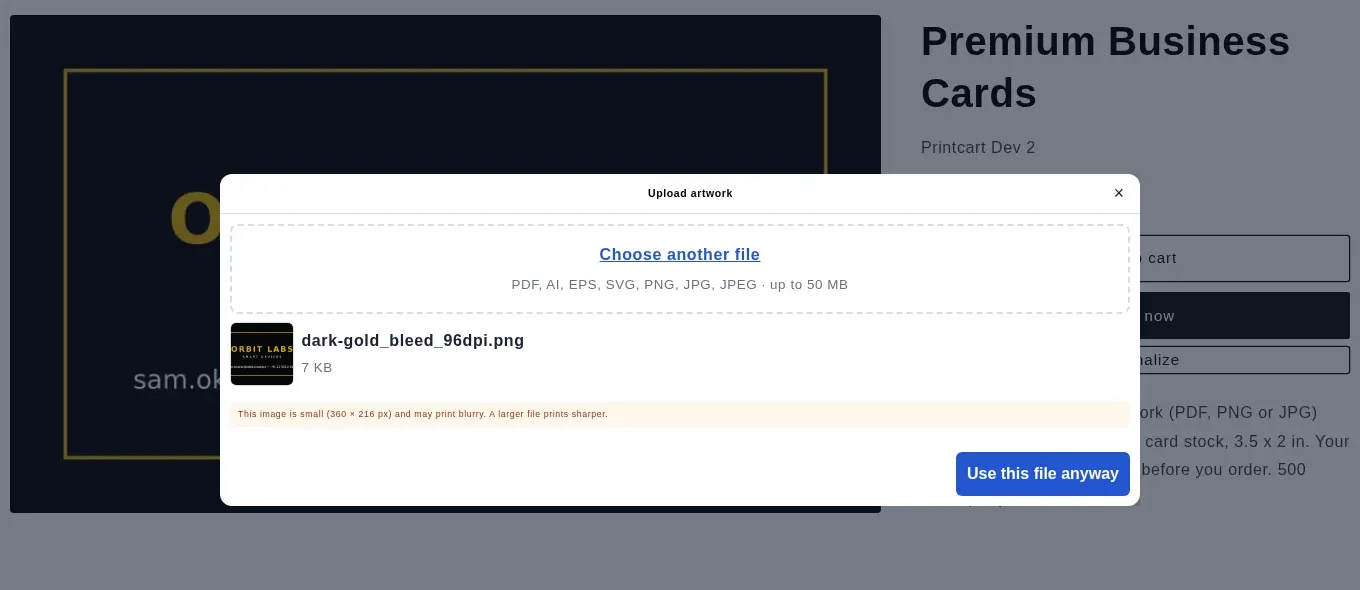
Expected result: The uploaded file appears with its name and size, and Use this file is active (Use this file anyway for a small image).
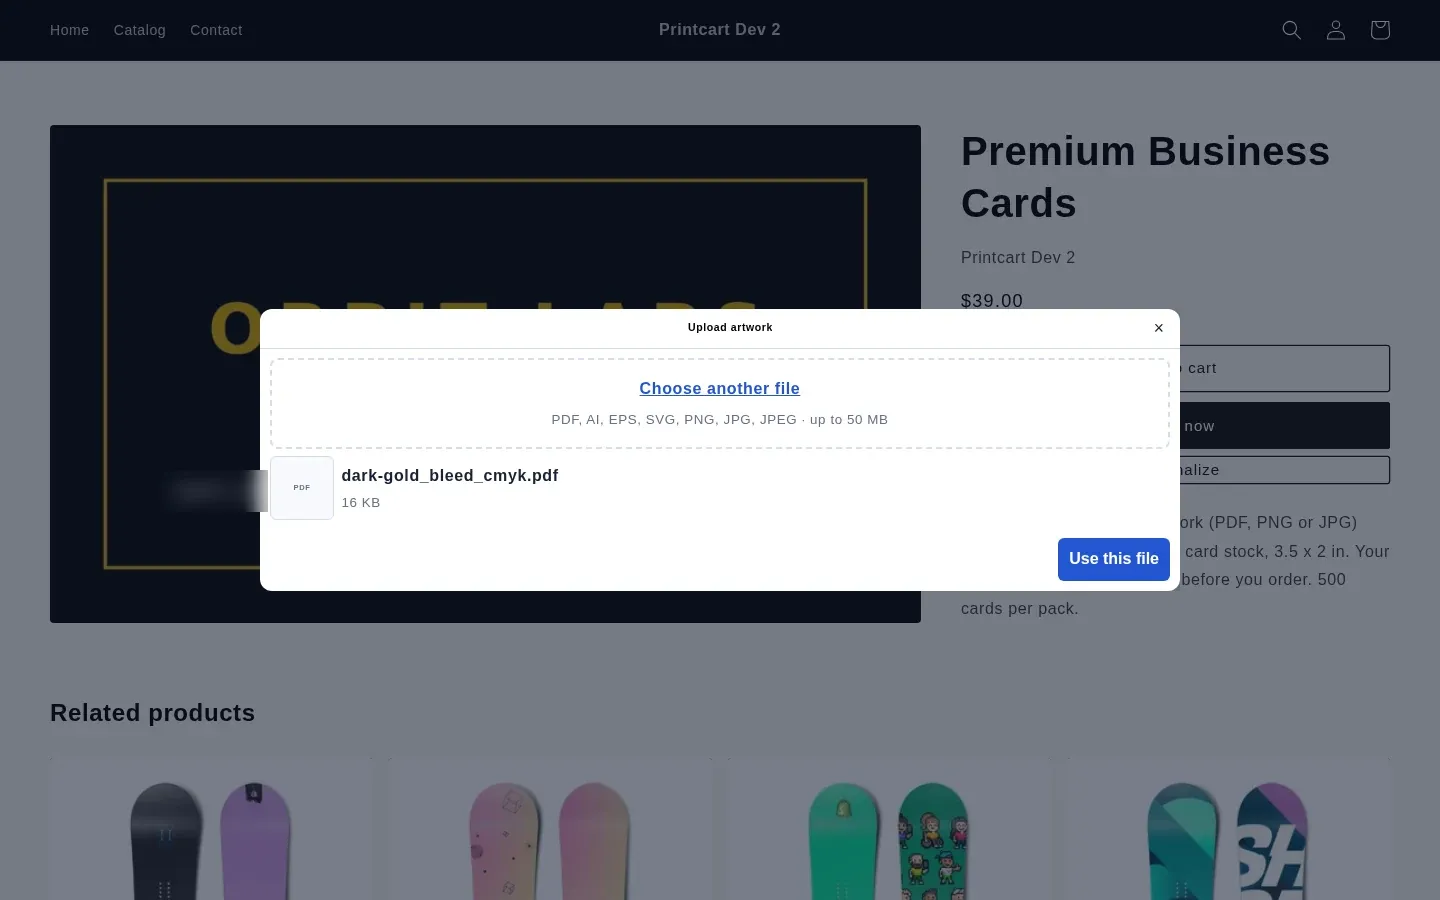
Step 4The file is attached to the item
Back on the product page the buyer sees Your file is attached to this item with the file name, Edit and Remove. Then they click Add to cart. The cart and checkout show the line Artwork file and an Upload code.
Expected result: The attached file shows under Buy it now.
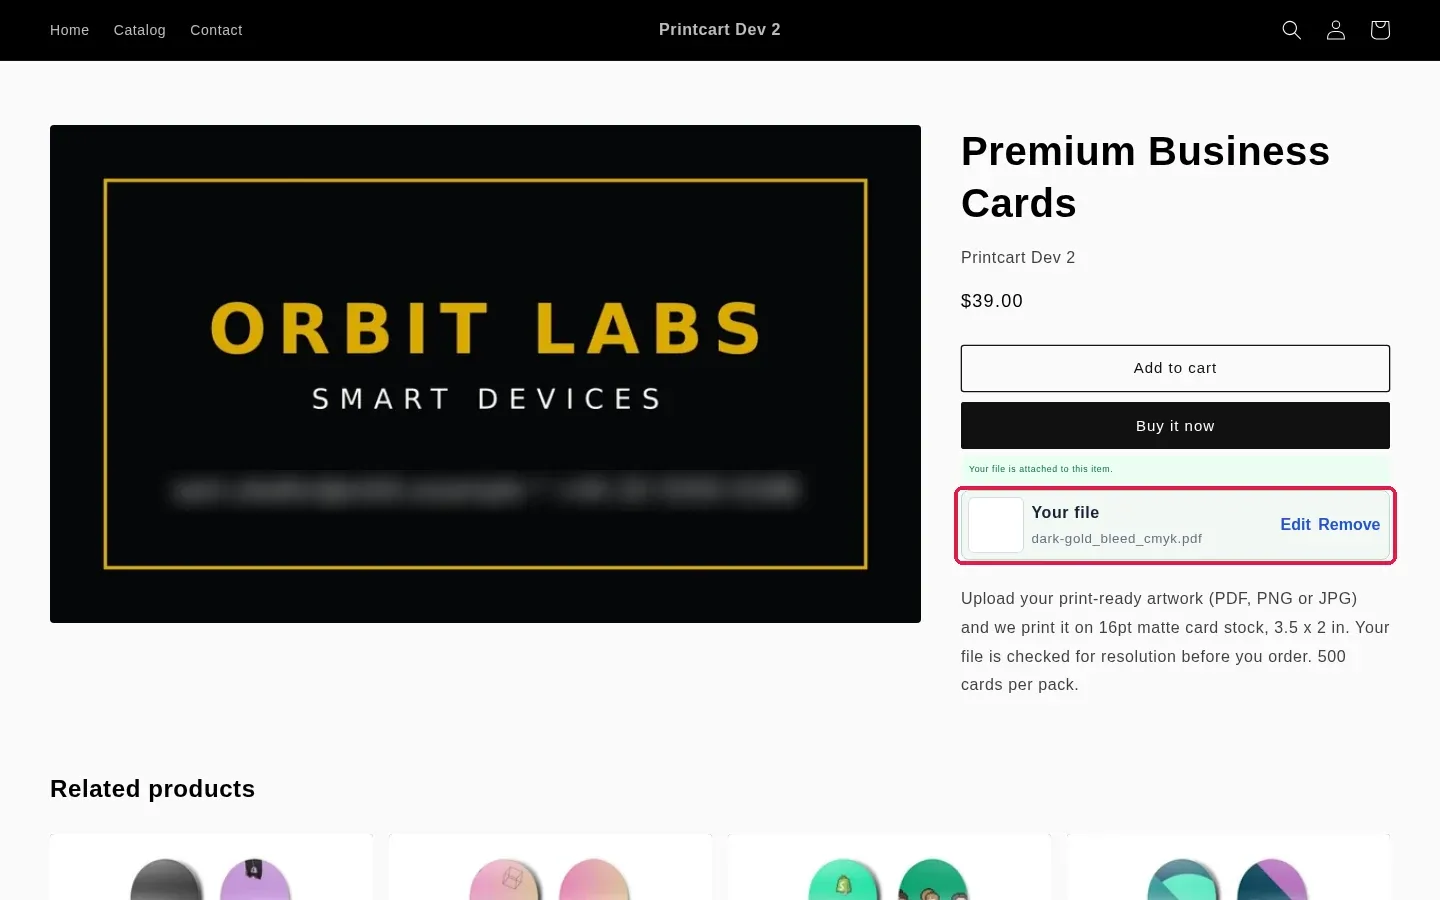
Step 5In the designer, the buyer sees the print quality
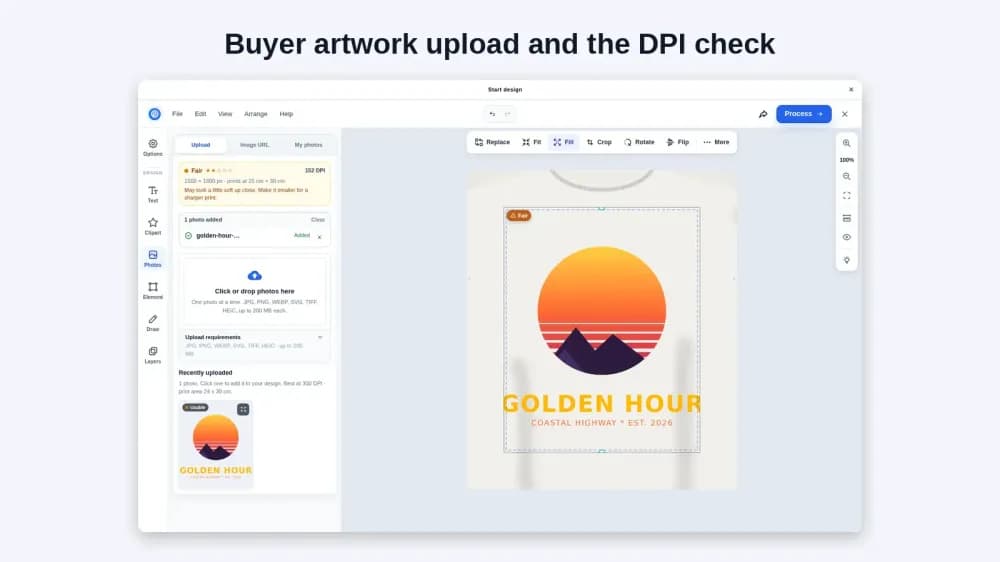
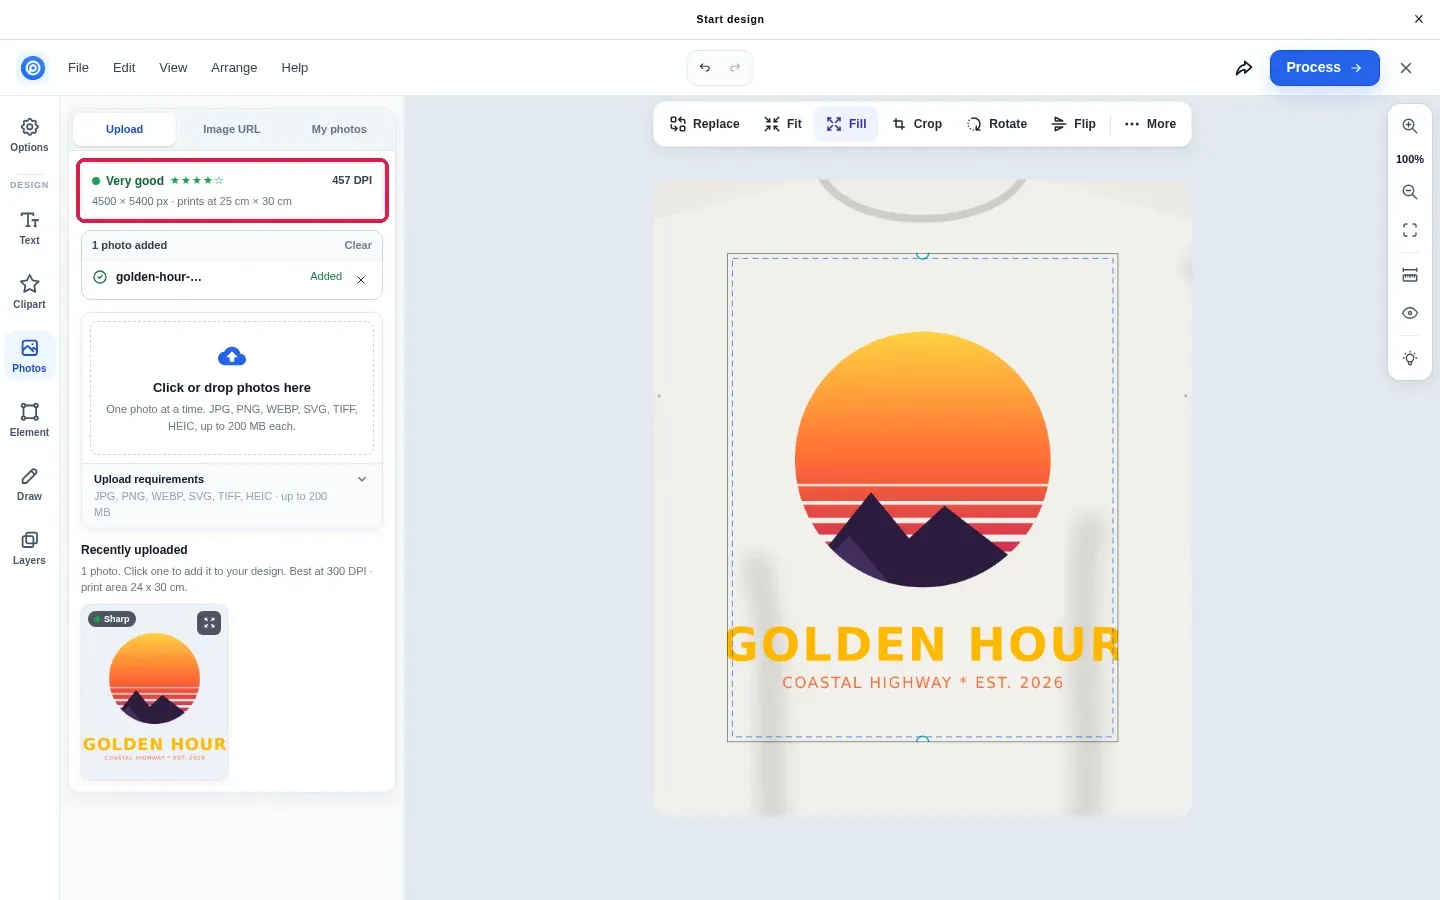
For Design products the resolution check is built into the designer. When the buyer uploads a photo, the designer compares its pixels with the print area and shows a rating. Our 4500 × 5400 px artwork on a 24 × 30 cm area showed Very good, 457 DPI.
Expected result: A green rating with the DPI value and the print size.
Step 6A low resolution photo gets a warning
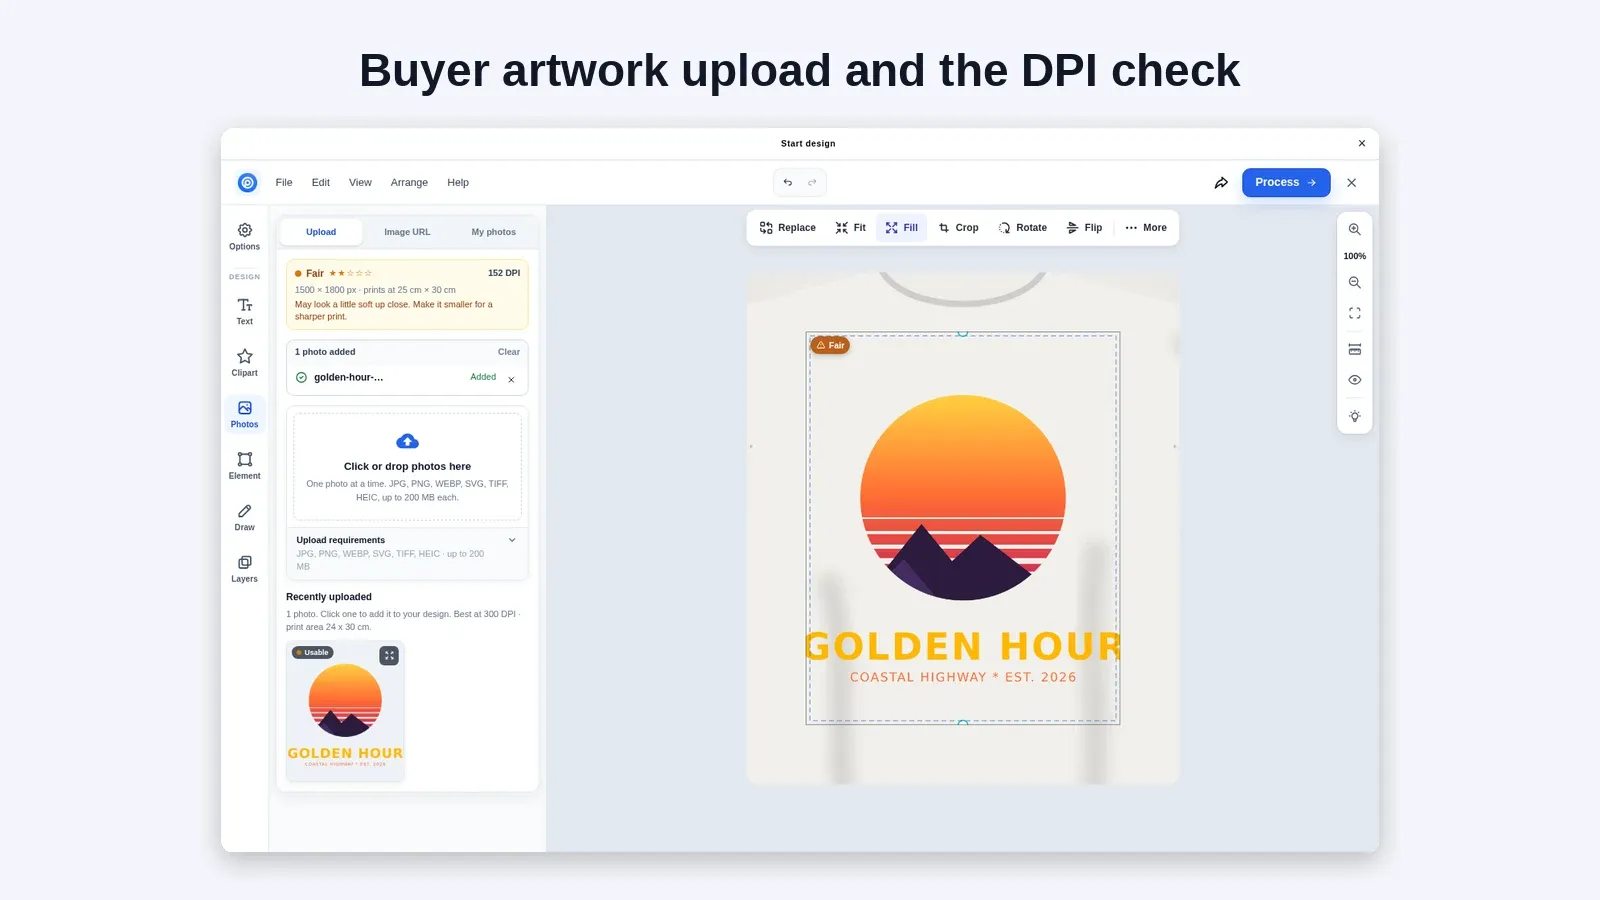
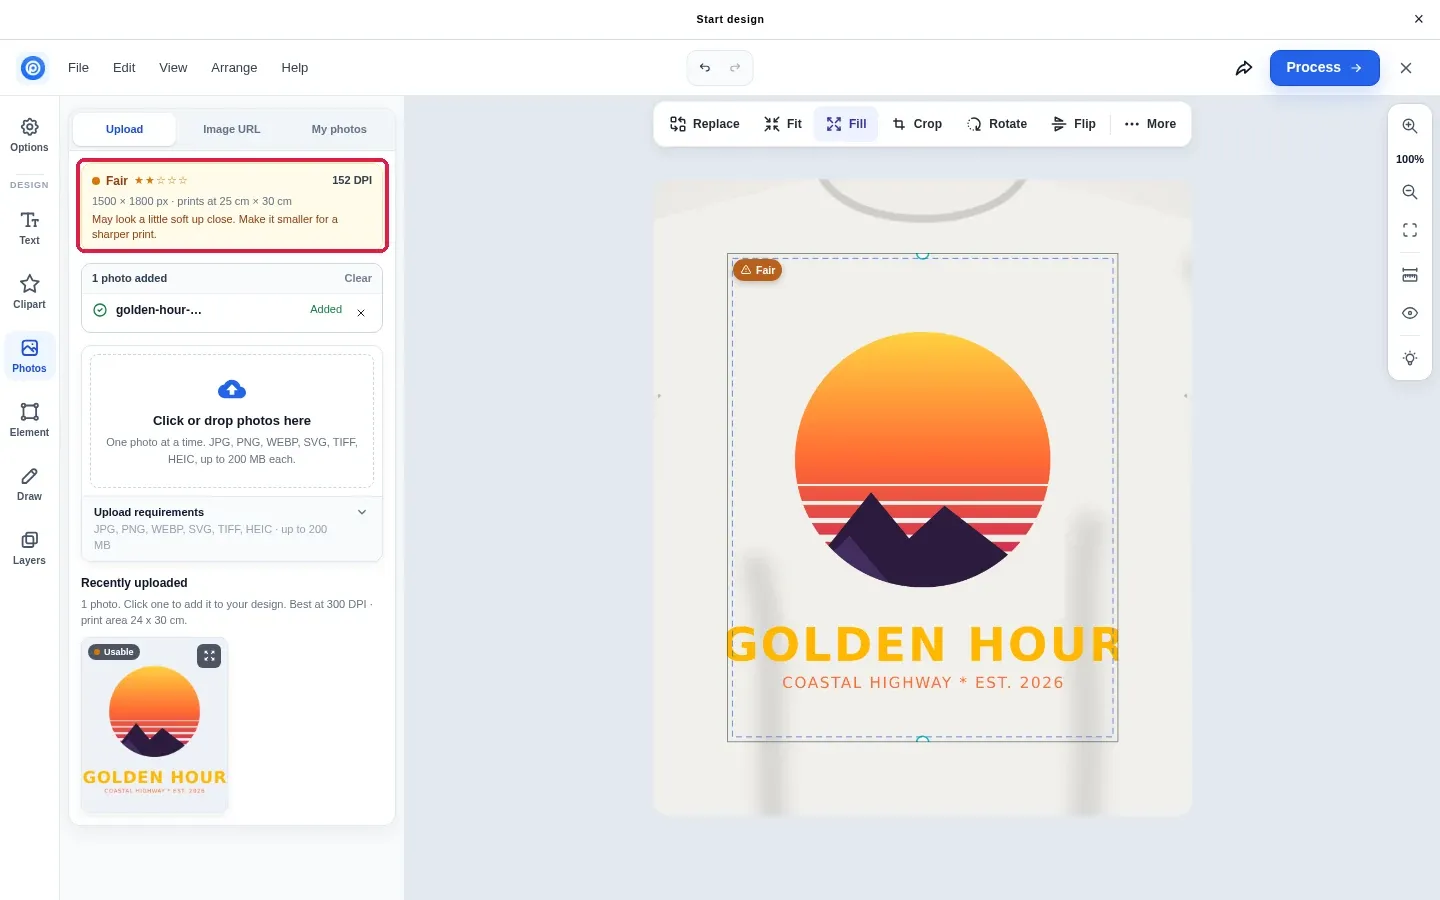
The same artwork at 1500 × 1800 px showed Fair, 152 DPI, with the message May look a little soft up close. Make it smaller for a sharper print. The buyer can still continue, so the warning helps without blocking the sale.
Expected result: An orange Fair rating with advice to make the image smaller.
What if something goes wrong?
- A small image was used anyway. The warning lets buyers continue on purpose. If the file is too small for your product, reply to the buyer before you print and ask for a larger file or a PDF.
- The file is bigger than 50 MB. Ask the buyer to export a compressed PDF or send it by email.
- The buyer uploaded the wrong file. They can click Edit or Remove on the product page before adding to cart.
Frequently asked questions
What DPI should buyers aim for?
The designer recommends 300 DPI at the print size. It shows the actual DPI for each photo and warns when it is lower, without stopping the order.
Can buyers upload PDF files?
Yes. The Upload artwork window accepts PDF, AI, EPS, SVG, PNG, JPG and JPEG files up to 50 MB.
How do I get help if a step does not work?
Message the Printcart team on WhatsApp at https://wa.me/84937869689 or email support@printcart.com. Send the product name, the step you are on and a screenshot of the screen.
What should you read next?
Your launch checklist
What should you check before you launch How Buyers Upload Print Artwork on a Shopify Store and How the DPI Check Works?
This guide covers file quality, proofing, and production risk in Printcart. Before you offer it to your own buyers, place one test order yourself with a real product, a real design file and a real checkout, then answer the questions below.
Sources
How Buyers Upload Print Artwork on a Shopify Store and How the DPI Check Works — common questions
What DPI should buyers aim for?
The designer recommends 300 DPI at the print size. It shows the actual DPI for each photo and warns when it is lower, without stopping the order.
Can buyers upload PDF files?
Yes. The Upload artwork window accepts PDF, AI, EPS, SVG, PNG, JPG and JPEG files up to 50 MB.
How do I get help if a step does not work?
Message the Printcart team on WhatsApp at https://wa.me/84937869689 or email support@printcart.com. Send the product name, the step you are on and a screenshot of the screen.
Next steps in Printcart
Connect this guide with catalog setup, templates, production workflows and implementation support.
Try it

Printcart Product Personalizer
Printcart Product Personalizer is a Shopify app that adds an online design tool to your products. Buyers personalize items with templates, text and image uploads, and you receive print-ready files in SVG, PDF, PNG and JPG. It is built for print shops, print-on-demand sellers and B2B suppliers who sell custom products on Shopify. A Free plan is available.
Put this guide into practice with Printcart
Use the related Printcart tool below, or create a free account to start building with the product designer.