Open Store Profile in the left menu and work through its six pages: Brand Identity , Profile Content , Contact , Store Addresses , SEO and Publish Readiness . The checklist on the right shows which required items are still missing. Once all required items are green, the profile is ready to publish as your public Brand Store page.
Key takeaways
Part 9 of 9 in the Printcart Dashboard tutorial series. Previous: Part 8, API keys and webhooks.
What do you need before you start?
- A store created in the Printcart Dashboard (see Part 1).
- Your website address, a short description, an owner email and phone number. A logo and a banner image are recommended.
The screenshots come from a demo account with a demo store called Demo Print Shop and made-up buyer names. Your store name, products and numbers will differ, but the screens and buttons are the same. Secret values are always hidden in the pictures.
How do you set up your store profile and brand settings?
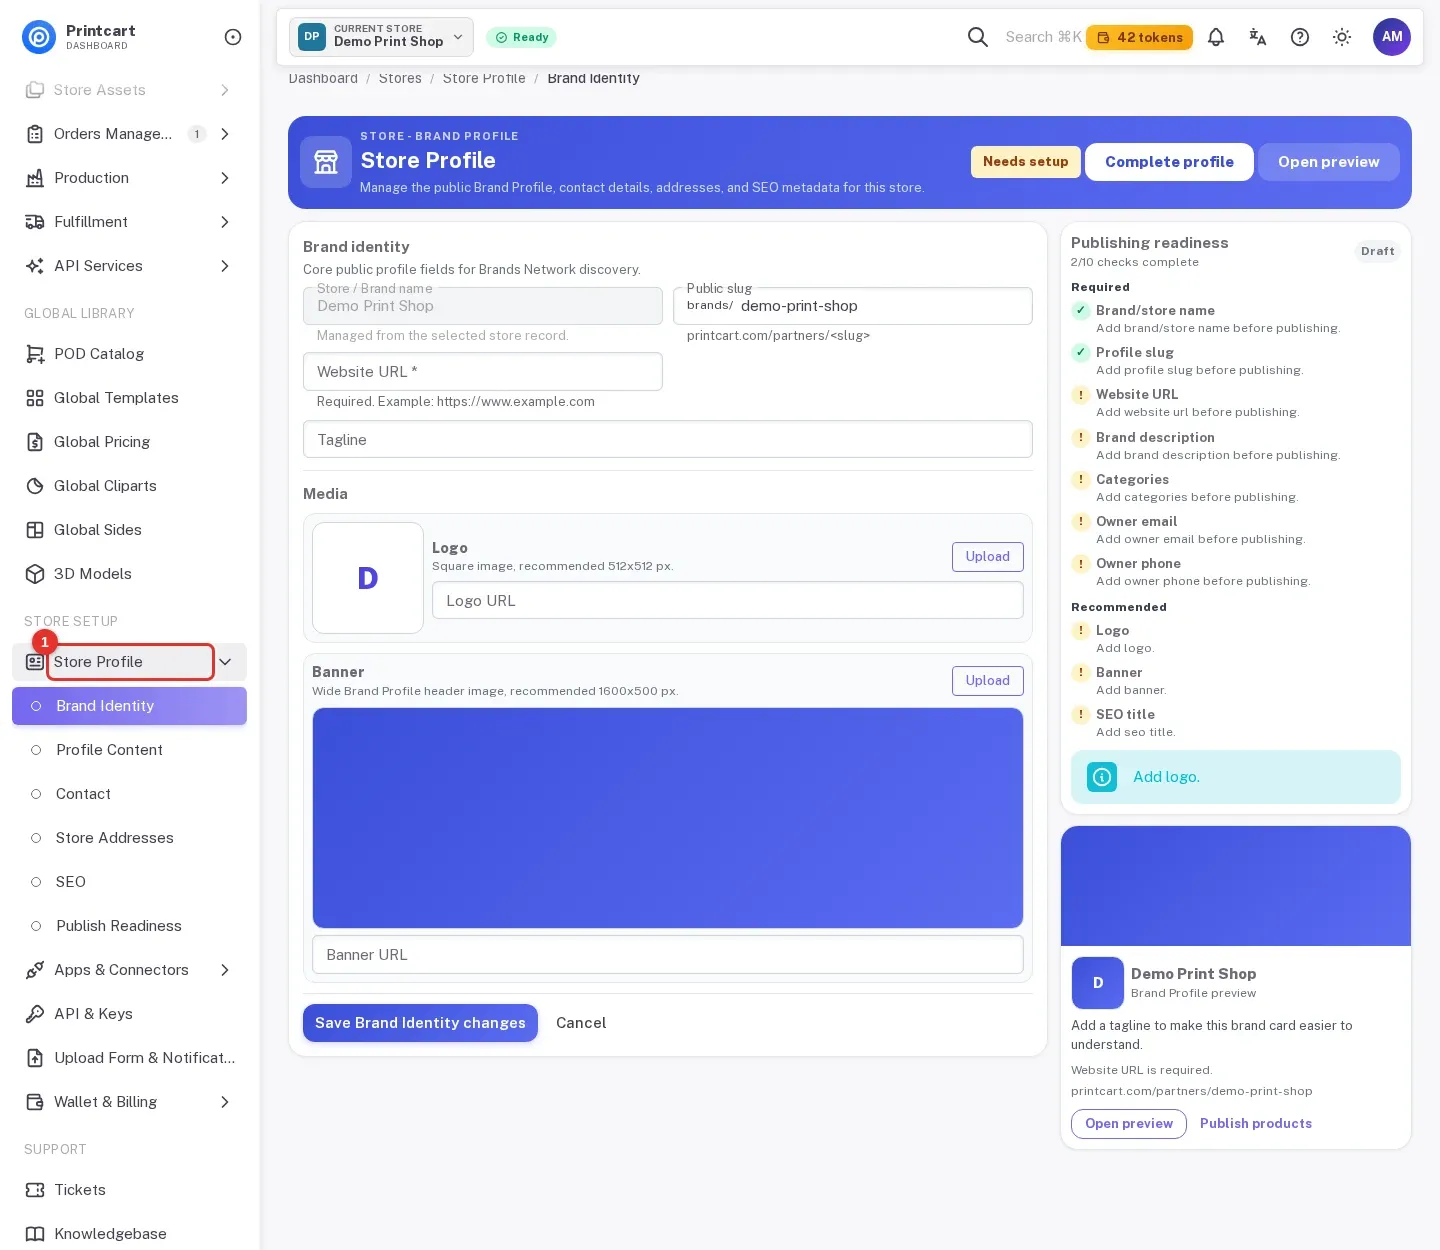
Step 1Open Store Profile
In the left menu, under Store Setup, click Store Profile. The group opens with six pages. The top of the page shows a status badge (Needs setup until the required items are done) and the panel on the right, Publishing readiness, counts the checks that are complete.
Expected result: The Brand Identity page opens.
Step 2Fill in Brand Identity
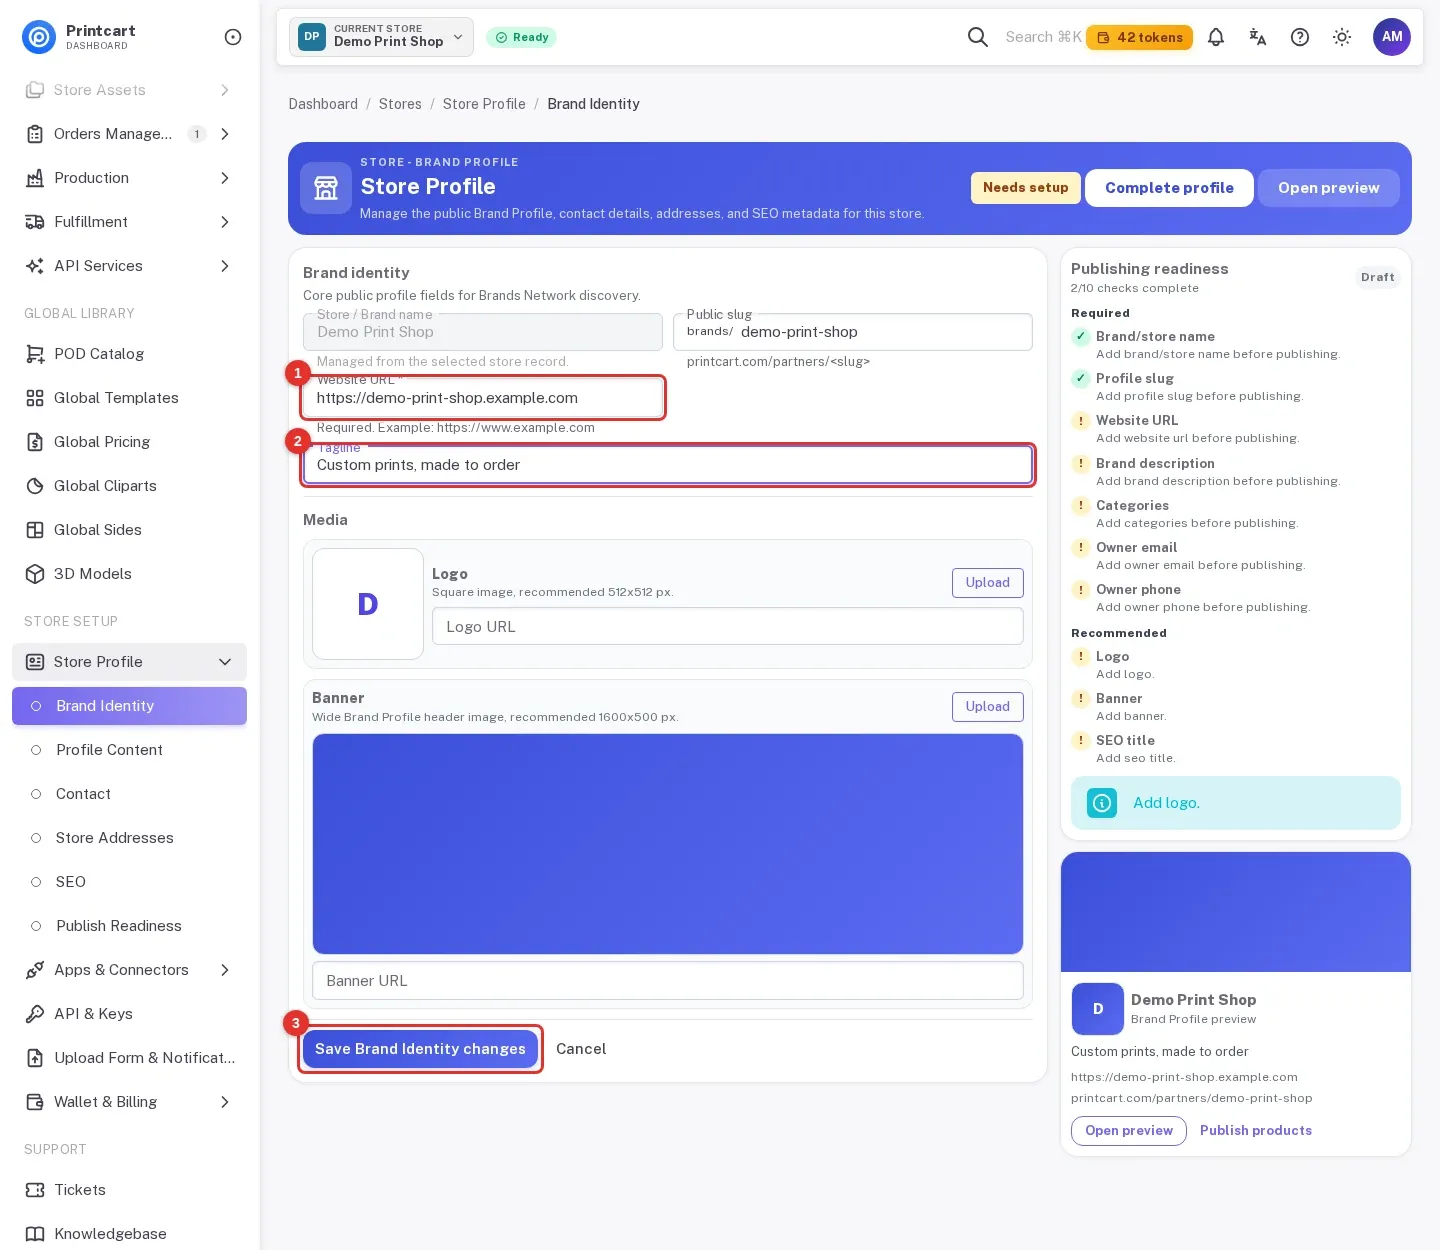
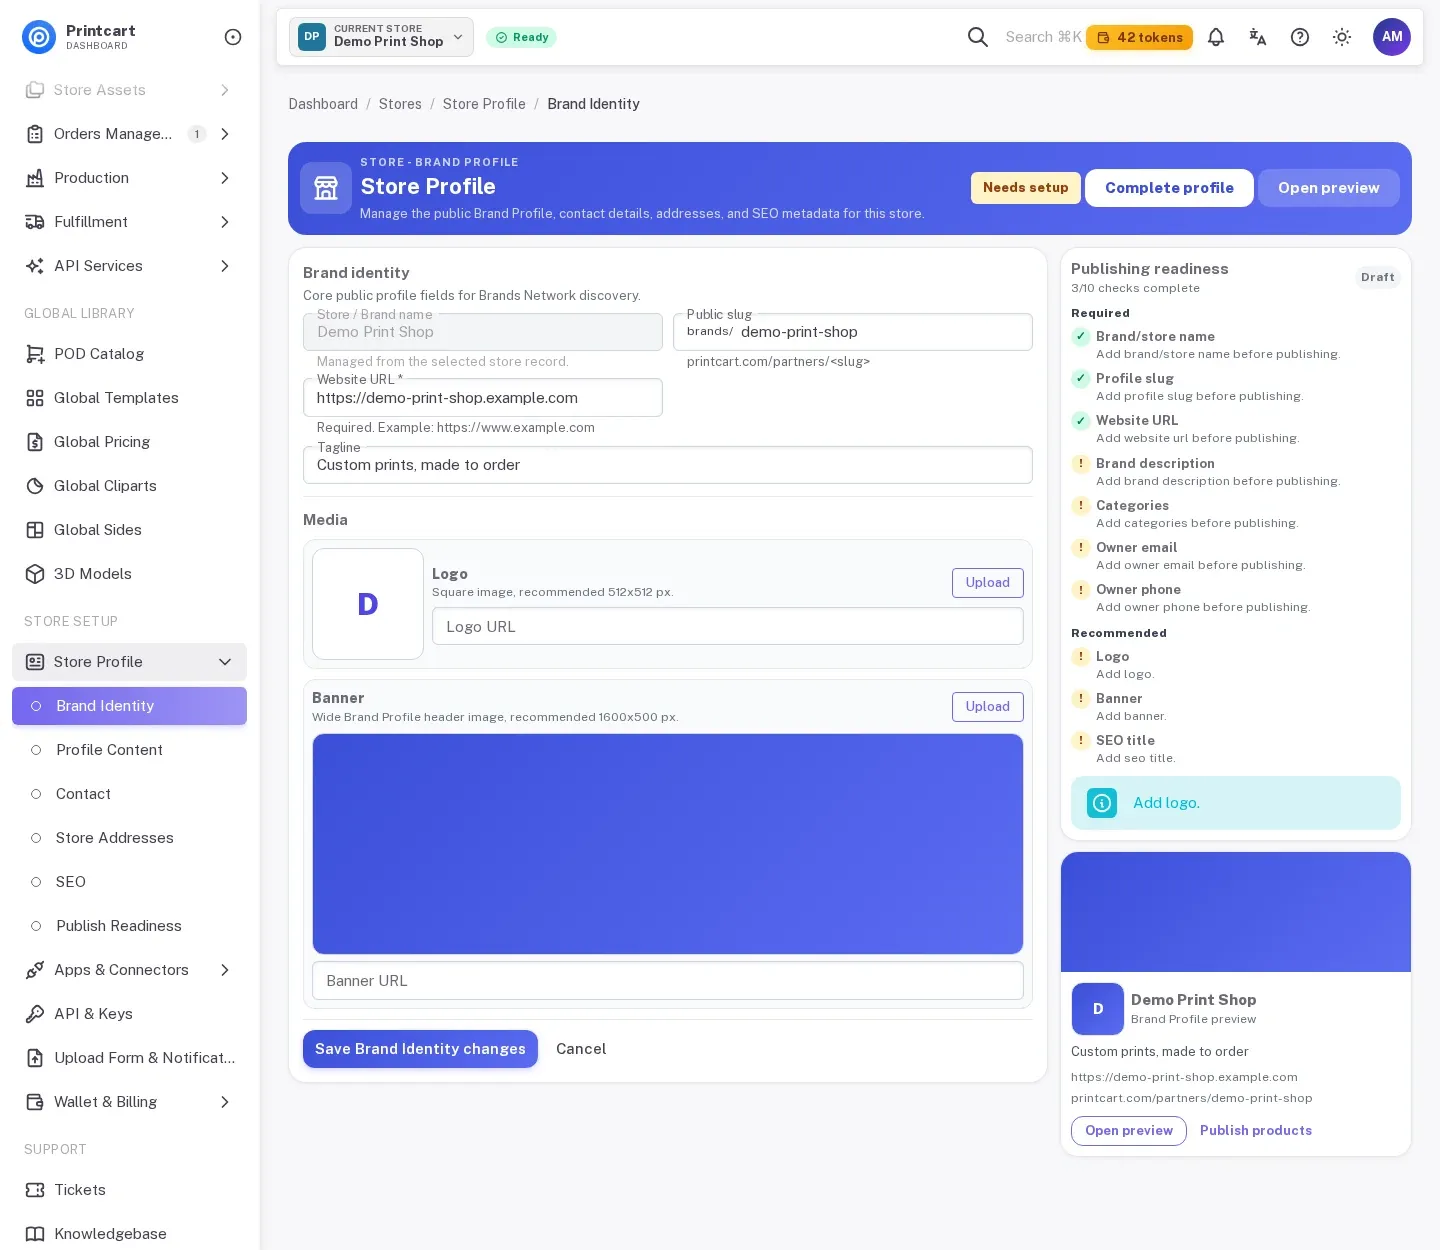
The store name comes from your store record. Choose a Public slug: your public page address is printcart.com/partners/<slug>. Enter your Website URL (required, for example https://www.example.com) and a short Tagline. Click Save Brand Identity changes.
Expected result: The saved values show in the Brand Profile preview card on the right.
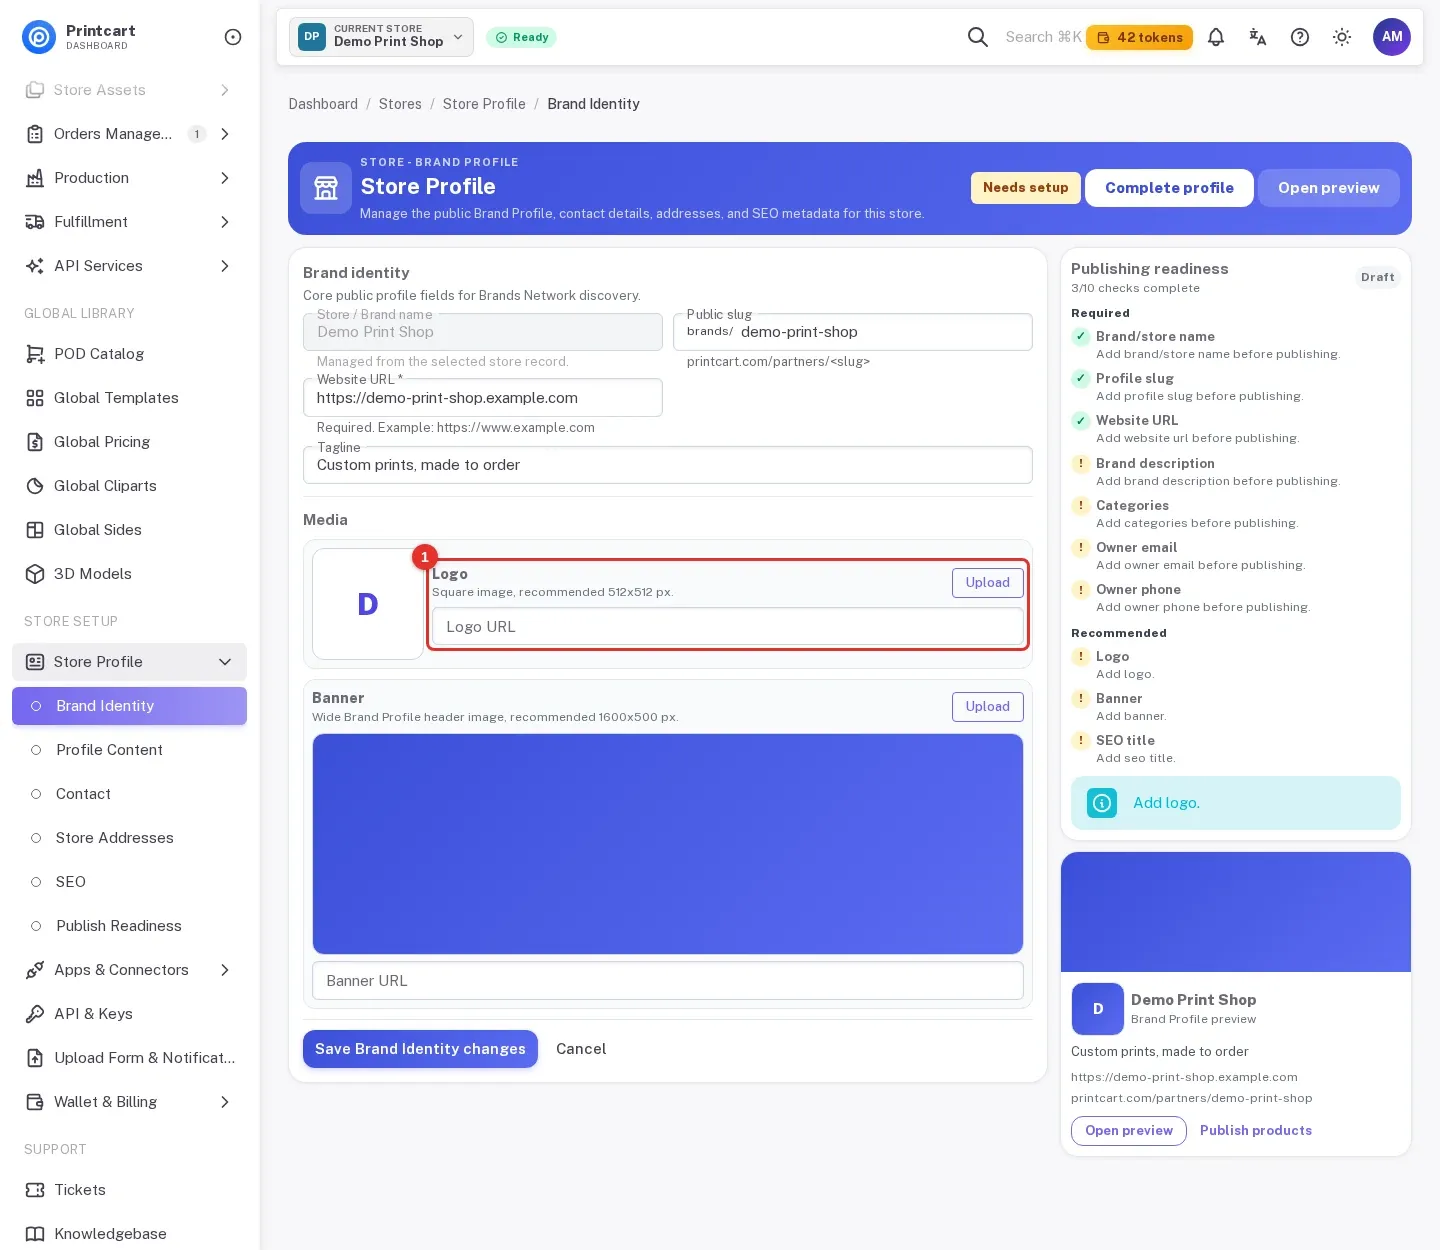
Step 3Add a logo and a banner
In the Media section, use Upload or paste an image address for the logo (square, 512 by 512 px recommended) and for the banner (wide, 1600 by 500 px recommended). Both are marked recommended, not required.
Expected result: The logo and banner show in the preview.
Step 4Describe your business
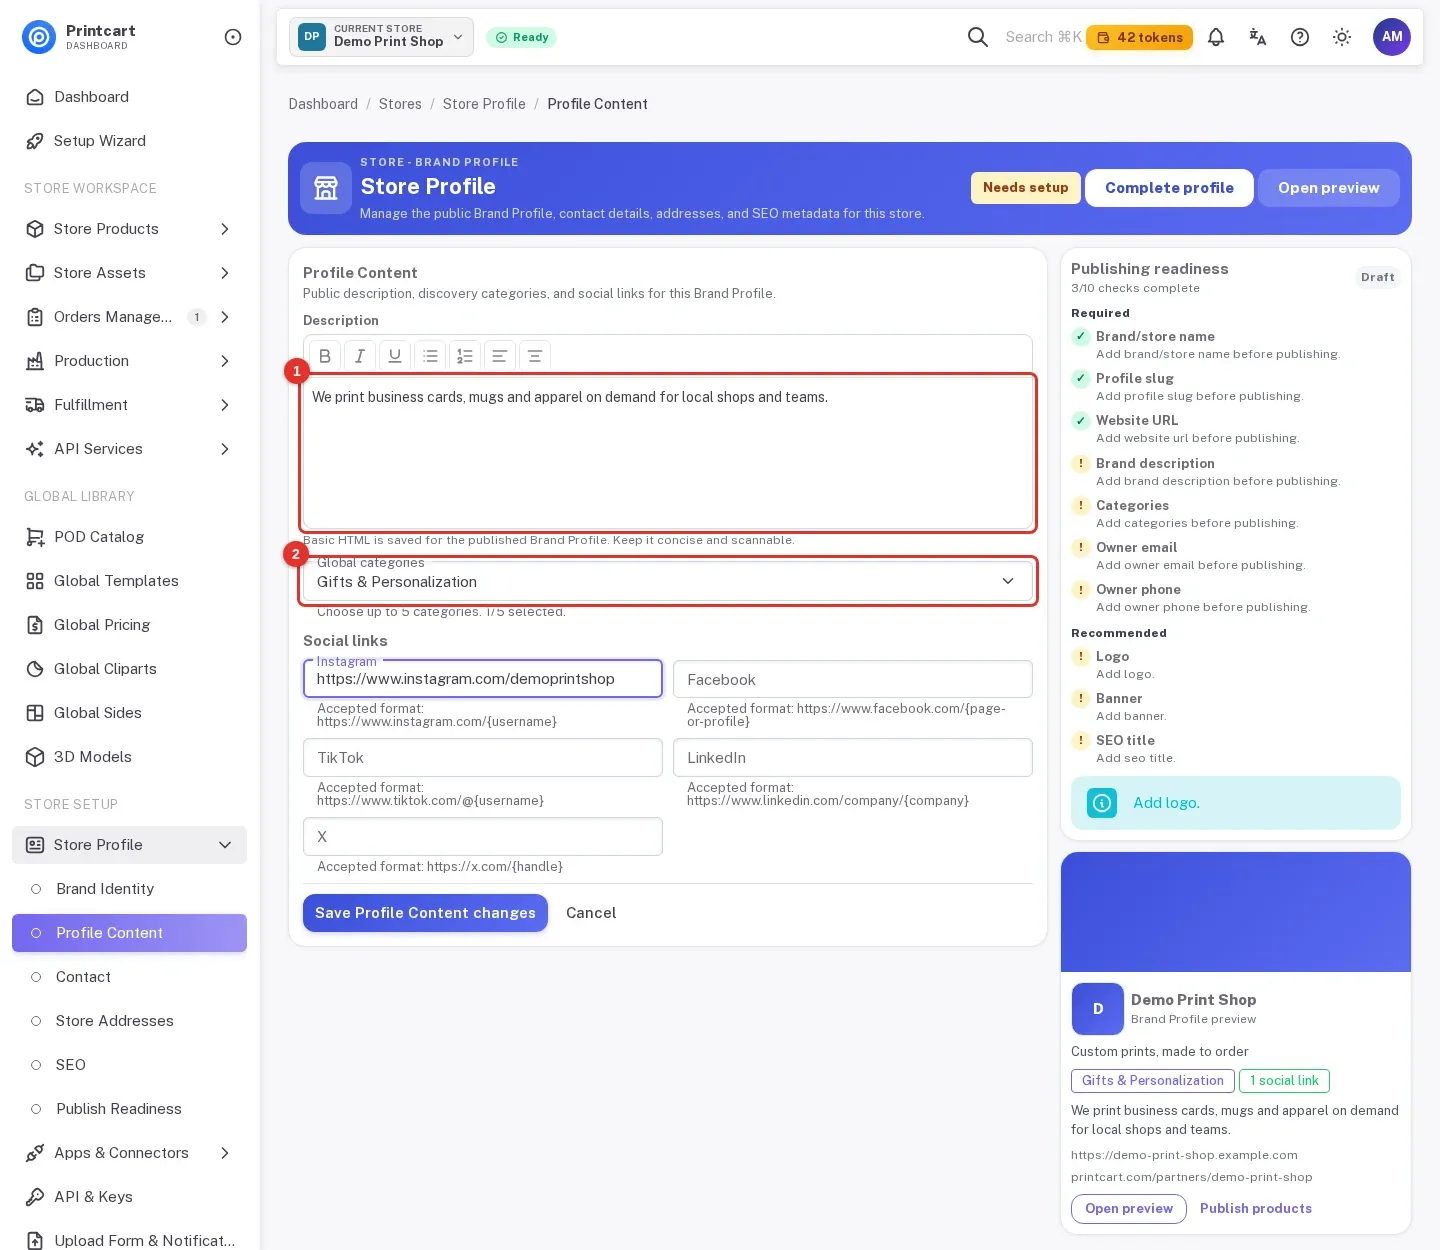
Open Profile Content. Write a short public Description, choose up to five Global categories, and add your social links (Instagram, Facebook, TikTok, LinkedIn and X). Click Save Profile Content changes.
Expected result: The Description and Categories items in the checklist turn green.
Step 5Add contact details and addresses
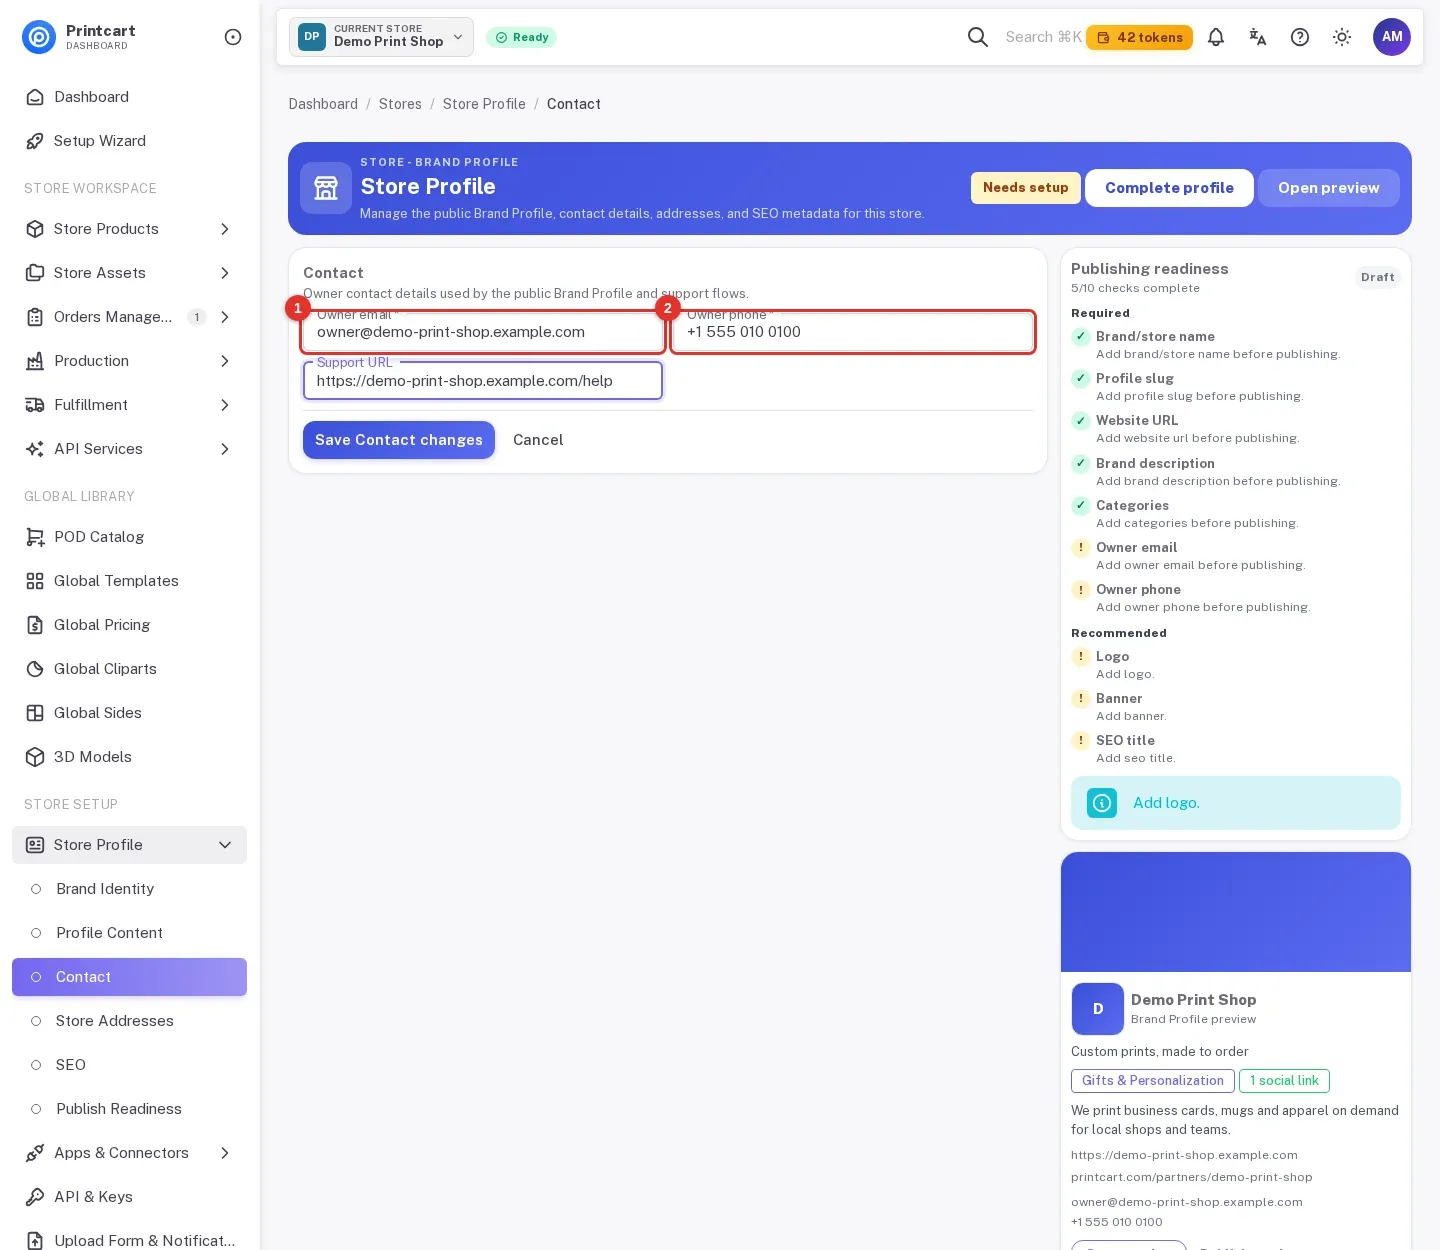
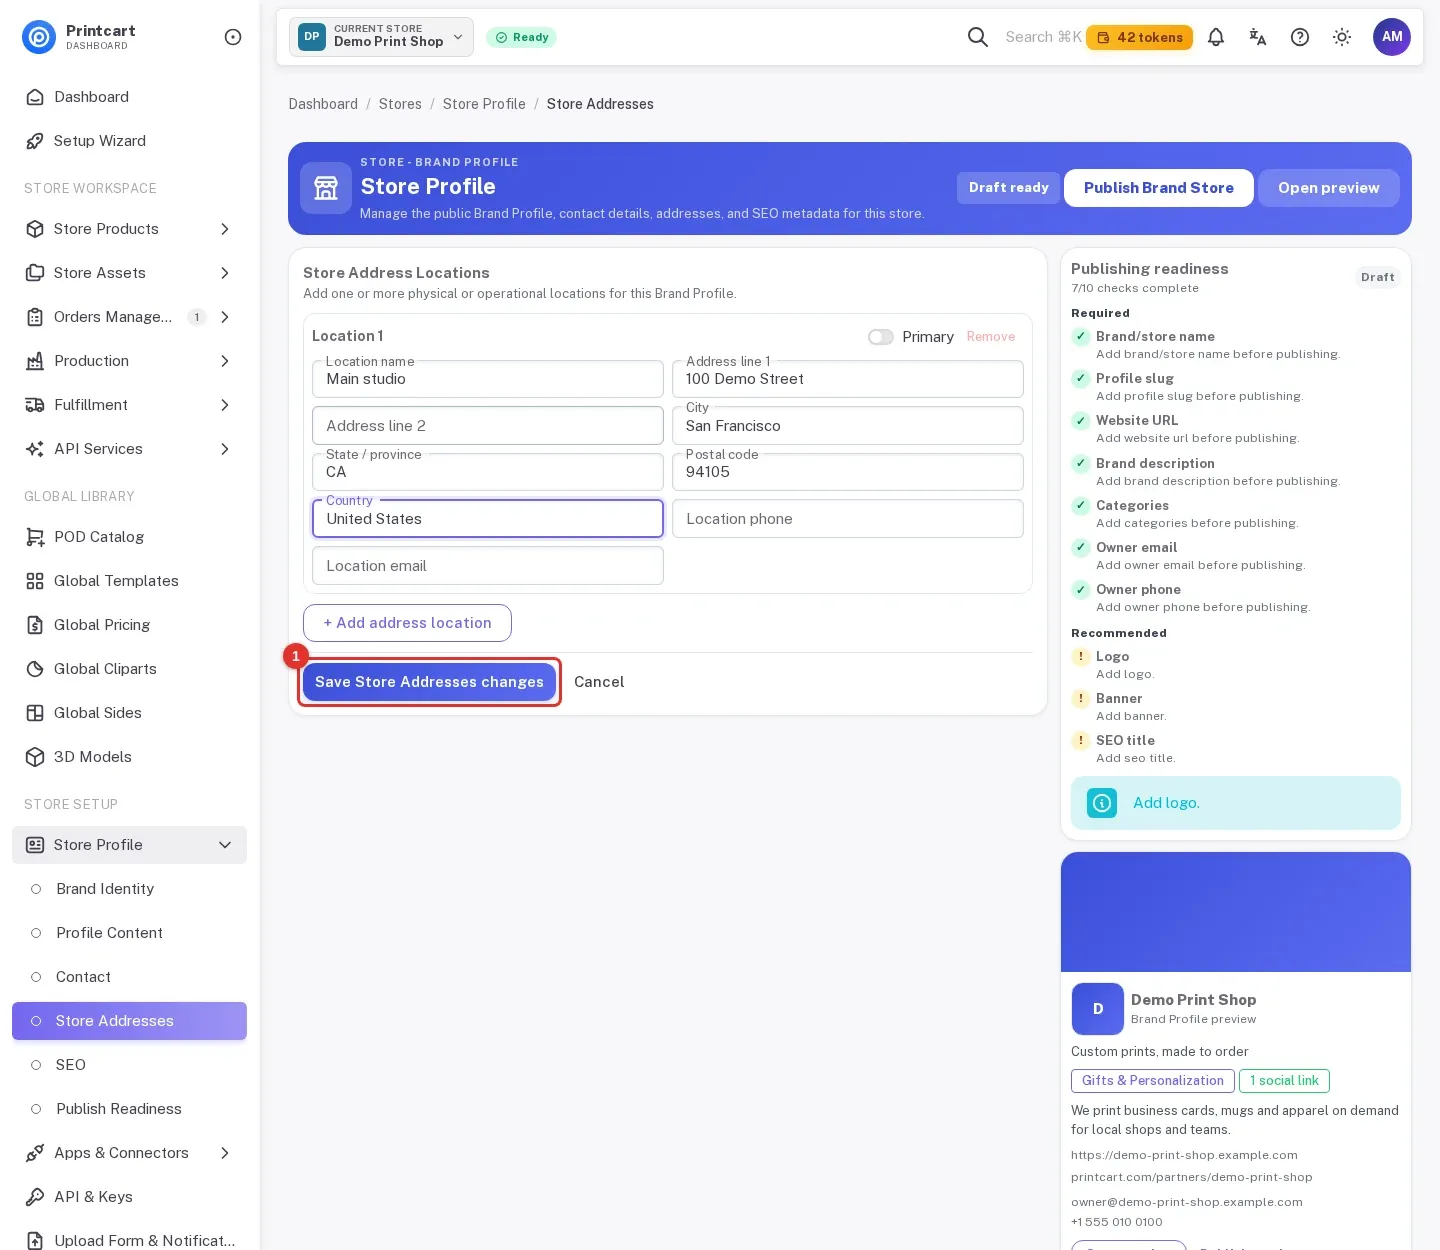
Open Contact, enter the Owner email and Owner phone (both required) and an optional Support URL, then save. Open Store Addresses to add one or more locations, such as a studio or shop, and save.
Expected result: The Owner email and Owner phone checks turn green.
Step 6Write the SEO title and description
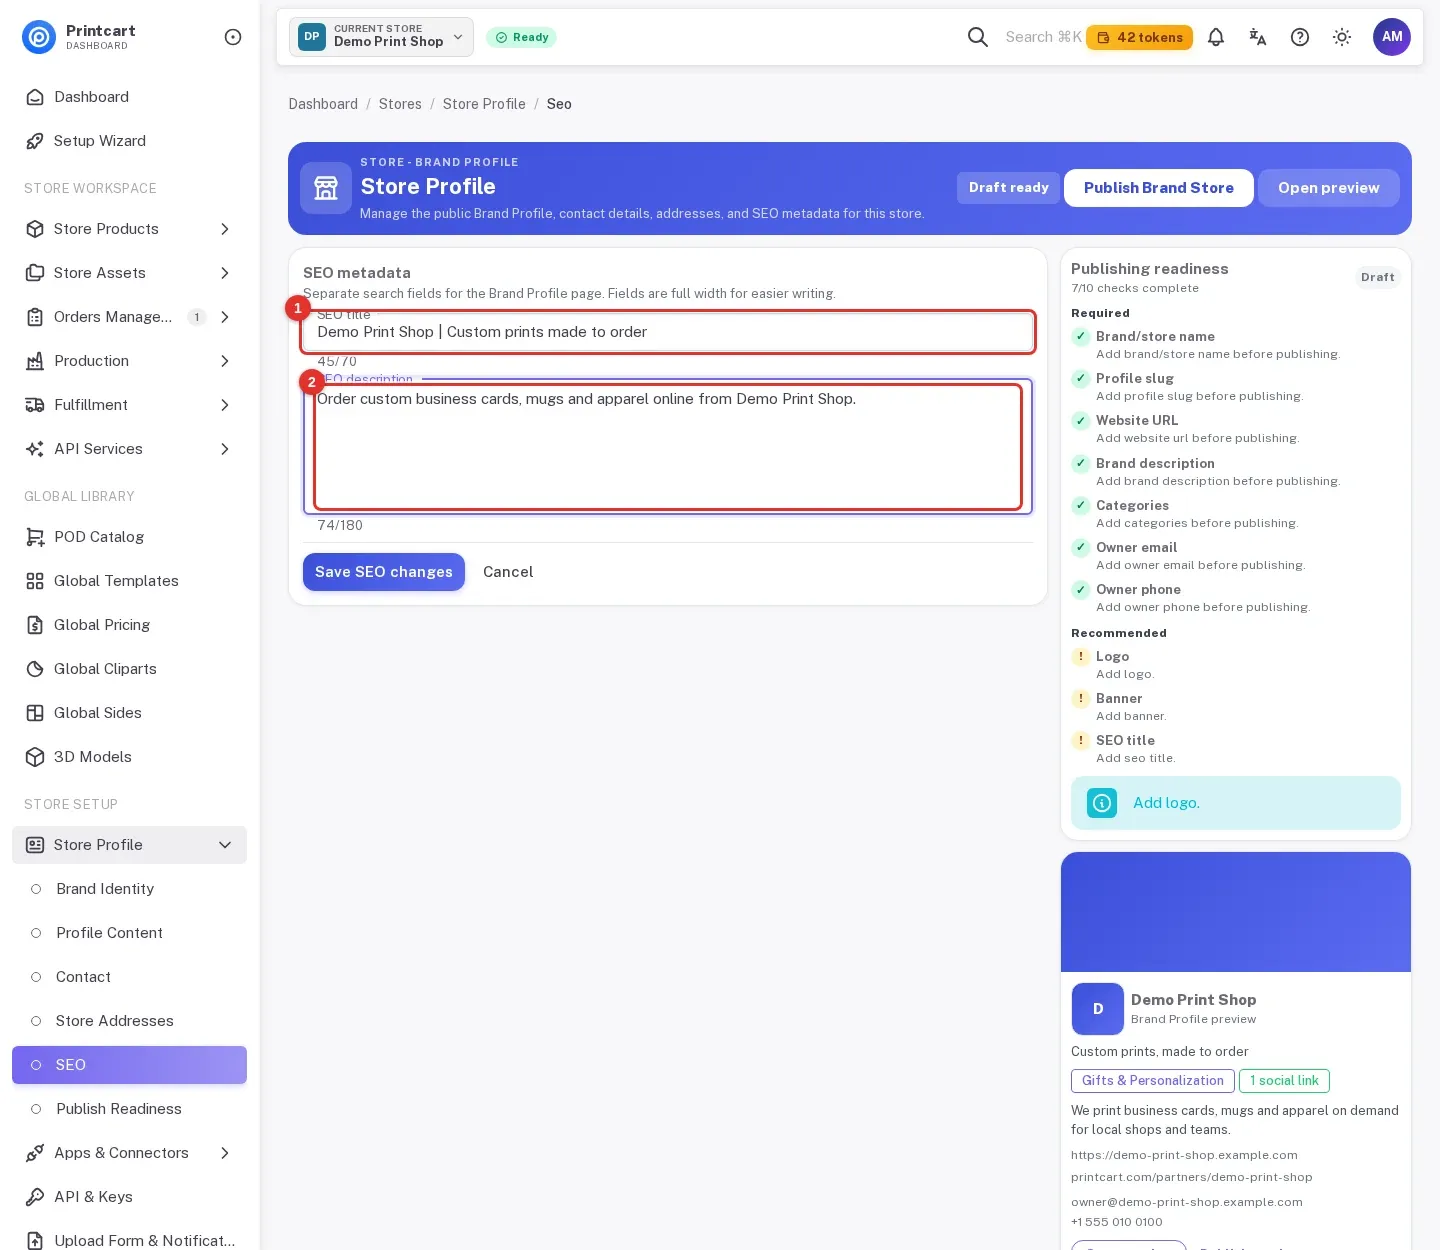
Open SEO. Write an SEO title (up to 70 characters) and an SEO description (up to 180 characters) that you want in search results for your Brand Profile page, then click Save SEO changes.
Expected result: The SEO title recommendation turns green.
Step 7Check the publishing checklist
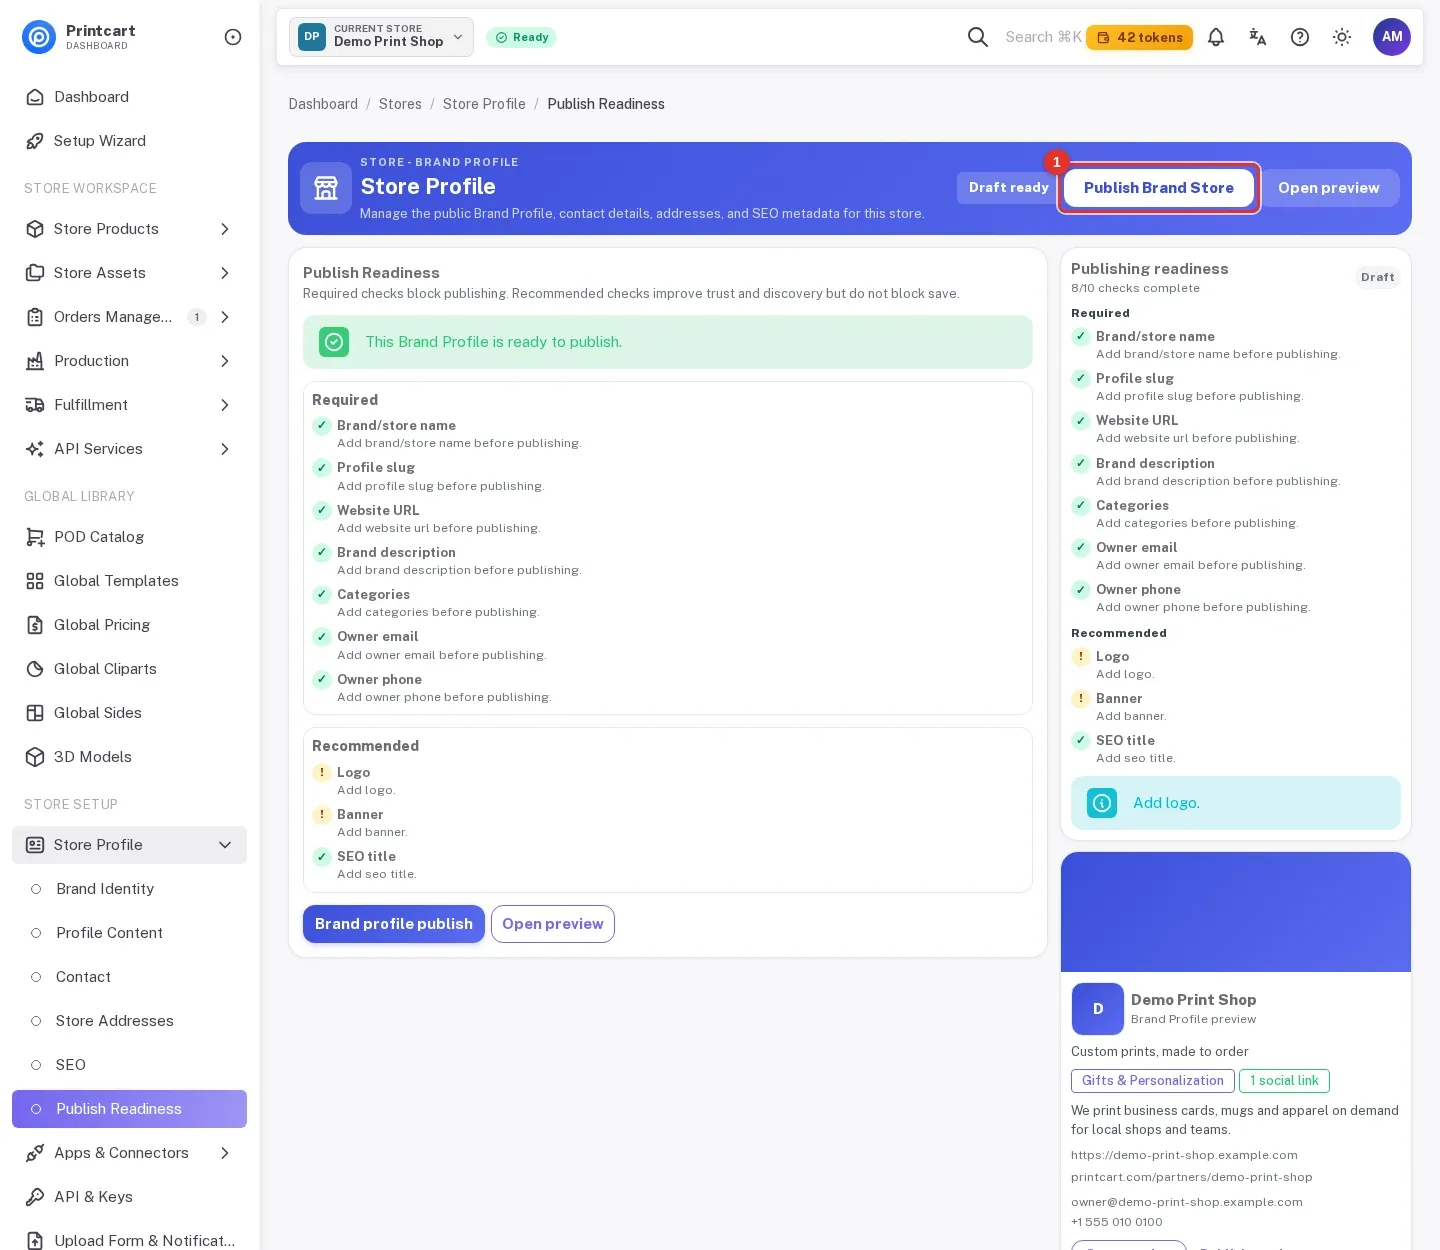
Open Publish Readiness. Required items (store name, slug, website URL, description, categories, owner email, owner phone) block publishing until they are done; recommended items (logo, banner, SEO title) do not. When nothing is missing, the page says the Brand Profile is ready to publish and offers the publish button. Use Open preview to look at the public page first.
Expected result: All required checks are green and the publish button is available.
Is publishing the Brand Profile included in every plan?
The plan comparison under Wallet & Billing then App subscriptions lists a published Brand Store profile as an Advanced plan feature and shows Preview only for Free and Premium. Fill in the profile on any plan; the plans guide (Part 7) shows where to read the comparison and how to upgrade.
Can I change the slug later?
You can edit the slug on the Brand Identity page. Anyone who saved the old address will need the new one, so change it rarely.
Why is the website URL required?
The checklist lists Website URL as a required item, because the public Brand Profile links to your storefront.
All 9 parts of the Printcart Dashboard series
- Sign up and create your store
- Connect your store
- Enable the designer and set up products
- Manage orders and design files
- Review buyer uploads and download files
- Use global templates and cliparts
- Plans, tokens and billing
- API keys and webhooks
- Store profile and brand settings (you are here)
Using a store platform? See the guides for Wix, WordPress and WooCommerce and Shopify. Back to all Printcart tutorials.
What should you do next?
- Plans, tokens and upgrading
- Connect your store to Printcart
- Sign up and create your store
- Browse all Printcart tutorials
Stuck on a step? Message the Printcart team on WhatsApp and include a screenshot of the screen you are on.
Printcart field note
What to verify before you roll out Set Up Your Store Profile and Brand Settings in the Printcart Dashboard
This tutorial is written from Printcart implementation patterns across web-to-print launch planning, buyer experience, and repeatable production. Before treating it as complete, test the workflow with one real product, one real design file, and one real order path.
Set Up Your Store Profile and Brand Settings in the Printcart Dashboard — common questions
What do you need before you start?
The screenshots come from a demo account with a demo store called Demo Print Shop and made-up buyer names. Your store name, products and numbers will differ, but the screens and buttons are the same. Secret values are always hidden in the pictures.
Is publishing the Brand Profile included in every plan?
The plan comparison under Wallet & Billing then App subscriptions lists a published Brand Store profile as an Advanced plan feature and shows Preview only for Free and Premium. Fill in the profile on any plan; the plans guide ( Part 7 ) shows where to read the comparison and how to upgrade.
Can I change the slug later?
You can edit the slug on the Brand Identity page. Anyone who saved the old address will need the new one, so change it rarely.
Why is the website URL required?
The checklist lists Website URL as a required item, because the public Brand Profile links to your storefront.
Next steps in Printcart
Connect set up your store profile and brand settings in the printcart dashboard with catalog setup, templates, production workflows, and implementation support.
Want to put set up your store profile and brand settings in the printcart dashboard into practice?
Use the related Printcart tool below, or create a free account to start building with the product designer.