In the Printcart Dashboard, open Store Products , add or edit a product and switch on Enable Design Tool (or Enable Upload for file uploads). Add at least one side with a print area, optionally link a printing option for pricing, then check the Readiness cockpit . When it says Ready, use Open Designer to test. Allow about 15 minutes for your first product.
Key takeaways
What do you need before you start?
- A Printcart account with a store, ideally connected to your platform (see the connect guide).
- The print size of your product and, if you have one, a product photo.
The screenshots come from a demo account with a demo store called Demo Print Shop and made-up buyer names. Your store name, products and numbers will differ, but the screens and buttons are the same. Secret values are always hidden in the pictures.
How do you enable the designer and set up a product?
Step 1Open Store Products
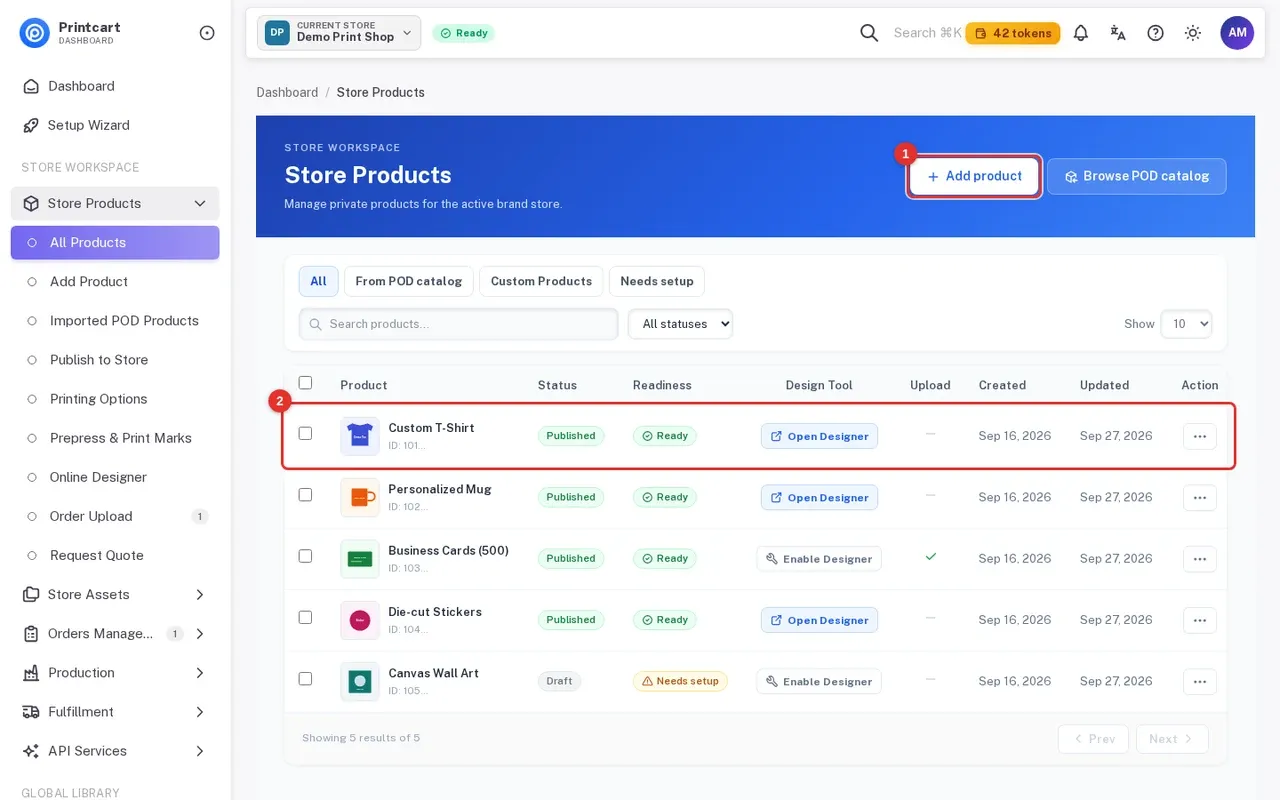
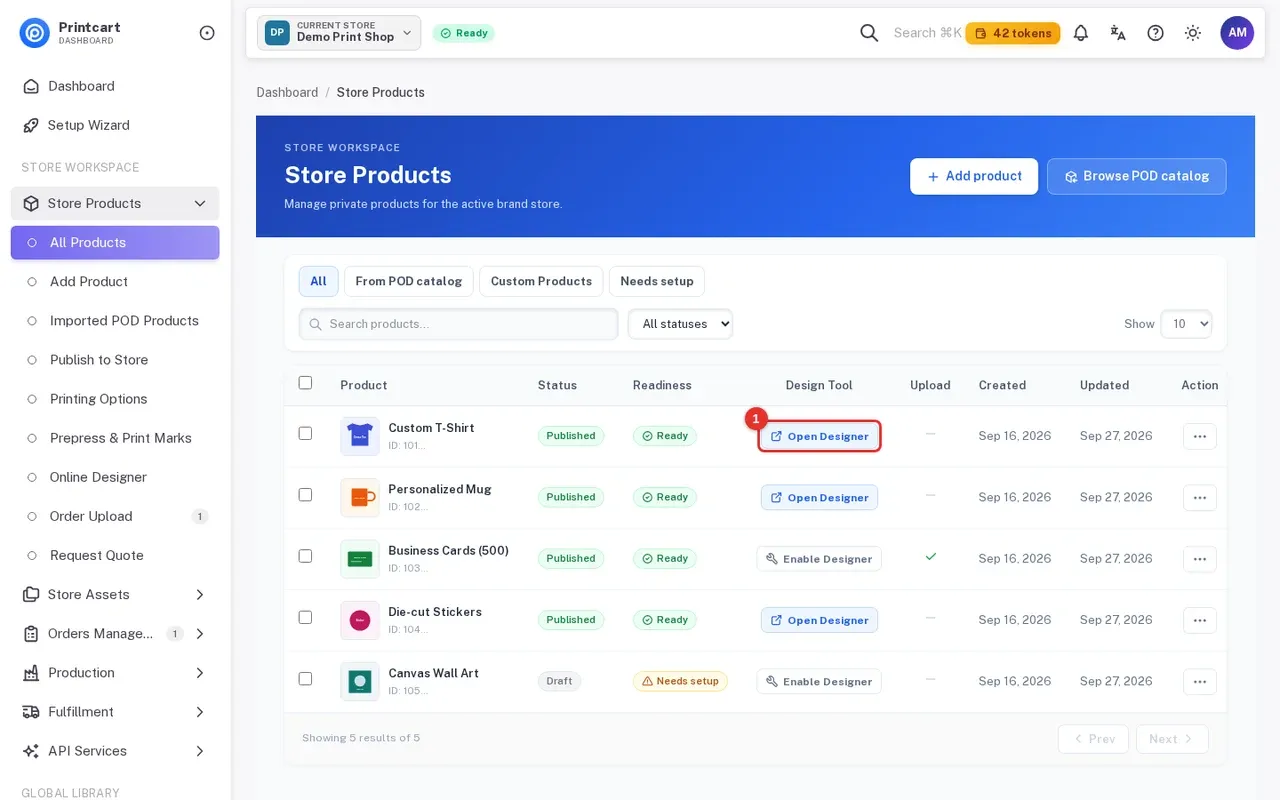
In the left menu click Store Products (www.printcart.com/en/products). The table shows each product with Status, Readiness, Design Tool and Upload columns. Use Add product for a new one, or Browse POD catalog to import a ready-made product. The tabs filter by All, From POD catalog, Custom Products and Needs setup.
Expected result: You can see which products already have the designer or upload enabled.
Step 2Enable the Design Tool
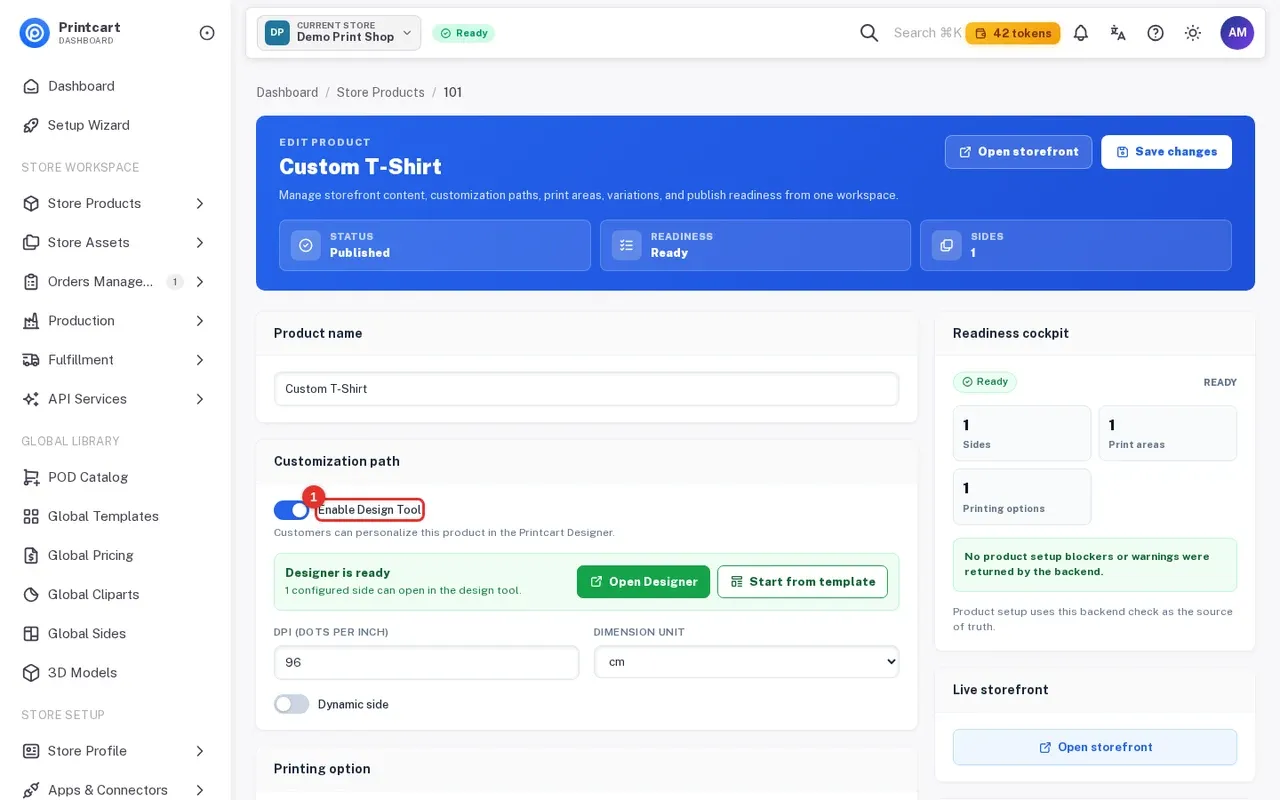
Open a product (or click Add product and save it first). Under Customization path, switch on Enable Design Tool: customers can then personalize this product in the Printcart Designer. Set the DPI and the Dimension unit (cm, for example) for your print size.
Expected result: A green message reads Designer is ready once a configured side exists. Before that it reads Designer needs product sides.
Step 3Add sides and print areas
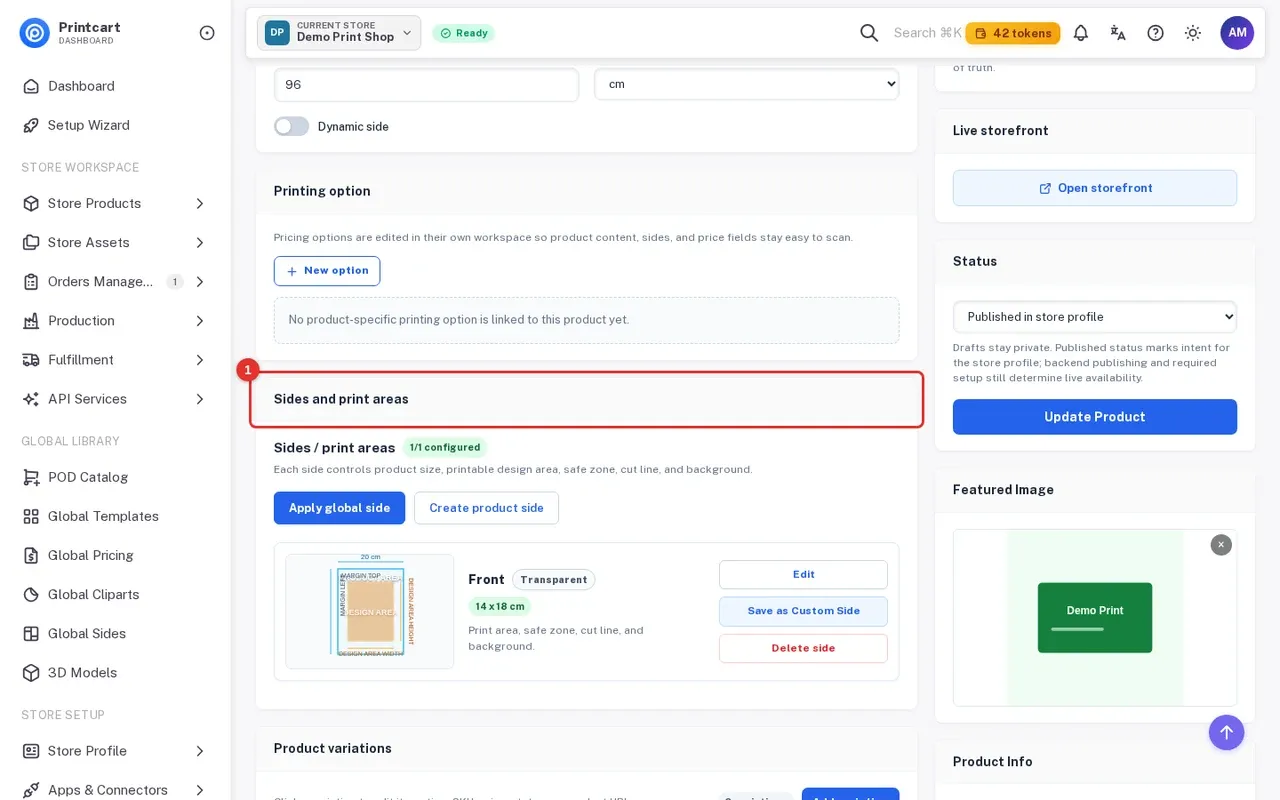
In Sides and print areas, click Create product side to define the product size and the printable design area, or Apply global side to start from a ready-made side. Each side shows its name (for example Front) and size, and a badge such as 1/1 configured.
Expected result: The product has at least one configured side, so the designer can open.
Step 4Link a printing option (pricing) if you need one
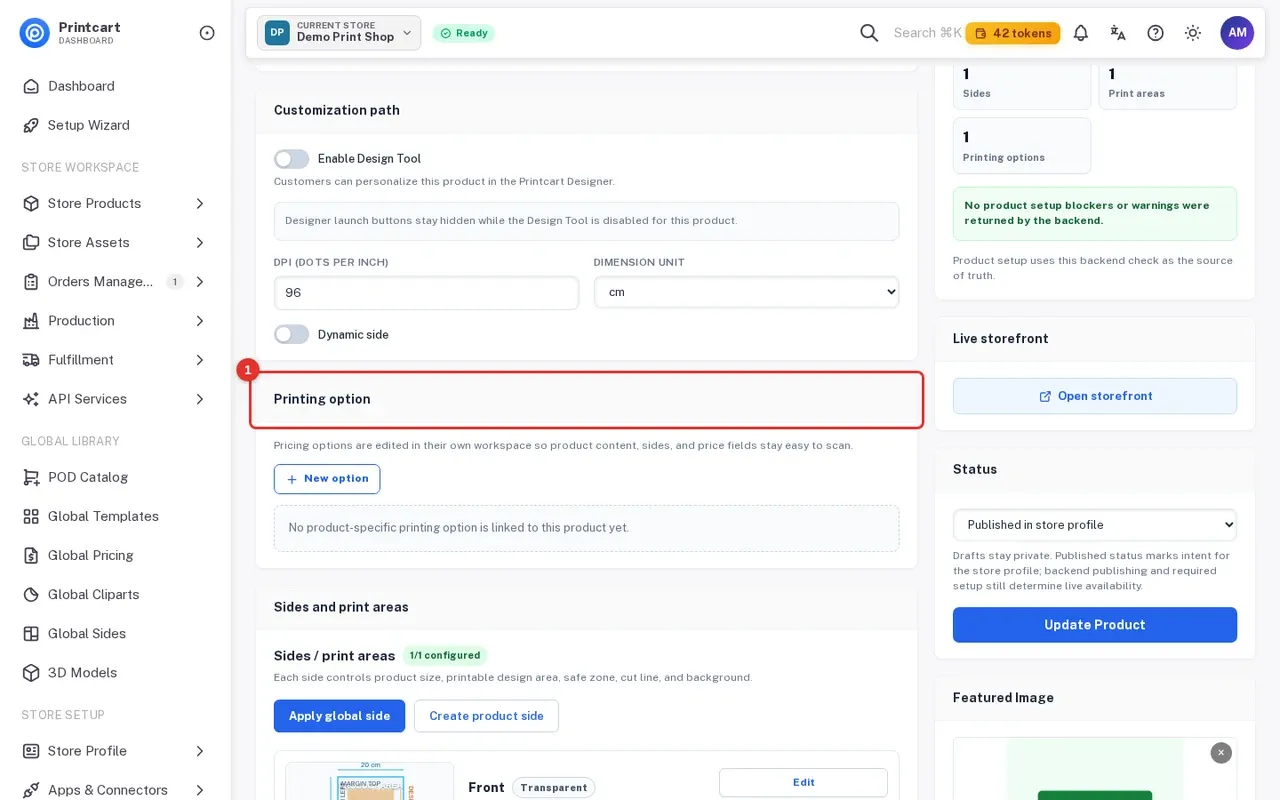
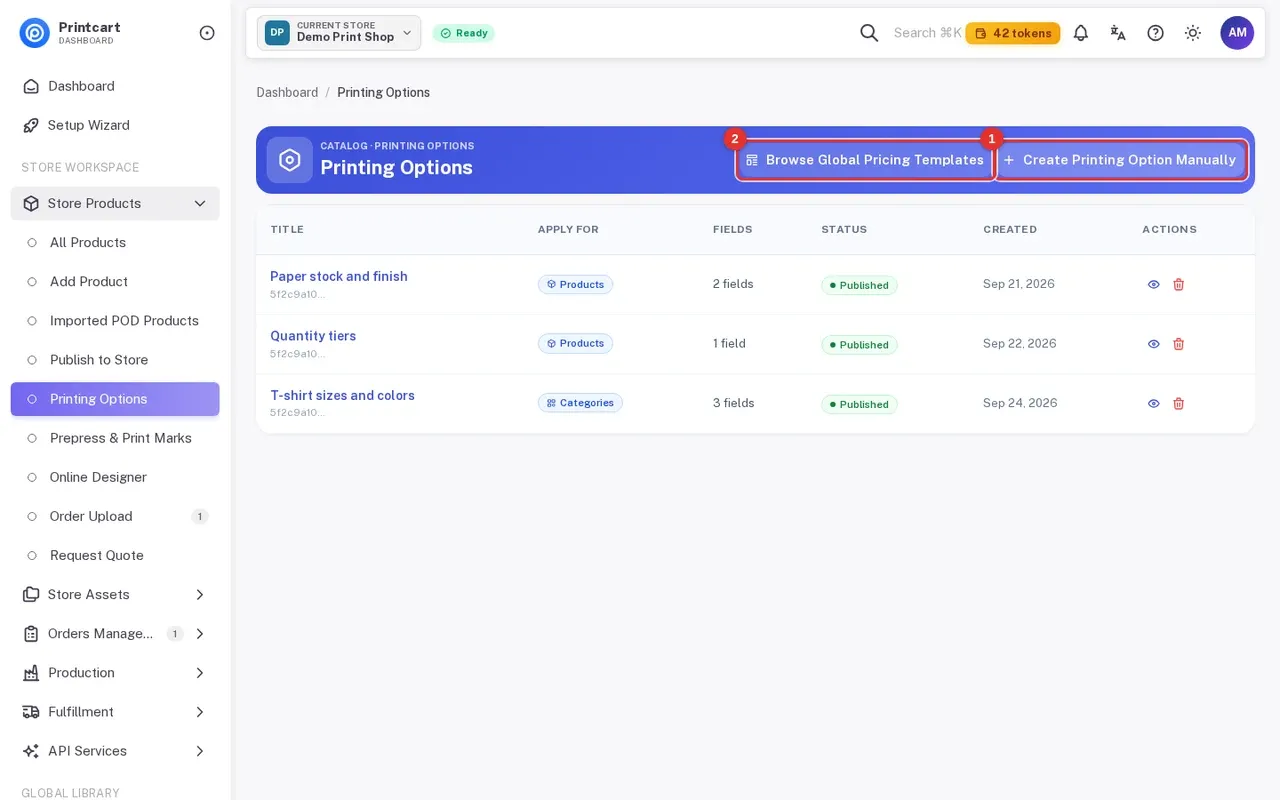
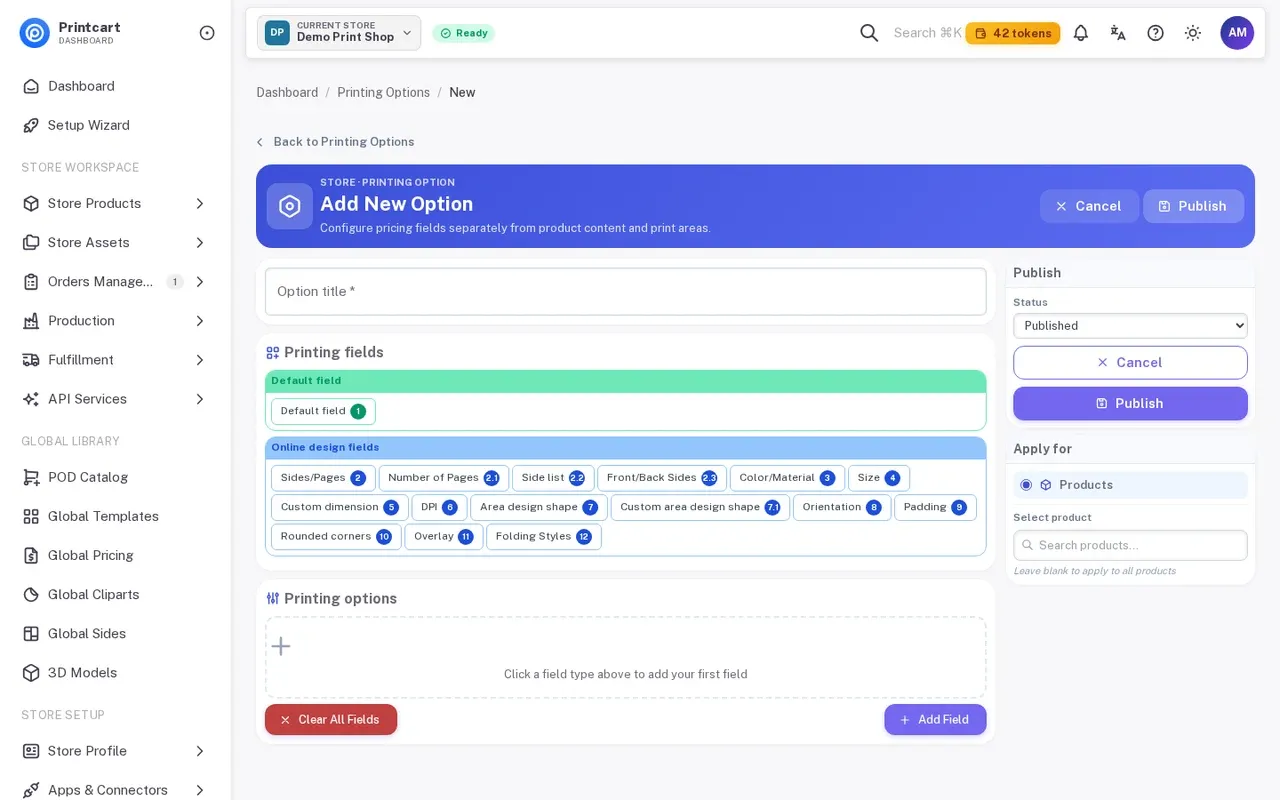
The Printing option card on the product page explains that pricing options are edited in their own workspace. Click New option, or open Printing Options in the menu. There you can Browse Global Pricing Templates or Create Printing Option Manually; the list shows each option's title, what it applies to (products or categories), its number of fields and its status.
Expected result: The option appears in the list as Published and is linked to the product.
Step 5Allow file uploads (optional)
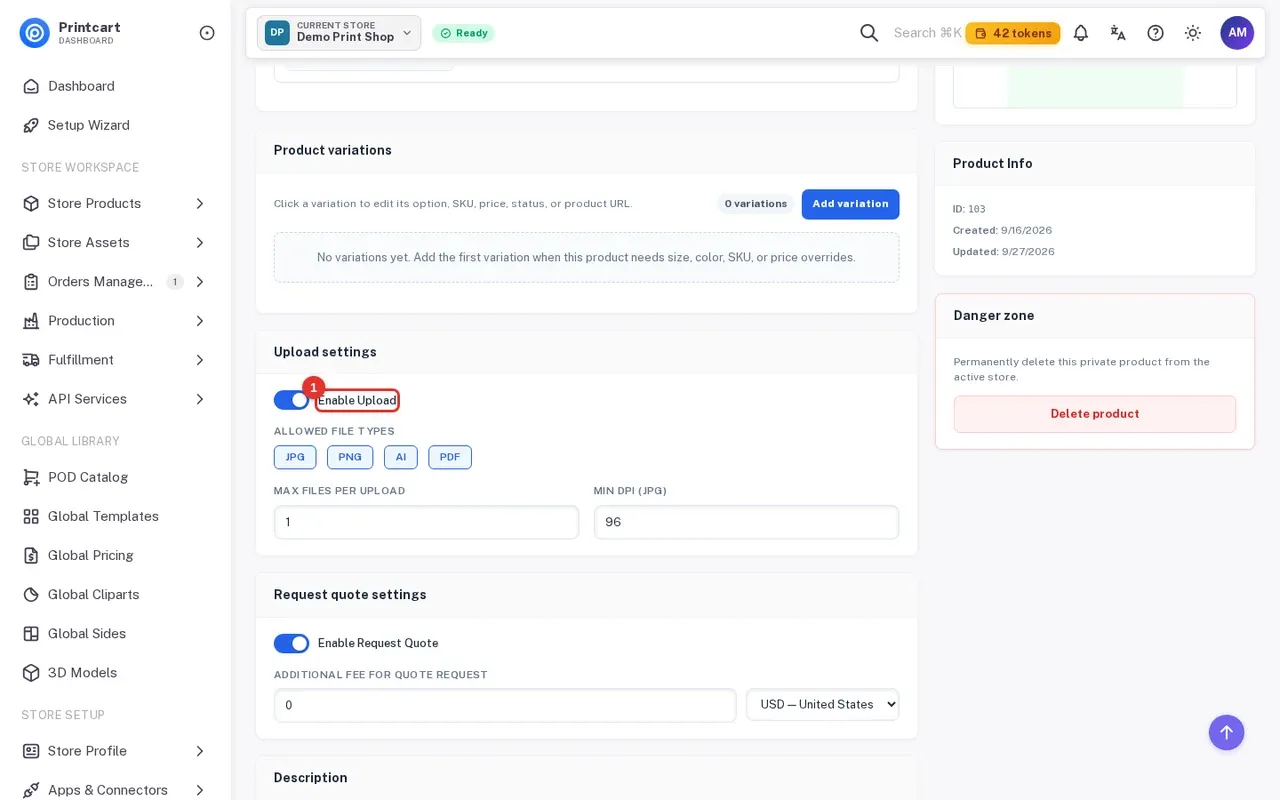
If buyers should send their own artwork, scroll to Upload settings and switch on Enable Upload. Choose the allowed file types (JPG, PNG, AI, PDF), the maximum files per upload and the minimum DPI for JPG. Uploaded files then arrive in Orders for review (see the review guide). Enable Request Quote sits just below for quote-based products.
Expected result: The product shows a check in the Upload column of the list.
Step 6Check the Readiness cockpit
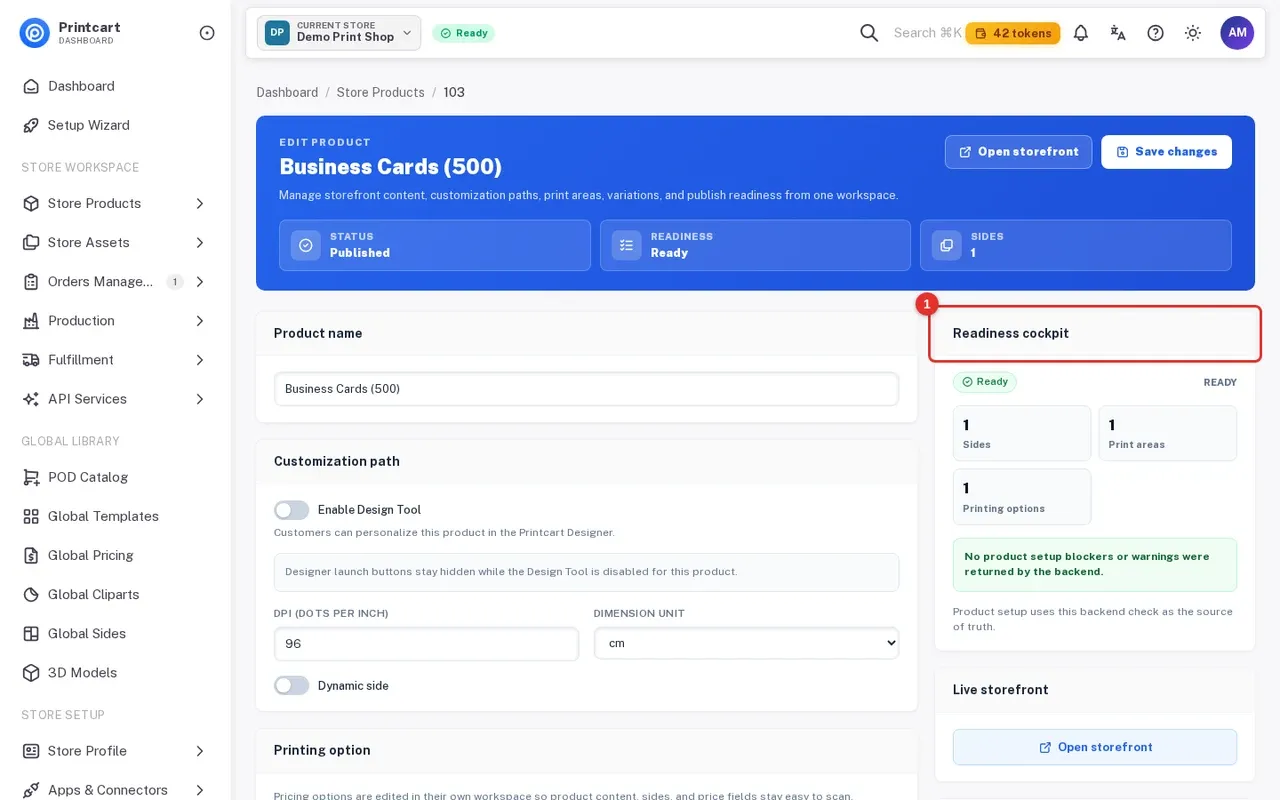
On the right of the product page, Readiness cockpit reports Ready and counts sides, print areas and printing options. If something is missing it lists what to fix (for example Add at least one side). A printing option is optional unless the product needs its own pricing or production rule.
Expected result: The product shows Ready in the Readiness column of the list.
Step 7Review Designer Settings for the whole store
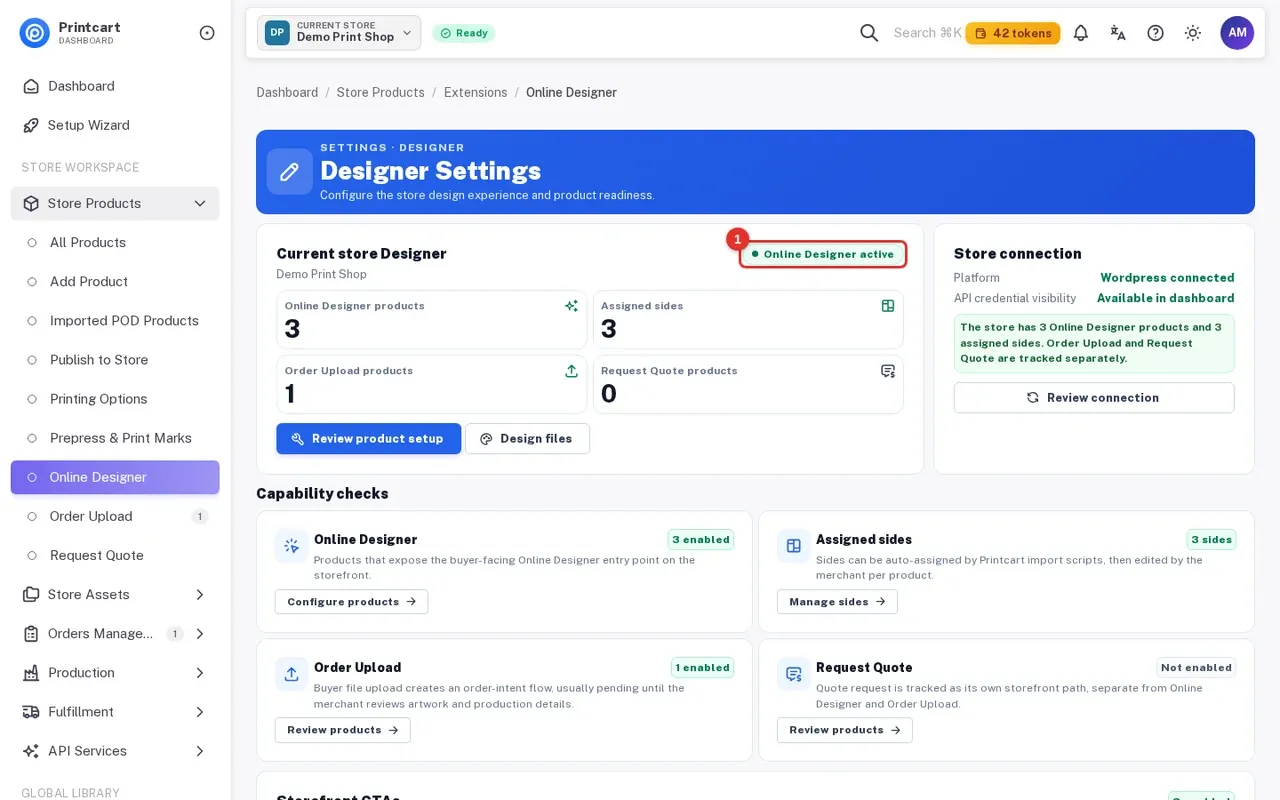
Open Online Designer under Store Products. Designer Settings shows an Online Designer active badge and capability checks: how many products have the designer, how many sides are assigned, and how many use Order Upload or Request Quote.
Expected result: You see the store-level counts and links to fix products that are not ready.
Step 8Test the designer and publish
Back in the product list, click Open Designer on a ready product to try it. When you are satisfied, choose the product Status (for example Published in store profile) and click Update Product. Open storefront shows the live page.
Expected result: The designer opens, and the product is live on your connected store.
Do I need a printing option for every product?
No. The Readiness cockpit treats a product-specific printing option as optional unless the product needs its own pricing or production rule.
Why does the product say Designer needs product sides?
The designer needs at least one side with a design area. Click Set up sides or add a side in Sides and print areas, then reload the product.
What is the difference between Enable Design Tool and Enable Upload?
Design Tool lets shoppers build the design online; Upload lets them send finished artwork. A product can use either or both.
What should you do next?
- Review, approve or decline uploaded files and download print files
- Printcart plans, tokens and upgrading
- Set up the online product designer: a complete guide
- Configure print product options, variants and print areas
- Browse all Printcart tutorials
Stuck on a step? Message the Printcart team on WhatsApp and include a screenshot of the screen you are on.
Printcart field note
What to verify before you roll out How to Enable the Online Designer and Set Up Products and Printing Options in the Printcart Dashboard
This tutorial is written from Printcart implementation patterns across catalog structure, design controls, and customer personalization. Before treating it as complete, test the workflow with one real product, one real design file, and one real order path.
How to Enable the Online Designer and Set Up Products and Printing Options in the Printcart Dashboard — common questions
What do you need before you start?
The screenshots come from a demo account with a demo store called Demo Print Shop and made-up buyer names. Your store name, products and numbers will differ, but the screens and buttons are the same. Secret values are always hidden in the pictures.
Do I need a printing option for every product?
No. The Readiness cockpit treats a product-specific printing option as optional unless the product needs its own pricing or production rule.
Why does the product say Designer needs product sides?
The designer needs at least one side with a design area. Click Set up sides or add a side in Sides and print areas , then reload the product.
What is the difference between Enable Design Tool and Enable Upload?
Design Tool lets shoppers build the design online; Upload lets them send finished artwork. A product can use either or both.
Next steps in Printcart
Connect how to enable the online designer and set up products and printing options in the printcart dashboard with catalog setup, templates, production workflows, and implementation support.
Want to put how to enable the online designer and set up products and printing options in the printcart dashboard into practice?
Use the related Printcart tool below, or create a free account to start building with the product designer.